Aviva Blood Glucose Meter Manual: A Comprehensive Guide
This manual details the Aviva Blood Glucose Meter‚ a tool for diabetes management‚ alongside its connection to Accu-Chek systems and broader Aviva health services.
The Aviva Blood Glucose Meter‚ developed in collaboration with Roche’s Accu-Chek‚ is a vital tool for individuals managing diabetes. It empowers users to monitor their blood glucose levels accurately and efficiently‚ facilitating informed healthcare decisions. This meter isn’t just a device; it’s a component of a wider health ecosystem offered by Aviva‚ extending beyond basic monitoring to encompass financial and wellbeing services.
The ACCU-CHEK Aviva Expert system‚ notably FDA-approved‚ features a built-in insulin calculator‚ simplifying complex dosing calculations. Aviva’s commitment extends to providing resources and support‚ ensuring users can confidently navigate their diabetes management journey. Whether starting a new monitoring routine or transferring from another system‚ this guide provides comprehensive instructions for optimal use and understanding of your results.
Understanding Diabetes and Blood Glucose Monitoring
Diabetes is a growing health concern‚ with the CDC reporting 23.6 million Americans affected in 2007‚ and numbers continuing to rise. Effective management relies heavily on consistent blood glucose monitoring. This process involves regularly checking glucose levels to understand how food‚ exercise‚ and medication impact your body.
The Aviva Blood Glucose Meter plays a crucial role in this process‚ providing real-time data to help maintain target ranges. Understanding these ranges‚ and recognizing high or low readings‚ is paramount. Regular monitoring empowers individuals to proactively manage their condition‚ preventing complications and improving overall health. Aviva supports this by offering a user-friendly system and accessible resources.
Key Features of the Aviva Blood Glucose Meter
The Aviva Blood Glucose Meter stands out with its integration into a comprehensive diabetes management system. Notably‚ the ACCU-CHEK Aviva Expert system is FDA-approved‚ featuring a built-in insulin calculator – a first-of-its-kind capability. This simplifies complex dosing calculations for precise insulin delivery advice.
Beyond this‚ the meter offers user-friendly operation‚ clear display readings‚ and compatibility with the AvivaConnect platform for data logging and analysis. It’s designed to empower individuals with the tools needed for effective self-management‚ supporting a proactive approach to health and wellbeing alongside Aviva’s wider health services.
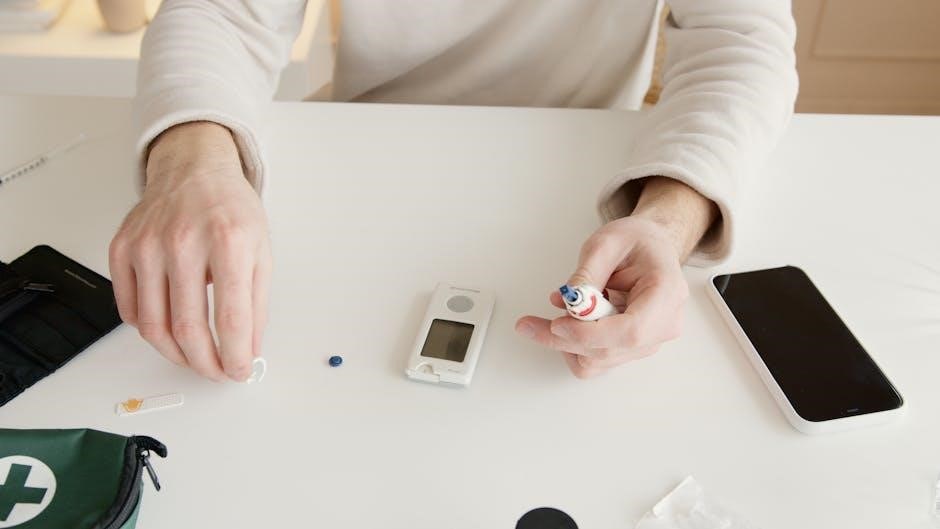
Components of the Aviva Blood Glucose Meter Kit
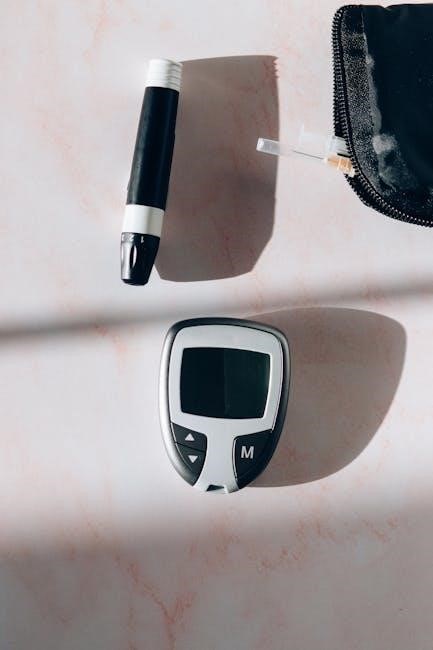
A complete Aviva Blood Glucose Meter Kit typically includes the meter itself‚ a lancing device for obtaining blood samples‚ and a supply of test strips – essential for accurate readings. The kit also provides a control solution‚ used to verify the meter and strips are functioning correctly.
Furthermore‚ users can expect a user manual detailing operation and troubleshooting‚ alongside a quick reference guide for ease of use. Bundles and subscriptions are available for convenient test strip replenishment‚ ensuring continuous monitoring. These components work together to facilitate effective diabetes management‚ supporting informed healthcare decisions.
Setting Up Your Aviva Blood Glucose Meter
Initial setup of your Aviva meter is straightforward. Begin by ensuring the device is ready for use‚ which involves inserting a fresh battery into the designated compartment. Following this‚ accurate time and date settings are crucial for proper data logging.
Navigate the meter’s menu‚ typically using buttons‚ to set the current date and time. Correct settings ensure accurate tracking of blood glucose readings over time. Refer to the user manual for specific button configurations and menu options. Proper setup is fundamental for reliable monitoring and effective diabetes management.
Inserting the Battery
To begin‚ locate the battery compartment on the Aviva meter – typically on the back or side‚ secured by a sliding cover. Gently slide the cover open‚ noting the battery polarity indicated inside (+ and ౼ symbols). Insert a new‚ compatible battery (usually AAA) aligning the positive and negative ends correctly.
Ensure the battery clicks securely into place. Replace the battery compartment cover until it snaps shut. A properly installed battery will power on the meter‚ displaying the startup screen. If the screen remains blank‚ double-check the battery’s orientation and ensure it’s making good contact.
Setting the Date and Time
Accurate date and time settings are crucial for proper data logging and tracking of your blood glucose readings. Upon initial startup‚ or if the time is incorrect‚ access the meter’s settings menu – usually by pressing and holding the ‘Menu’ or ‘Set’ button. Navigate to the ‘Date’ and ‘Time’ options using the arrow buttons.
Adjust the year‚ month‚ and day‚ then the hour and minute‚ confirming each selection. The meter may use a 12 or 24-hour clock format; select your preference. Save the settings by pressing the ‘Menu’ or ‘Set’ button again. Verify the displayed date and time are correct for accurate record-keeping.
Performing a Blood Glucose Test
Testing with the Aviva meter is a straightforward process‚ essential for effective diabetes management. Begin by ensuring your hands are clean and dry. Prepare the lancing device with a fresh lancet‚ adjusting the depth setting as needed for a sufficient blood sample. Insert a test strip into the meter; the meter will typically activate automatically.
Once prompted‚ gently prick your fingertip with the lancing device. Apply a small drop of blood to the designated area on the test strip. Avoid smearing the blood. The meter will display your blood glucose reading within seconds‚ providing vital information for managing your health.
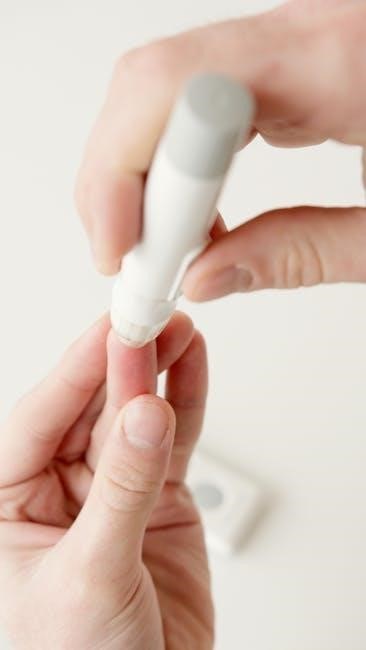
Preparing the Lancing Device
Proper lancing device preparation is crucial for a comfortable and accurate blood glucose test. First‚ remove the cap from the lancing device. Insert a new‚ sterile lancet firmly into the device‚ ensuring it clicks into place. Twist off the protective cover of the lancet – do not reuse lancets!
Adjust the depth setting on the device according to your skin type and desired blood flow. Start with a lower setting and increase if needed. Replace the cap securely. Always use a fresh lancet for each test to minimize discomfort and prevent infection. Proper preparation ensures a reliable sample.

Obtaining a Blood Sample
To obtain a sufficient blood sample‚ wash your hands thoroughly with warm water and dry them completely. Select a testing site – typically the side of a fingertip is recommended. Avoid using the same spot repeatedly. Press the lancing device firmly against the chosen site and press the release button.
A small drop of blood should appear. If the drop is too small‚ gently massage the finger towards the puncture site – avoid squeezing forcefully. Wipe away the first drop of blood with a clean‚ dry cloth‚ as it may contain tissue fluid that could affect results. A proper sample is vital for accuracy.
Applying the Blood to the Test Strip

Ensure your hands are dry before handling the test strip. Insert a new Aviva test strip into the meter‚ observing the correct orientation as indicated on the strip and meter. The meter will typically display a readiness symbol. Gently touch the edge of the blood sample to the designated sample area on the test strip.
Do not smear or apply blood to the top of the strip. The strip will automatically draw in the required amount of blood. Avoid touching the sample area with your fingers. The meter will begin the testing process and display your blood glucose result within seconds.
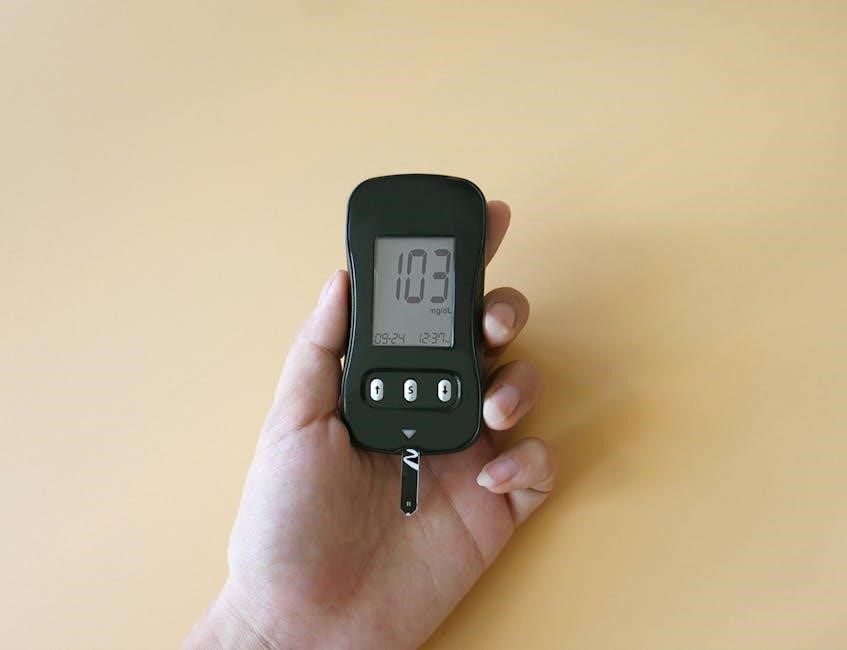
Understanding Your Blood Glucose Results
Interpreting your Aviva meter readings is crucial for effective diabetes management. Target ranges vary‚ but generally‚ a fasting blood glucose of 80-130 mg/dL is considered healthy. Post-meal levels should ideally be below 180 mg/dL two hours after eating.
High readings (hyperglycemia) may indicate insufficient medication‚ dietary issues‚ or illness. Low readings (hypoglycemia)‚ below 70 mg/dL‚ require immediate attention – consume fast-acting carbohydrates. Consistent monitoring helps identify patterns and adjust treatment plans. Discuss results with your healthcare provider for personalized guidance.
Target Blood Glucose Ranges
Establishing personalized target ranges with your doctor is vital when using the Aviva meter. Generally‚ before meals‚ aim for 80-130 mg/dL. One to two hours post-meal‚ the target is typically less than 180 mg/dL. These ranges can differ based on individual factors like age‚ diabetes type‚ and overall health.
Consistent monitoring helps you understand how food‚ exercise‚ and medication affect your levels. Keeping a log‚ potentially using the AvivaConnect platform‚ aids in identifying trends. Remember‚ these are guidelines; your healthcare provider will tailor ranges to your specific needs for optimal control.
High and Low Blood Glucose Readings
Consistently high readings (above 200 mg/dL) may indicate insufficient medication‚ improper diet‚ or illness‚ requiring immediate medical attention. Conversely‚ low readings (below 70 mg/dL) demand swift action to prevent hypoglycemia. Symptoms include shakiness‚ sweating‚ and confusion.
The Aviva meter helps identify these trends. If experiencing severe hypoglycemia‚ seek emergency help. Understanding your body’s response and having a plan with your doctor is crucial. Regular monitoring and proactive management‚ aided by the meter’s data‚ are key to avoiding dangerous fluctuations.
Using the AvivaConnect Platform
AvivaConnect is a digital platform designed to seamlessly integrate with your Aviva Blood Glucose Meter‚ offering enhanced data management and insights. This platform allows for automatic logging of your blood glucose readings‚ eliminating manual entry and reducing errors. You can track trends‚ identify patterns‚ and share data with your healthcare provider for more informed decisions.
Access AvivaConnect through a web browser or mobile app. The platform provides personalized reports and tools to help you better understand and manage your diabetes. It’s a powerful resource for proactive health management.
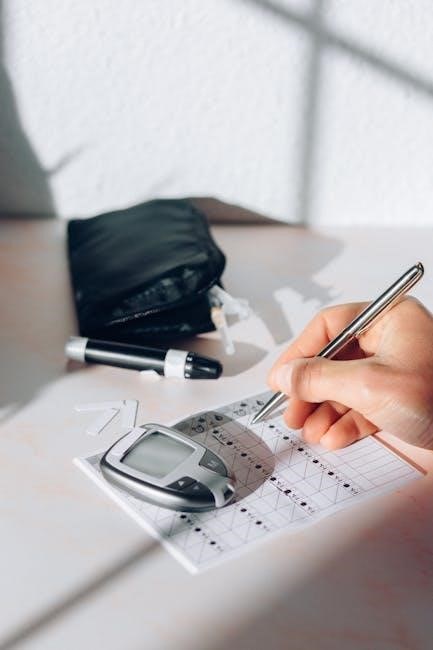
Data Management and Logging
Effective data management is crucial for successful diabetes control. The Aviva Blood Glucose Meter stores your recent test results‚ allowing you to review your history directly on the device. For more comprehensive tracking‚ utilize the AvivaConnect platform. This system automatically logs readings‚ creating detailed reports and graphs.
Consistent logging reveals patterns and helps identify factors influencing your blood glucose levels. Share these logs with your doctor to optimize your treatment plan. Accurate records empower you to take control of your health and make informed lifestyle choices.
Troubleshooting Common Issues
Encountering issues is normal; this section addresses frequent problems. Meter Error Messages indicate specific malfunctions – consult the manual for code definitions and solutions. Inaccurate Readings can stem from improper technique‚ expired test strips‚ or a faulty meter. Ensure correct strip insertion and fresh supplies.
If problems persist‚ try resetting the meter or contacting Aviva support. Regularly check the device and strips for damage. Maintaining a clean meter and proper storage are vital for reliable results. Don’t ignore persistent errors; seek professional guidance.
Meter Error Messages
The Aviva meter displays error codes signaling specific problems requiring attention. Common messages include “Strip Error‚” indicating an issue with the test strip – ensure proper insertion and check the expiration date. “System Error” suggests a more significant malfunction‚ potentially needing meter replacement or support contact.
“Lo” or “Hi” readings outside the measurable range require retesting with a new strip. Refer to the manual’s comprehensive error code list for detailed explanations and troubleshooting steps. Ignoring these messages can lead to inaccurate results; always address them promptly for reliable monitoring.
Inaccurate Readings
Several factors can cause inaccurate blood glucose readings with the Aviva meter. Expired or damaged test strips are a primary culprit; always verify the expiration date and inspect for damage. Improper blood sample size – too little or too much – can also skew results. Ensure adequate washing and drying of hands before testing to avoid contamination.
Meter malfunction‚ though less common‚ is possible. Compare readings with a control solution to assess meter accuracy. If discrepancies persist‚ contact Aviva support. Consistent inaccurate readings warrant professional medical advice and potential meter replacement.
Maintaining Your Aviva Blood Glucose Meter
Regular maintenance ensures accurate results and extends the meter’s lifespan. Cleaning is crucial; wipe the meter with a damp cloth after each use‚ avoiding harsh chemicals. Disinfect periodically with isopropyl alcohol‚ focusing on the test strip port. Proper test strip storage is vital – keep them in their original container‚ tightly sealed‚ and away from heat and moisture.
Avoid extreme temperatures and direct sunlight. Do not attempt to disassemble or repair the meter yourself. Follow Aviva’s guidelines for battery replacement. Consistent care guarantees reliable performance for effective diabetes management.
Cleaning and Disinfection
Maintaining hygiene is paramount for accurate readings and preventing infection. After each use‚ gently wipe the Aviva meter’s exterior with a slightly damp cloth. Avoid abrasive cleaners or submerging the device in water. For disinfection‚ use a 70% isopropyl alcohol solution applied to a clean cloth – never directly onto the meter.
Pay particular attention to the test strip port‚ ensuring no blood residue remains. Allow the alcohol to evaporate completely before inserting a new test strip. Regular cleaning contributes to the longevity and reliability of your Aviva blood glucose monitoring system.
Test Strip Storage
Proper test strip storage is crucial for reliable blood glucose readings. Always store Aviva test strips in their original vial‚ tightly closed‚ in a cool‚ dry place. Avoid direct sunlight‚ heat‚ and humidity‚ as these factors can degrade the strips and affect accuracy.
Do not store strips in the bathroom or near water sources. Check the expiration date on the vial before each use; expired strips may yield inaccurate results. Discard any damaged or expired strips responsibly. Following these guidelines ensures optimal performance from your Aviva testing supplies.
Aviva and Accu-Chek Relationship
The Aviva Blood Glucose Meter system is closely linked with Accu-Chek‚ a Roche company renowned for diabetes care innovation; Roche developed the ACCU-CHEK Aviva Expert system‚ notably the first FDA-approved meter with a built-in insulin calculator.
This collaboration signifies a commitment to advanced diabetes management tools. While Aviva offers broader financial and health services‚ the meter itself leverages Accu-Chek’s expertise in blood glucose monitoring technology. This partnership delivers a sophisticated system designed to simplify complex calculations and provide precise insulin dosing advice for users.
Where to Find Additional Support and Resources
Aviva provides multiple avenues for support regarding your blood glucose meter. You can access their email enquiries page‚ categorized for efficient routing to the appropriate team.
Furthermore‚ MyAviva accounts offer policy management tools and guidance‚ keeping you informed and in control. Aviva’s broader website details insurance‚ investments‚ and pensions‚ offering comprehensive financial wellbeing resources. For specific meter assistance‚ explore Accu-Chek’s support channels‚ given their technological partnership. Remember to utilize these resources to maximize your meter’s benefits and manage your health effectively.
Aviva’s Wider Health and Financial Services
Beyond the Aviva Blood Glucose Meter‚ Aviva offers a comprehensive suite of health and financial products. This includes health insurance‚ providing coverage for private healthcare costs and wellbeing support with rewards and discounts.
Aviva also specializes in home insurance‚ protecting buildings and belongings‚ alongside life and travel cover options. For financial planning‚ they provide pensions‚ investment accounts‚ and stocks & shares ISAs. Aviva aims to be a holistic provider‚ managing risks and supporting long-term financial security‚ extending far beyond diabetes management tools.