Samsung HW-T400 Manual: Article Plan (04/30/2026 15:56:46)
This article details setup, operation, and troubleshooting for the Samsung HW-T400 soundbar, including connections, remote control use, and accessing the full manual online.
The Samsung HW-T400 is a 2.0 channel soundbar with a built-in woofer, designed to enhance your TV’s audio experience with clear and immersive sound quality.
Overview of the HW-T400 Model
The Samsung HW-T400 soundbar represents a streamlined audio solution for modern televisions. It’s a 2.0 channel system, meaning it delivers sound from two distinct channels – left and right – creating a stereo soundscape. A key feature is the integrated woofer, eliminating the need for a separate subwoofer unit and simplifying setup.
This model is designed for ease of use and compatibility with a wide range of Samsung TVs, offering seamless integration and control via the TV remote. While specifications are subject to change, the HW-T400 aims to provide a noticeable audio upgrade over standard TV speakers, delivering richer bass and clearer dialogue. It’s a popular choice for those seeking improved sound without the complexity of a full surround sound system.
Key Features and Specifications
The Samsung HW-T400 boasts several key features, including built-in active subwoofer technology for enhanced bass performance within a compact design. Connectivity options include HDMI ARC and Optical input, ensuring compatibility with various TVs. It supports Dolby Digital decoding for immersive audio experiences.
While detailed specifications may vary, typical features include a total power output of around 40 Watts. The soundbar supports Bluetooth connectivity for wireless music streaming from compatible devices. Design and specifications are subject to change without notice. It’s a 2.0 channel system, and the included remote allows for convenient control. Users can access a comprehensive manual via QR code or Samsung’s website (http://www.samsung.com/support).
Unboxing and Component Check
Carefully unpack the soundbar, subwoofer (if applicable), cables, remote, and manual. Verify all listed components are present and undamaged before proceeding with setup.
Package Contents List
Upon opening the box, ensure you have all the necessary components for a complete setup. The standard package includes the Samsung HW-T400 Soundbar unit itself, delivering immersive audio. You should also find the Remote Control, complete with batteries for immediate operation. Connection cables are vital; check for both an HDMI cable for ARC connectivity and an Optical Cable for alternative TV connections.
A Power Cord is included to power the soundbar and, if applicable, a separate Subwoofer Power Cord. Crucially, the package contains a User Manual providing detailed instructions. Some regions may also include a Wall Mounting Kit for flexible placement options. Finally, verify the presence of a Quick Start Guide for simplified initial setup. If any items are missing, contact Samsung Support immediately.
Identifying the Soundbar Components
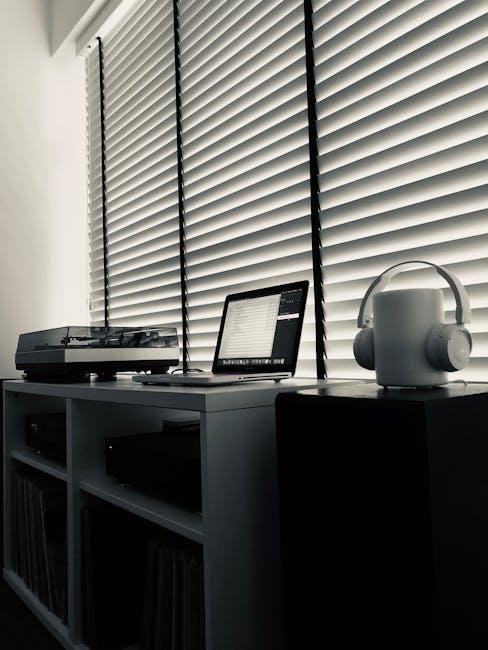
The Samsung HW-T400 Soundbar features a sleek, minimalist design. Locate the front speaker grille, responsible for delivering the primary audio output. On the top panel, you’ll find touch-sensitive control buttons for power, volume, and source selection. The rear panel houses the connection ports – HDMI ARC, Optical Input, and the Power Input.
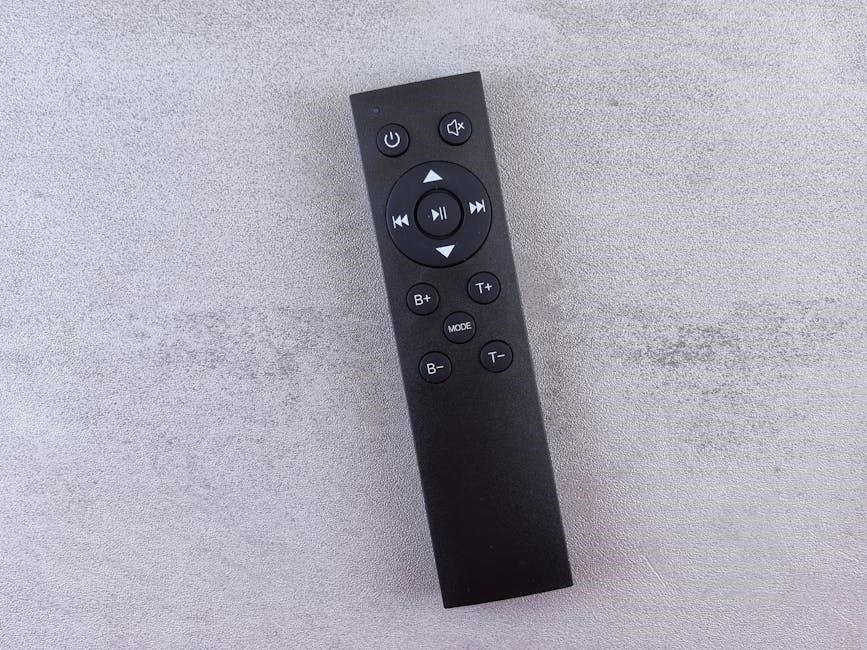
Examine the subwoofer (if included – some models have built-in woofers). It has its own speaker driver and a power port. Note the LED indicators on both the soundbar and subwoofer; these provide status updates during operation. Familiarize yourself with the remote control, identifying buttons for power, volume, sound modes, and pairing. Understanding these components will simplify setup and operation.

Setting Up the HW-T400
Proper placement and connection – via HDMI ARC or optical cable – are crucial for optimal sound quality from your new Samsung HW-T400 soundbar.
Placement Recommendations
For the best audio experience with your Samsung HW-T400, careful placement is key. Position the soundbar directly facing the listening area, ideally centered beneath your television. Ensure there are no obstructions blocking the sound path, such as furniture or decorative items.
Maintain a clear space of at least a few inches around the soundbar to allow for optimal sound diffusion. Avoid placing the soundbar inside enclosed spaces, as this can negatively impact audio quality. Consider the room’s acoustics; hard surfaces may reflect sound, while soft furnishings can absorb it.
Experiment with slight adjustments to find the position that delivers the most immersive and balanced sound for your specific room and listening preferences.
Connecting to Your TV – HDMI ARC
HDMI ARC (Audio Return Channel) offers a simplified connection for superior audio quality. Locate the HDMI ARC port on both your Samsung HW-T400 soundbar and your TV – it’s usually labeled. Use a high-speed HDMI cable to connect the two ARC ports.
On your Samsung TV, navigate to the settings menu and select ‘Sound’. Then, choose ‘Sound Output’ and set it to ‘HDMI ARC’. You may also need to enable ‘HDMI-CEC’ (Consumer Electronics Control) to allow the TV remote to control the soundbar’s volume.
Once connected, the soundbar should automatically detect the TV’s audio signal. If not, consult your TV’s manual for specific ARC configuration instructions.
Connecting to Your TV – Optical Cable
If your TV doesn’t have an HDMI ARC port, an optical cable provides an alternative connection method. Locate the optical output port on your TV and the optical input port on the Samsung HW-T400 soundbar.
Carefully connect an optical cable between these ports, ensuring it clicks securely into place. On your TV, access the ‘Sound’ settings and select ‘Optical’ or ‘Digital Audio Output’ as the audio output source.
You may also need to adjust the digital audio format to PCM if you experience any sound issues. The soundbar should automatically detect the audio signal; however, check the soundbar’s input source selection if needed.
Automatic Subwoofer Connection
The HW-T400 soundbar and subwoofer typically connect wirelessly during initial power-up; otherwise, a simple pairing process establishes the connection automatically.
Automatic Subwoofer Pairing Process
Upon powering on the soundbar and subwoofer for the first time, they should automatically attempt to connect wirelessly. Ensure both units are within range – ideally, no more than 10 feet apart – and free from obstructions.
The soundbar will emit a tone indicating a successful connection. If pairing fails, verify both devices are plugged in and powered on. A blue LED on the rear of the subwoofer typically confirms a successful wireless link.
Allow a few moments for the automatic process to complete. If the subwoofer doesn’t connect after several minutes, proceed to the manual pairing instructions for a guaranteed connection.
Manual Subwoofer Pairing Process
If automatic pairing fails, initiate the manual process. Locate the ‘PAIRING’ button on the rear of the subwoofer. Press and hold this button for approximately five seconds until the subwoofer’s LED indicator begins to flash rapidly.
On the soundbar, navigate to the settings menu (often accessible via the soundbar’s remote or the Samsung TV remote if connected). Select the ‘Subwoofer Pairing’ option and confirm the initiation of the manual pairing mode.
The soundbar and subwoofer should now attempt to connect. A successful connection is indicated by a solid blue LED on the subwoofer and a confirmation tone from the soundbar.

Using Your Samsung TV Remote
Control the soundbar’s volume and functions directly from your Samsung TV remote after setting the TV’s audio output to ‘External Speakers’ in the TV menu.
Controlling the Soundbar with TV Remote (Samsung TVs)
Seamlessly operate your Samsung HW-T400 soundbar using your existing Samsung TV remote! After establishing a connection via HDMI ARC or optical cable, navigate to your Samsung TV’s settings menu. Locate the ‘Sound’ or ‘Audio Output’ section. From there, select ‘External Speakers’ to direct the audio signal to the soundbar.
Once configured, your TV remote will control the soundbar’s core functions – primarily volume adjustment. Powering the soundbar on or off is often linked to the TV’s power state. For detailed instructions specific to your TV model, consult its user manual. This integration provides a streamlined and convenient user experience, eliminating the need for a separate remote.
Setting TV Audio Output to External Speakers
To enjoy sound through your Samsung HW-T400, you must configure your TV’s audio output settings. Access your TV’s menu, typically through the ‘Settings’ icon. Navigate to the ‘Sound’ or ‘Audio’ section – the exact wording varies by model. Within these settings, find the ‘Speaker Settings’ or ‘Audio Output’ option.
Select ‘External Speakers’ or a similar designation to route the audio signal to the soundbar. Some TVs may offer additional options like ‘HDMI ARC’ or ‘Optical’ – choose the corresponding setting based on your connection method. Ensure the soundbar is powered on during this process. Refer to your TV’s user manual for precise instructions, as menu structures differ. This step is crucial for proper audio functionality.
Soundbar Controls and Indicators
Understand the functions of the top panel buttons and the meaning of the LED indicators to effectively operate and monitor your Samsung HW-T400 soundbar.
Top Panel Controls Explained
The Samsung HW-T400 soundbar features intuitive top panel controls for convenient operation. The Power button initiates on/off functionality, easily accessible for immediate use. Volume Up/Down buttons allow precise audio level adjustments to suit your listening preferences.
A dedicated Source button cycles through available input sources – HDMI ARC, Optical, and potentially Bluetooth – enabling seamless switching between connected devices. Additionally, a multi-function button may control playback (Play/Pause) and potentially call features if Bluetooth is connected.
These controls provide direct access to essential functions, offering a user-friendly experience without relying solely on the TV remote. Familiarizing yourself with these buttons ensures effortless control over your soundbar’s core features.
LED Indicator Meanings
The Samsung HW-T400 utilizes LED indicators to communicate its status and connection information. A solid blue LED typically signifies the soundbar is powered on and functioning normally. Flashing blue often indicates Bluetooth pairing mode, ready to connect with a device.
A red LED may signal an error or standby mode. When using HDMI ARC, a brief flash upon power-up confirms successful communication with the TV. Optical input is usually indicated by a specific color or pattern.
Understanding these LED cues allows for quick troubleshooting and confirmation of proper setup. Refer to the full manual for a comprehensive list of indicator meanings and their corresponding actions.

Downloading the Full Manual
Access the complete Samsung HW-T400 manual easily by scanning the provided QR code or downloading the PDF directly from Samsung’s support website.
Accessing the Manual via QR Code
Samsung provides a convenient way to instantly access the full HW-T400 manual using a Quick Response (QR) code. This code is typically located within the product packaging, often on a separate information sheet or directly on the soundbar itself.
To utilize this feature, simply open the camera application on your smartphone or tablet. Position the camera so that the QR code is clearly visible within the viewfinder. Most modern smartphone cameras will automatically detect the QR code and prompt you with a link to access the manual online.
Alternatively, you can download a dedicated QR code reader application from your device’s app store if your camera doesn’t automatically recognize the code. Clicking the provided link will direct you to the official Samsung support page where you can view or download the complete HW-T400 user manual.
Downloading the PDF Manual from Samsung’s Website (http://www.samsung.com/support)
For offline access or archiving, you can easily download the complete Samsung HW-T400 manual in PDF format directly from Samsung’s official support website. Navigate to http://www.samsung.com/support in your web browser.
In the search bar, enter “HW-T400” or “Samsung HW-T400 manual” to locate the product page. Once found, scroll down to the “Downloads” or “Manuals” section. You should find a downloadable PDF version of the user manual listed there.
Click the download link, and the PDF file will be saved to your computer or mobile device. This allows you to view the manual even without an internet connection, making it a valuable resource for future reference and troubleshooting. Samsung frequently updates manuals, so ensure you have the latest version.

Troubleshooting Common Issues
This section addresses typical problems like no sound output or subwoofer connection difficulties, offering solutions to quickly resolve common user experiences.
No Sound Output
If you experience no sound from your Samsung HW-T400, begin by verifying the power connection to both the soundbar and your TV. Ensure the volume is not muted on either device and that the soundbar is selected as the audio output source on your TV.
Check the HDMI ARC or optical cable connection, confirming it’s securely plugged into both the TV and soundbar. For HDMI ARC, verify that ARC is enabled in your TV’s settings. If using an optical cable, ensure the optical port is clean and free of obstructions.
Try cycling the power on both the soundbar and TV. Also, consult your TV’s user manual for specific instructions on configuring audio output to external speakers. If the issue persists, a factory reset of the soundbar might be necessary.
Subwoofer Not Connecting
If your subwoofer isn’t connecting to the Samsung HW-T400, first attempt the automatic subwoofer pairing process. Ensure the subwoofer is powered on and within range of the soundbar – ideally, within 30 feet with no obstructions. If automatic pairing fails, proceed with the manual pairing process as detailed in the manual.
Verify the subwoofer’s power cord is securely connected and the outlet is functioning. Check for any potential interference from other wireless devices. A factory reset of the subwoofer, followed by a re-pairing attempt, can often resolve connectivity issues.
Confirm that the soundbar isn’t already paired with another subwoofer. Refer to the full manual for detailed troubleshooting steps and LED indicator meanings related to subwoofer connection status.
Important Safety Information
Always follow general safety precautions, and ensure proper power supply and cord handling to prevent damage or injury while using the HW-T400.
General Safety Precautions
To ensure safe operation of your Samsung HW-T400 soundbar, please adhere to the following guidelines. Avoid placing the soundbar in areas exposed to direct sunlight, extreme temperatures, or high humidity.
Do not use the soundbar near water or expose it to rain. Ensure adequate ventilation around the unit to prevent overheating. Never insert objects into the soundbar’s vents;
Clean the soundbar with a soft, dry cloth; avoid using harsh chemicals or abrasive cleaners. Disconnect the power cord during cleaning and when the unit is not in use for extended periods.
If you notice any unusual smells, smoke, or sounds, immediately disconnect the power and contact Samsung support. Do not attempt to repair the soundbar yourself.
Power Supply and Cord Safety
Regarding the power supply, only use the power cord provided with the Samsung HW-T400 soundbar. Ensure the voltage indicated on the power adapter matches your local electrical supply.
Avoid overloading power outlets or extension cords, as this could create a fire hazard. Do not damage the power cord; avoid bending, twisting, or placing heavy objects on it.
Always unplug the soundbar from the power outlet before cleaning or during lightning storms. If the power cord is damaged, it must be replaced by Samsung or a qualified technician.
Never attempt to modify the power cord or plug. Keep the power cord away from heat sources and sharp edges. A damaged cord presents a significant safety risk.

Warranty Information
Samsung provides warranty coverage for the HW-T400; details are available online or by contacting Samsung Support for assistance and claim procedures.
Warranty Coverage Details
The Samsung HW-T400 soundbar is covered by a limited warranty, protecting against manufacturing defects in materials and workmanship under normal use. This warranty typically lasts for one year from the date of original purchase, but specific durations may vary by region. The warranty does not cover damage resulting from misuse, accidents, modifications, or unauthorized repairs.
To make a warranty claim, you’ll generally need to provide proof of purchase (receipt) and a description of the issue. Samsung may require you to ship the product to an authorized service center for inspection and repair. The warranty service options, including repair or replacement, are determined by Samsung at their discretion. Always refer to the official warranty statement included with your product or available on the Samsung website for complete details and limitations.
Contacting Samsung Support
For assistance with your Samsung HW-T400 soundbar, several support options are available. You can visit Samsung’s online support center at http://www.samsung.com/support for FAQs, troubleshooting guides, and downloadable manuals. Alternatively, you can contact Samsung support directly via phone; numbers vary by region, so check the website for your local contact information.
Live chat support is often available through the Samsung website, offering real-time assistance from a support representative. Social media channels, like Twitter and Facebook, can also be used to reach out for help, though response times may vary. When contacting support, have your model number (HW-T400) and serial number readily available to expedite the process.