smithfield anytime sliced ham heating instructions

Smithfield Anytime Sliced Ham: A Comprehensive Heating Guide

Smithfield Anytime Sliced Ham offers convenient‚ flavorful options; mastering heating ensures optimal enjoyment‚ whether using the stovetop‚ microwave‚ or oven for delicious results.

Understanding Smithfield Anytime Sliced Ham

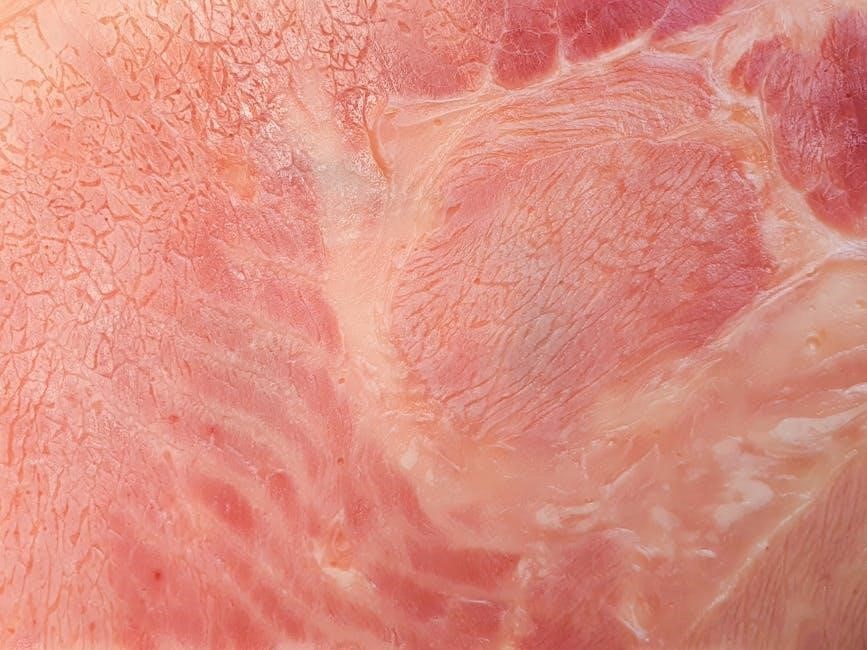
Smithfield Anytime Sliced Ham is a versatile and convenient product designed for quick and easy meal preparation. It’s pre-cooked‚ offering a significant time-saver for busy individuals and families. Understanding its characteristics is key to achieving the best heating results. This ham is crafted with a specific curing process‚ utilizing ingredients like water‚ dextrose‚ salt‚ potassium lactate‚ and sodium phosphates to enhance flavor and preserve quality.

The “Anytime” designation highlights its readiness to eat‚ though heating is recommended to elevate the taste and texture. It’s important to differentiate between fully cooked and uncooked hams; Smithfield Anytime Sliced Ham falls firmly into the fully cooked category‚ meaning it doesn’t require extensive cooking‚ just gentle warming. The inclusion of sodium nitrite contributes to its distinctive color and extended shelf life‚ ensuring a consistently delicious product;

Fully Cooked vs. Uncooked Ham

Distinguishing between fully cooked and uncooked ham is crucial for safe and effective preparation. Uncooked ham‚ often sold as “city ham‚” requires thorough cooking to an internal temperature of 145°F to eliminate potential bacteria. This necessitates longer cooking times and careful monitoring with a meat thermometer.

Smithfield Anytime Sliced Ham‚ however‚ is fully cooked. This means it has already undergone a heating process to ensure safety and is ready to eat straight from the package. Heating is primarily for enhancing palatability and achieving the desired warmth. Because it’s pre-cooked‚ the focus shifts from cooking to safety‚ to simply warming through to an internal temperature of 140°F. This difference significantly impacts preparation time and method‚ making Smithfield Anytime Sliced Ham a convenient option.

Key Ingredients & Curing Process

Smithfield Anytime Sliced Ham’s distinctive flavor profile stems from a carefully controlled curing process. Key ingredients include water‚ dextrose‚ salt‚ potassium lactate‚ and sodium phosphates – all contributing to both taste and preservation. Sodium diacetate‚ sodium erythorbate‚ and sodium nitrite are also utilized‚ playing vital roles in color retention and inhibiting bacterial growth‚ ensuring product safety.

The curing process itself involves immersing the ham in a brine solution containing these ingredients. This process not only imparts flavor but also draws moisture into the meat‚ resulting in a tender and juicy texture. Natural flavorings‚ maple syrup‚ and caramel color are added for enhanced taste and visual appeal. This meticulous process is fundamental to the quality and convenience of Smithfield Anytime Sliced Ham.

Nutritional Information Overview

Smithfield Anytime Sliced Ham provides a convenient protein source‚ though mindful consumption is key as part of a balanced diet. A typical serving size offers a substantial amount of protein‚ essential for muscle maintenance and overall health. However‚ it’s also important to note the sodium content‚ inherent in the curing process‚ which contributes to flavor and preservation.

The ham also contains carbohydrates‚ primarily from dextrose and maple syrup added during curing‚ and a moderate amount of fat. Consumers should review the specific nutritional label on the packaging for precise values‚ as these can vary slightly depending on the product variation. Understanding these nutritional aspects allows for informed dietary choices when enjoying Smithfield Anytime Sliced Ham.

Heating Methods: A Detailed Comparison

Various methods – stovetop‚ microwave‚ and oven – offer distinct advantages for heating Smithfield Anytime Sliced Ham‚ catering to different time constraints and quantity needs.

Stovetop Heating: Recommended Method

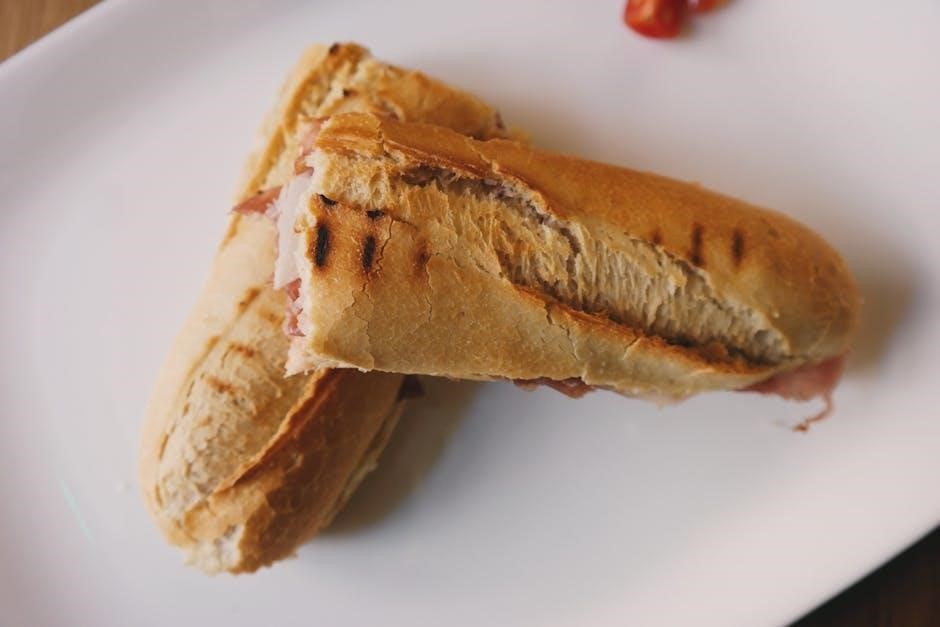
For optimal results‚ the stovetop is the recommended method for heating Smithfield Anytime Sliced Ham. This approach allows for quick and even warming‚ preserving the ham’s delightful texture and flavor. Begin by ensuring you have a clean skillet ready for use.

To initiate the process‚ place the desired number of ham slices into the hot skillet. It’s crucial to maintain a medium-high heat level throughout the heating process. This temperature ensures the ham warms thoroughly without becoming dry or tough.

Heating time is brief‚ requiring approximately 30 seconds per side. Monitor closely‚ flipping the slices halfway through to guarantee consistent heating. This method delivers warm‚ savory ham slices perfect for sandwiches‚ snacks‚ or as part of a larger meal. Enjoy the convenience and quality of Smithfield!

Optimal Heat Level (Medium-High)

Achieving the perfect temperature is paramount when heating Smithfield Anytime Sliced Ham on the stovetop. Utilizing a medium-high heat level is specifically recommended to ensure efficient and even warming of the ham slices. This setting strikes a balance‚ providing sufficient heat to quickly raise the ham’s temperature without compromising its delicate texture or causing it to dry out.

Lower heat settings may result in prolonged heating times‚ potentially leading to a less desirable texture. Conversely‚ excessively high heat could cause the ham to burn or become overly crispy. Medium-high heat allows for a controlled warming process‚ preserving the ham’s natural moisture and savory flavor.

Consistent monitoring is still advised‚ even with the optimal heat setting‚ to guarantee the ham is heated through to a satisfying temperature. This careful approach ensures a consistently delicious experience with every slice.

Heating Time per Side (Approximately 30 Seconds)

For optimal stovetop results with Smithfield Anytime Sliced Ham‚ a heating time of approximately 30 seconds per side is recommended. This brief warming period‚ combined with medium-high heat‚ effectively elevates the ham to a palatable temperature without sacrificing its moistness or flavor profile. It’s a quick and convenient method for a satisfying snack or meal component.

This timing is a guideline; slight adjustments may be necessary depending on the thickness of the ham slices and the specific stovetop used. Visual cues‚ such as a gentle warming and slight sheen‚ can indicate readiness. Avoid prolonged heating‚ as this can lead to dryness.

Consistent flipping ensures even heat distribution‚ preventing any one area from becoming overheated. This simple technique guarantees a uniformly warmed slice‚ enhancing the overall enjoyment of the product.

Microwave Heating: Quick & Convenient

Microwave heating offers a remarkably fast and convenient method for warming Smithfield Anytime Sliced Ham‚ ideal for quick snacks or adding to sandwiches. To ensure even heating‚ arrange the slices in a single layer on a microwave-safe plate‚ preventing overlapping which can lead to uneven temperatures. This maximizes exposure to the microwaves‚ promoting consistent warming throughout each slice.

Crucially‚ cover the ham loosely with plastic wrap. This traps some moisture‚ preventing excessive drying during the heating process‚ while still allowing steam to escape. Avoid sealing the wrap tightly‚ as this could cause it to burst. Heating times will vary based on microwave wattage‚ but start with short intervals.

Monitor closely and adjust heating time accordingly to avoid overheating. The goal is a warmed-through product‚ not a dried-out one.

Arranging Slices for Even Heating

Achieving uniformly heated Smithfield Anytime Sliced Ham in the microwave hinges on proper slice arrangement. The most effective technique involves placing the slices in a single‚ non-overlapping layer on a microwave-safe plate. Avoid stacking or piling the ham‚ as this creates areas where microwaves struggle to penetrate effectively‚ resulting in cold spots and unevenly warmed portions.

Spacing the slices slightly apart further enhances microwave penetration. This allows the energy to circulate more freely‚ ensuring each slice receives consistent heat. Consider using a larger plate if necessary to accommodate the slices without crowding. A well-organized arrangement is paramount for a satisfyingly warm and flavorful experience.

Remember‚ consistent heat distribution is key to preventing some slices from becoming overly dry while others remain cool.

Covering with Plastic Wrap (Loosely)

When microwaving Smithfield Anytime Sliced Ham‚ covering the slices with plastic wrap is recommended‚ but crucial to do so loosely. The purpose isn’t to create a sealed environment‚ but rather to trap some moisture and help distribute heat more evenly across the ham. Ensure the plastic wrap doesn’t directly touch the ham slices‚ as this can cause sticking and uneven cooking.

Ventilation is key! Poke a few small holes in the plastic wrap to allow steam to escape. This prevents pressure buildup and ensures the ham doesn’t become soggy. A tightly sealed wrap will hinder proper heating and potentially lead to uneven temperatures.

Alternatively‚ a microwave-safe lid can be used instead of plastic wrap‚ offering similar benefits without the need for venting. Proper covering maintains optimal moisture and heat for a delicious result.

Oven Heating: For Larger Quantities

Oven heating is ideal when you need to warm a substantial amount of Smithfield Anytime Sliced Ham‚ ensuring consistent temperature throughout. Begin by preheating your oven to 325°F (163°C). Remove the ham from its packaging‚ and importantly‚ reserve the liquid included – this adds moisture and flavor during the heating process.

Pour the reserved liquid over the ham within a 2-inch deep roasting pan. This prevents drying and maintains tenderness. Next‚ wrap the ham completely with aluminum foil‚ creating a sealed environment to lock in moisture. This step is vital for preventing the ham from becoming dry and brittle.

Heating time is approximately 10 minutes per pound‚ but always verify with a meat thermometer. Consistent monitoring guarantees a perfectly heated‚ flavorful result for larger gatherings or meal prepping.

Preheating the Oven (325°F)

Proper oven preheating is crucial for evenly heating Smithfield Anytime Sliced Ham‚ ensuring a consistent temperature throughout the entire cooking process. Set your oven to 325°F (163°C) and allow it to fully reach this temperature before introducing the ham. This typically takes around 15-20 minutes‚ depending on your oven model.

Why 325°F? This moderate temperature prevents the ham from drying out or becoming overly browned before it’s heated through. A lower temperature allows for gentle warming‚ preserving the ham’s natural moisture and delicate flavor profile. Patience during preheating is key to achieving optimal results.

Confirming preheating can be done with an oven thermometer for accuracy. A properly preheated oven guarantees a safe and delicious final product‚ ready to be enjoyed with family and friends.

Using the Reserved Liquid

Don’t discard the liquid included in the Smithfield Anytime Sliced Ham packaging! This flavorful liquid is a vital component for maintaining moisture and enhancing the ham’s overall taste during oven heating. After removing the ham from its packaging‚ carefully reserve approximately 1 cup of this liquid.

Pour the reserved liquid into the bottom of the roasting pan before placing the ham inside. This creates a moist environment‚ preventing the ham from drying out as it heats. The liquid also helps to distribute heat evenly‚ ensuring a more consistent temperature throughout the slices.

The liquid contains natural ham juices and seasonings‚ contributing to a richer‚ more savory flavor. Utilizing it is a simple step that significantly elevates the final result‚ delivering a tender and delicious Smithfield ham experience.

Wrapping the Ham Completely

After pouring the reserved liquid into the roasting pan and placing the Smithfield Anytime Sliced Ham inside‚ it’s crucial to wrap the ham completely with aluminum foil. This step is essential for trapping moisture and ensuring even heating throughout the entire portion of ham.

Ensure the foil is tightly sealed around the pan‚ creating a closed environment. This prevents steam from escaping‚ which would otherwise lead to a drier‚ less flavorful result. A secure wrap also helps maintain a consistent temperature‚ preventing hot spots and uneven cooking.

Properly wrapped ham will retain its natural juices and remain tender during the heating process. This technique is particularly important for larger quantities of ham‚ guaranteeing a consistently delicious outcome every time you enjoy Smithfield’s quality product.

Heating Time per Pound (Approximately 10 Minutes)

For oven heating‚ a general guideline is to allocate approximately 10 minutes per pound of Smithfield Anytime Sliced Ham. This timing ensures the ham reaches a safe and palatable internal temperature without becoming overly dry. However‚ always verify with a meat thermometer for accuracy.

This estimate assumes the oven is preheated to 325°F (163°C) and the ham is securely wrapped in aluminum foil with the reserved liquid. Adjust the heating time slightly based on your oven’s performance and the specific weight of the ham.

Regularly check the internal temperature‚ aiming for 140°F (60°C). Remember‚ this is a guideline; prioritize temperature over strict time adherence for the best results and a perfectly heated‚ flavorful Smithfield ham.

Safety & Temperature Guidelines

Prioritize food safety by ensuring Smithfield ham reaches an internal temperature of 140°F; utilize a meat thermometer for accurate readings and safe handling practices.

Internal Temperature Target (140°F)

Achieving an internal temperature of 140°F is crucial when heating Smithfield Anytime Sliced Ham‚ guaranteeing both safety and optimal palatability. This temperature ensures any potential bacteria are eliminated‚ providing a worry-free dining experience. While the ham is fully cooked‚ reheating to this specific point revitalizes the flavor and texture‚ making each slice even more enjoyable.

Consistent temperature monitoring is key. Relying solely on visual cues can be unreliable; a meat thermometer provides precise readings. Insert the thermometer into the thickest part of the ham slice‚ avoiding any bone or fat. If the temperature hasn’t reached 140°F‚ continue heating in short intervals‚ rechecking frequently to prevent overcooking and dryness. Remember‚ food safety is paramount‚ and reaching this target temperature is non-negotiable for a safe and delicious meal.

Properly heated ham offers the best taste and texture‚ and 140°F is the sweet spot for Smithfield products.

Using a Meat Thermometer

Employing a meat thermometer is the most reliable method for ensuring Smithfield Anytime Sliced Ham reaches the safe and ideal internal temperature of 140°F. Visual estimations are often inaccurate‚ potentially leading to undercooked or overcooked ham. A thermometer removes the guesswork‚ guaranteeing a perfect result every time.

Proper insertion technique is vital for an accurate reading. Insert the thermometer into the thickest portion of the ham slice‚ avoiding contact with bone‚ fat‚ or the heating surface. Ensure the probe is centered within the meat for a representative temperature. Digital thermometers provide quick and easy-to-read results‚ while instant-read models are convenient for frequent checks during the heating process.

Regular monitoring throughout heating is recommended. Check the temperature periodically‚ especially towards the end of the cooking time‚ to prevent exceeding 140°F and compromising the ham’s moisture and tenderness.

Safe Handling Practices

Prioritizing food safety is crucial when handling Smithfield Anytime Sliced Ham. Begin by washing your hands thoroughly with soap and water before and after handling the product. Prevent cross-contamination by using separate cutting boards and utensils for raw meats and ready-to-eat items like ham.

Proper storage is essential. Keep the ham refrigerated at 40°F (4°C) or below until ready to use. Discard any ham that has been left at room temperature for more than two hours. When reheating‚ ensure the ham reaches an internal temperature of 140°F to eliminate any potential bacteria.

Avoid reusing any marinade or liquid that has come into contact with raw meat. Always cook ham thoroughly and never consume undercooked portions. Following these simple guidelines will ensure a safe and enjoyable dining experience.

Tips for Optimal Flavor & Texture

For best results‚ position the ham fat-side up during oven heating and add a cup of water to maintain moisture‚ avoiding excessive heat exposure.

Fat-Side Up for Oven Heating

When oven-heating Smithfield Anytime Sliced Ham‚ consistently placing the ham fat-side up is crucial for achieving optimal flavor and preventing excessive dryness. The fat layer acts as a natural basting agent‚ slowly rendering during the heating process and self-basting the lean meat below. This ensures a more succulent and flavorful final product‚ locking in moisture and enhancing the overall taste experience.

Positioning the ham this way allows the melting fat to continuously redistribute‚ contributing to a richer‚ more tender texture. Ignoring this simple step can result in a drier‚ less appealing ham. Remember to place the ham in a 2-inch deep roasting pan for best results‚ further aiding in moisture retention during the heating process. This technique is a cornerstone of achieving perfectly heated Smithfield ham.

Adding Moisture During Oven Heating (1 Cup Water)

To further enhance moisture retention when oven-heating Smithfield Anytime Sliced Ham‚ adding one cup of water to the roasting pan is highly recommended. This creates a humid environment within the pan‚ minimizing moisture loss from the ham during the heating process. The water gently steams the ham‚ contributing to a more tender and juicy texture‚ preventing it from becoming dry or overly firm.

Ensure the water is added before covering the pan tightly with aluminum foil. The foil traps the steam‚ circulating it around the ham for even hydration. This simple addition significantly improves the final result‚ especially for longer heating times or larger cuts of ham. Remember to reserve any liquid from the original packaging‚ as this can also be used for added flavor and moisture.

Avoiding Overheating

Overheating Smithfield Anytime Sliced Ham can lead to a dry‚ tough texture and diminish its overall flavor. Since the ham is fully cooked‚ the goal is simply to warm it through‚ not to cook it further. Careful monitoring of both heating time and internal temperature is crucial to prevent this. Resist the urge to extend heating times unnecessarily‚ especially when using quicker methods like the stovetop or microwave.

Regularly check the ham’s internal temperature with a meat thermometer‚ aiming for the recommended 140°F. Once this temperature is reached‚ remove the ham from the heat source immediately. Allowing it to rest for a few minutes after heating will help redistribute the juices‚ resulting in a more succulent and enjoyable eating experience. Prioritize gentle warming over aggressive cooking.

Smithfield Brand Information

Smithfield Foods‚ a leading American food company with 88 years of experience‚ prioritizes quality and sustainability in producing delicious‚ value-added packaged meats.

Smithfield Foods: Company Overview

Smithfield Foods‚ Inc.‚ established as an industry leader‚ boasts a rich history spanning over eight decades dedicated to providing quality packaged meats and fresh products. Headquartered in Smithfield‚ Virginia‚ the company operates a vast network of facilities and employs thousands‚ contributing significantly to the American food supply chain.

As a publicly traded entity (Nasdaq: SFD)‚ Smithfield is committed to innovation and meeting evolving consumer demands. Their extensive portfolio includes popular brands like Smithfield®‚ Eckrich®‚ and Gwaltney®‚ alongside a diverse range of hog production and processing capabilities. The company’s core values center around responsibly feeding the world‚ emphasizing both product excellence and sustainable practices. Smithfield actively invests in initiatives focused on animal care‚ environmental stewardship‚ and community engagement‚ solidifying its position as a responsible corporate citizen.

Smithfield’s Commitment to Quality

Smithfield Foods prioritizes delivering consistently high-quality products‚ beginning with careful ingredient selection and rigorous quality control measures throughout the entire production process. Their dedication extends from sourcing to packaging‚ ensuring every slice of Smithfield Anytime Sliced Ham meets stringent standards for flavor‚ texture‚ and safety.

The company employs advanced technologies and adheres to strict food safety protocols‚ including Hazard Analysis and Critical Control Points (HACCP)‚ to minimize risks and guarantee product integrity. Smithfield’s commitment also encompasses continuous improvement‚ actively seeking feedback and investing in research and development to enhance product offerings. This dedication fosters consumer trust and reinforces Smithfield’s reputation as a reliable provider of delicious‚ safe‚ and consistently high-quality ham products.

Sustainability Initiatives

Smithfield Foods demonstrates a strong commitment to environmental stewardship and responsible production practices through numerous sustainability initiatives. These efforts encompass reducing greenhouse gas emissions‚ conserving water resources‚ and minimizing waste across their operations. Smithfield actively invests in innovative technologies and sustainable farming methods to lessen their environmental footprint.

Furthermore‚ the company focuses on animal welfare‚ implementing programs to enhance the health and well-being of livestock. They also prioritize community engagement‚ supporting local initiatives and promoting responsible sourcing. Smithfield’s dedication to sustainability extends to packaging‚ exploring eco-friendly materials and reducing overall packaging waste‚ reflecting a holistic approach to responsible corporate citizenship and a future-focused vision.

rotary lift installation instructions pdf

Rotary Lift Installation Instructions PDF: A Comprehensive Guide

Accessing detailed Rotary lift manuals is crucial for safe and correct setup; Google Translate facilitates understanding instructions across languages, ensuring proper installation procedures.

Understanding Rotary Lift Models & PDF Access

Rotary Lift offers a diverse range of lift models, each requiring specific installation procedures detailed in its corresponding PDF manual. Identifying your exact model – two-post, four-post, inground, or specialty – is the first step.

These manuals are readily accessible online through the Rotary Lift official website, often categorized by model year and type. Utilizing search terms like “[Lift Model Number] installation manual PDF” will quickly locate the correct document.

Google Translate can assist in understanding manuals available in different languages, ensuring clarity and preventing installation errors. Proper PDF access guarantees a safe and compliant installation process, maximizing lift performance and longevity.

Importance of Official Installation Manuals

Official Rotary Lift installation manuals are paramount for a successful and, crucially, safe installation. These documents provide model-specific instructions, detailing every step from foundation preparation to final testing. Deviating from these guidelines can compromise lift functionality and create hazardous conditions.

The manuals outline critical safety precautions, required tools, and precise specifications for electrical and hydraulic connections. Utilizing unofficial sources or relying on guesswork is strongly discouraged.

Furthermore, proper installation, guided by the official PDF, ensures compliance with industry standards and warranty validity. Google Translate aids comprehension if the manual isn’t in your native language, reinforcing a secure setup.

Safety Precautions Before Installation

Prior to commencing any Rotary Lift installation, stringent safety measures are essential. Disconnect all electrical power to the designated installation area and verify its absence with a reliable tester. A thorough site assessment is vital, ensuring the floor can bear the lift’s substantial weight.

Review the official installation PDF for specific hazards related to your lift model. Google Translate can assist in understanding warnings if the manual is in another language. Never attempt installation without fully comprehending these precautions.

Always prioritize personal safety; appropriate PPE is non-negotiable, and a clear understanding of emergency procedures is crucial.

Required Personal Protective Equipment (PPE)

Essential PPE for Rotary Lift installation includes safety glasses with side shields to protect against flying debris. Sturdy, closed-toe work boots are mandatory, safeguarding feet from potential impacts. Work gloves, preferably with reinforced palms, provide grip and hand protection during handling of heavy components.

Depending on the installation environment, hearing protection may be necessary. A hard hat is crucial if there’s a risk of falling objects. Refer to the installation PDF – potentially translated via Google Translate if needed – for model-specific PPE recommendations.

Ensure all PPE is in good condition and fits properly for maximum effectiveness.

Pre-Installation Site Assessment

Before commencing installation, a thorough site assessment is vital. Verify the floor’s structural integrity, ensuring it can support the lift’s weight – consult the Rotary Lift installation PDF for specific load requirements. Check for underground utilities to avoid damage during concrete work.

Adequate clearance around the lift is crucial for safe operation and maintenance. Utilize translation tools like Google Translate if the PDF is in another language. Ensure sufficient lighting illuminates the installation area. Confirm the availability of a suitable electrical supply, meeting voltage and amperage specifications.

Document any existing site conditions before starting.

Tools and Equipment Needed for Installation

Successful Rotary lift installation demands specific tools. A comprehensive list is detailed within the official installation PDF – referencing it is paramount. Essential items include a concrete mixer (if foundation pouring is required), various wrenches and sockets, a torque wrench (calibrated to spec), and levels.

Hydraulic hose crimping tools may be necessary, alongside pipe wrenches and Teflon tape for sealing connections. Consider a multimeter for electrical checks. Translation tools, like Google Translate, can aid understanding of tool requirements if the PDF isn’t in your native language. Safety glasses and gloves are non-negotiable.

Preparing the Installation Site

Thorough site preparation is vital before commencing Rotary lift installation, as detailed in the official PDF. This includes ensuring a level and adequately reinforced concrete floor capable of supporting the lift’s weight. Verify sufficient clearance around the installation area for safe operation and maintenance.

Electrical supply preparation is critical; confirm voltage and amperage match lift requirements. Utilize translation tools, such as Google Translate, if the PDF’s language presents a barrier. Proper grounding is essential. Clear the area of obstructions and ensure adequate lighting for safe working conditions.

Concrete Foundation Requirements

Rotary Lift installation PDFs emphasize robust concrete foundations. Minimum thickness should adhere to manufacturer specifications, typically 4-6 inches, reinforced with rebar. Ensure the concrete mix achieves a minimum compressive strength of 4,000 PSI after 28 days of curing. The foundation must be perfectly level, within a tolerance of 3/16 inch across the lift’s footprint.

Consult the PDF for specific anchor bolt patterns and sizes. Utilize translation tools like Google Translate if needed to understand detailed diagrams. Proper anchoring is crucial for stability and safety. Verify the foundation’s ability to withstand dynamic loads during lift operation.

Electrical Supply Considerations

Rotary Lift installation PDFs detail specific electrical requirements. Most lifts necessitate a dedicated circuit with appropriate voltage (typically 220V or 480V) and amperage, as outlined in the manual. Confirm local electrical codes compliance before commencing work. Proper grounding is paramount for safety; follow the PDF’s grounding procedures meticulously.

Utilize a qualified electrician for all wiring connections. Consider the distance between the power source and the lift, factoring in voltage drop. Google Translate can assist in understanding electrical diagrams if the manual is in another language. Ensure the circuit breaker is correctly sized to prevent overloads.

Step-by-Step Installation Process ⎯ Two-Post Lifts

Rotary Lift two-post lift PDFs guide users through column assembly, emphasizing precise positioning and bolting to the concrete foundation. Next, the carriage and mast installation requires careful alignment, ensuring smooth vertical movement. Detailed diagrams illustrate hydraulic hose connections to the power unit, stressing leak prevention.

Refer to the PDF for torque specifications for all fasteners. Google Translate can aid comprehension of multilingual manuals. Always double-check each step before proceeding. Proper installation guarantees safe operation and longevity of the lift. Follow the manual’s sequence meticulously for optimal results.

Column Assembly and Positioning

The Rotary Lift installation PDF details column assembly, beginning with attaching the base plates and uprights, ensuring correct orientation as per diagrams. Precise positioning is vital; the manual specifies minimum concrete thickness and anchor bolt patterns. Utilize shims for leveling on uneven floors, referencing the PDF’s guidance.

Torque specifications for all bolts are critical – consult the manual. Google Translate assists with understanding instructions in different languages. Verify plumbness using a level before fully tightening. Incorrect positioning compromises lift stability and safety. Adhere strictly to the PDF’s instructions for a secure foundation.

Carriage and Mast Installation

The Rotary Lift installation PDF guides carriage and mast installation, emphasizing proper lubrication of sliding surfaces before assembly. Carefully align the mast with the column, following the diagram for correct pin placement. Ensure smooth carriage travel by checking for obstructions. Torque all fasteners to the specifications detailed in the manual – crucial for safety.

Google Translate can aid in understanding multilingual instructions. Verify the carriage locking mechanism functions correctly before proceeding. Incorrect installation can lead to operational issues and potential hazards. Refer to the PDF for specific model variations and adjustments. A secure and properly functioning carriage is paramount.

Power Unit and Hydraulic Hose Connection

The Rotary Lift installation PDF stresses the importance of a clean hydraulic system. Connect hoses securely, ensuring proper tightening to prevent leaks – a common issue. Bleed the system according to the manual’s instructions to remove air, vital for optimal performance. Verify correct hose routing to avoid kinks or damage during lift operation.

Utilize Google Translate if the manual contains sections in another language. Double-check all connections before powering on the unit. Improper connections can cause system failure or hazardous situations. Refer to the PDF for specific torque specifications and fluid type. A leak-free and properly bled system is essential for safe operation.

Step-by-Step Installation Process ⎼ Four-Post Lifts

The Rotary Lift installation PDF details a phased approach for four-post lifts. Begin with base frame assembly, meticulously aligning components as illustrated. Next, install runways and carriages, ensuring smooth travel. Synchronization of lift pads is critical; follow the manual’s calibration procedures precisely. Utilize Google Translate for clarity if sections are in another language.

Securely bolt all connections, referencing torque specifications. Verify levelness throughout the process. Proper alignment prevents uneven lifting and potential damage. Consult the PDF for specific model variations. A correctly assembled four-post lift provides stable and safe vehicle elevation.

Base Frame Assembly

The Rotary Lift installation PDF emphasizes a precise base frame assembly. Begin by laying out all components, verifying against the parts list. Connect the main frame rails using grade-8 bolts, adhering strictly to torque specifications detailed in the manual. Ensure perfect alignment; any deviation impacts lift stability.

Utilize shims if the floor is uneven, achieving a perfectly level foundation. Double-check all welds and connections for integrity. Refer to diagrams within the PDF for correct orientation. Google Translate can assist with understanding any foreign language sections. A solid base is paramount for safe operation.

Runway and Carriage Installation

The Rotary Lift PDF guides precise runway and carriage installation. Begin by carefully positioning the runways onto the assembled base frame, ensuring proper alignment with pre-drilled holes. Secure them using the specified hardware, again adhering to torque values. Next, install the carriages, lubricating all moving parts with the recommended grease.

Verify smooth carriage travel along the runways – any binding indicates misalignment. Consult the diagrams in the manual for correct orientation and component placement. Google Translate aids comprehension of multilingual instructions. Proper installation guarantees balanced weight distribution and safe vehicle lifting.

Lift of Pads and Synchronization

Rotary Lift PDFs detail the precise lifting pad installation and synchronization process. Attach the lifting pads securely to the carriage assemblies, verifying proper alignment with the vehicle lifting points. Synchronization is critical; the manual outlines procedures for adjusting the hydraulic system to ensure equal lifting height on all pads.

Utilize the synchronization screws for fine-tuning, referencing the diagrams for correct adjustment points. Google Translate can assist with understanding instructions in different languages. Improper synchronization can lead to uneven lifting and potential vehicle damage. Thorough testing confirms stable and balanced operation.

Electrical Wiring and Connections

Rotary Lift installation PDFs emphasize strict adherence to electrical codes and specifications. Carefully review the wiring diagrams before commencing any connections, ensuring correct voltage and amperage. Proper grounding is paramount for safety; the manual details grounding procedures to prevent electrical shock and equipment damage.

Utilize appropriately sized wiring and circuit breakers as specified in the documentation. Google Translate can aid in understanding instructions if the manual is in another language. Double-check all connections for tightness and insulation. Incorrect wiring can cause malfunctions or create hazardous conditions; professional assistance is recommended if unsure.

Voltage and Amperage Requirements

Rotary Lift installation PDFs clearly state the specific voltage and amperage needed for each model. Incorrect power supply can severely damage the lift’s components and void the warranty. Typically, these lifts require 220V or 480V three-phase power, with amperage varying based on lift capacity. Confirm these requirements with the manual before any electrical work begins.

Ensure your facility’s electrical system can handle the load. Google Translate can help decipher specifications if the documentation isn’t in your native language. Dedicated circuits are essential to prevent overloading. Always consult a qualified electrician to verify compatibility and perform the connections safely.

Grounding Procedures

Proper grounding is paramount for safety when installing a Rotary lift, as detailed in the installation PDFs. Effective grounding protects against electrical shock and prevents damage to sensitive electronic components. The manual will specify the correct grounding wire gauge and connection points.

Connect the lift’s grounding terminal to a dedicated grounding rod or the building’s grounding system. Utilize a qualified electrician for this critical step. Google Translate can assist in understanding grounding instructions if the manual is in another language. Verify the grounding connection with a multimeter to ensure a low-resistance path to ground.

Hydraulic System Setup and Bleeding

Following the Rotary lift installation PDF, carefully connect all hydraulic lines, ensuring they are tightened securely to prevent leaks. Bleeding the hydraulic system is essential to remove air bubbles, which can compromise lift performance and safety. Refer to the manual for the specific bleeding procedure for your lift model.

Typically, this involves opening bleed screws at various points while operating the lift’s controls. Google Translate can help decipher instructions if the PDF is in a foreign language. Monitor the hydraulic fluid level throughout the process, adding fluid as needed. A properly bled system will provide smooth, consistent lifting action.

Initial Lift Testing and Adjustments

After installation, detailed in the Rotary lift installation PDF, perform initial testing with no vehicle present. Engage and disengage the safety locks multiple times, verifying proper function. Check for any unusual noises or hydraulic leaks during operation. Leveling and alignment are critical; use a level to ensure the lift platforms are perfectly horizontal.

Adjust the leveling screws as needed to achieve a stable, even surface. Google Translate can assist with understanding any foreign language sections of the manual. Document all adjustments made. Confirm smooth operation through the full range of motion before placing a vehicle on the lift.

Safety Lock Engagement Testing

Thorough safety lock testing, as detailed in the Rotary lift installation PDF, is paramount. Raise the lift to various heights – incrementally – and engage the safety locks at each point. Manually attempt to lower the lift while the locks are engaged; it should remain firmly secured. Repeat this process several times at each height to confirm reliability.

Inspect the lock mechanisms for any signs of wear or damage. Google Translate can help decipher any multilingual safety warnings. Ensure the release mechanism functions smoothly. Document all test results. A properly functioning safety lock is the primary safeguard against accidental lowering.

Leveling and Alignment Procedures

Precise leveling and alignment, guided by the Rotary lift installation PDF, are critical for optimal performance and safety. Utilize a precision level to check both the lift’s columns (for two-post lifts) or base frame (for four-post lifts) in multiple directions. Adjust the leveling screws until perfectly level is achieved.

Alignment ensures smooth carriage movement. Verify runway alignment on four-post lifts. Google Translate can assist with understanding instructions if the PDF is in another language. Minor adjustments may be needed. Improper leveling can cause uneven lifting and premature wear. Document all adjustments made.

Troubleshooting Common Installation Issues

The Rotary lift installation PDF often includes a troubleshooting section. Common issues include hydraulic leaks, electrical connection problems, and uneven lifting. Check all hose connections for tightness and damage; a leak can compromise lift capacity. Verify proper voltage and grounding of electrical components.

Uneven lifting often indicates leveling issues – revisit those procedures. If encountering language barriers in the PDF, Google Translate can be invaluable. Consult the manual’s diagrams for correct component placement. Always disconnect power before inspecting electrical systems. Document all troubleshooting steps taken.

Post-Installation Inspection and Certification

The Rotary lift installation PDF emphasizes a thorough post-installation inspection. Verify all bolts are tightened to the specified torque, referencing the manual’s charts. Test safety locks at various lift heights, ensuring reliable engagement. Confirm proper operation of all controls and emergency lowering systems.

Certification often requires a qualified inspector to verify compliance with safety standards. Documentation, including inspection reports and the installation PDF, is crucial. Address any identified issues before putting the lift into service. Utilize Google Translate if the PDF is in another language.

Locating and Downloading Rotary Lift PDFs

Official Rotary Lift PDFs are typically available on the Rotary Lift website, often within a dedicated “Support” or “Resources” section. Search by model number for the precise installation manual. Authorized distributors may also provide downloadable PDFs or direct links. Beware of unofficial sources, ensuring the document’s authenticity.

Google searches using specific keywords like “Rotary Lift [model number] installation PDF” can yield results, but verify the source. Translation tools, like Google Translate, can assist with manuals in other languages. Download and save the PDF for future reference during maintenance or troubleshooting.

double flush detox instructions

Double Flush Detox: A Comprehensive Guide (Updated 12/10/2025)

Embark on a transformative journey with the Double Flush Detox, a two-week program designed to cleanse and potentially reshape your physique, focusing on targeted areas.

This system aims to reduce the body’s toxic burden, leveraging natural processes for optimal wellness and a revitalized system, according to its advocates.

What is the Double Flush Detox?

The Double Flush Detox is a two-week detoxification program gaining attention for its claims of slimming hips and thighs while simultaneously cleansing the body. It’s built on the premise that accumulated toxins contribute to weight gain and hinder optimal health, and this program aims to address that.

Proponents believe reducing the “toxic load” allows the body to function more efficiently, potentially leading to weight loss and increased energy levels. The detox isn’t simply about restriction; it’s a structured approach involving specific phases, herbal supplements, and dietary adjustments.

However, it’s crucial to acknowledge that the concept of “detoxification” is often debated within the scientific community. While the body possesses natural detoxification mechanisms (liver, kidneys, etc.), the extent to which these programs enhance those processes remains a point of contention. This program is presented as a potential aid, not a guaranteed solution;

The Core Principles of the Double Flush System

The Double Flush Detox operates on the belief that effective cleansing requires a two-pronged approach: initial internal cleansing followed by thorough waste removal. This is reflected in its two distinct phases, each with a specific purpose and methodology.

The system centers around the idea of mobilizing toxins from their storage sites within the body and then facilitating their elimination. This isn’t about simply starving the body; it’s about supporting its natural detoxification pathways. The program emphasizes the importance of herbal support to stimulate cleansing processes and psyllium husk to aid in waste removal.

Crucially, dietary guidelines and adequate hydration are integral to the system’s success. Specific foods are encouraged to support detoxification, while others are restricted to minimize the toxic load. The system aims to optimize the body’s inherent ability to purify itself.

Phase 1: The Herb Phase ⸺ Initial Cleansing

The initial phase of the Double Flush Detox focuses on stimulating the body’s natural cleansing mechanisms through the strategic use of specific herbs. This phase aims to loosen and mobilize toxins stored in various tissues, preparing them for elimination in the subsequent phase.

This isn’t a prolonged stage; it’s designed to kickstart the detoxification process. The selection of herbs is crucial, with proponents suggesting certain botanicals possess properties that support liver function, bile flow, and overall cellular cleansing. The goal is to gently encourage the release of accumulated toxins without overwhelming the system.

Careful attention to dosage and timing is paramount during this phase. Following recommended guidelines ensures optimal effectiveness and minimizes potential discomfort. This phase sets the stage for the more intensive waste removal process to follow.

Key Herbs Used in Phase 1

Several herbs are traditionally employed during the initial phase of the Double Flush Detox, each believed to contribute uniquely to the cleansing process. Commonly cited are herbs known for their choleretic properties – those that stimulate bile production – as bile is essential for fat digestion and toxin removal.

These may include specific varieties of gentian, dandelion root, and artichoke leaf extract. Other herbs often incorporated are those with liver-supporting qualities, such as milk thistle, which is thought to protect liver cells and enhance their detoxification capabilities.

The precise blend and concentration of these herbs can vary depending on the specific protocol followed. It’s crucial to source high-quality, reputable herbal supplements to ensure purity and potency. Always research potential interactions with any existing medications before starting.

Dosage and Timing for Herbal Intake

Precise dosage and timing are paramount during Phase 1 of the Double Flush Detox to maximize effectiveness and minimize potential discomfort. Typically, herbal intake begins with a smaller dose to assess individual tolerance, gradually increasing over the first few days.

A common starting point involves consuming the herbal blend – often in capsule or tincture form – three times daily, approximately 30 minutes before meals. This allows for optimal absorption and interaction with the digestive system.

Following the initial adjustment period, the dosage may be increased to the manufacturer’s recommended amount, or as advised by a qualified healthcare practitioner. Consistency is key; maintaining a regular schedule ensures a sustained cleansing effect. Avoid exceeding the recommended dosage.

Phase 2: The Psyllium Phase ⸺ Waste Removal

Following the initial cleansing of Phase 1, the Double Flush Detox transitions into Phase 2, focusing on the thorough removal of accumulated waste with psyllium husk. This phase is crucial for eliminating toxins mobilized during the herbal stage, promoting a deeper level of detoxification.

Psyllium husk, a soluble fiber derived from the Plantago ovata plant, acts as a natural bulk-forming agent, adding volume to the stool and facilitating its passage through the digestive tract. This process helps to sweep away lingering toxins and undigested food particles.

Phase 2 typically lasts for a specified duration, often mirroring the length of Phase 1, and requires diligent adherence to the recommended psyllium dosage and hydration guidelines for optimal results.

Understanding Psyllium Husk and its Benefits

Psyllium husk, the cornerstone of Phase 2, is a remarkable natural fiber sourced from the seeds of the Plantago ovata plant. Its primary benefit lies in its exceptional ability to absorb water, forming a bulky, gel-like substance within the digestive system.

This bulking action isn’t merely about increasing stool volume; it actively promotes regularity and eases waste elimination. By adding bulk, psyllium stimulates intestinal contractions, facilitating the movement of toxins and undigested materials through the colon.

Beyond waste removal, psyllium offers additional advantages. It can contribute to feelings of fullness, potentially aiding in weight management, and may help regulate blood sugar and cholesterol levels. However, its primary role in the Double Flush Detox is to effectively clear the digestive pathway.

Psyllium Husk Dosage and Preparation

Proper dosage and preparation are crucial for maximizing the benefits of psyllium husk during Phase 2 of the Double Flush Detox. Begin with a conservative dose of one tablespoon of psyllium husk mixed with at least 8 ounces of water.

Gradually increase the dosage over several days, up to a maximum of two to three tablespoons per day, always accompanied by sufficient water. Crucially, drink the psyllium mixture immediately after combining it with water to prevent it from thickening prematurely.

Failure to consume enough water alongside psyllium can lead to constipation or even intestinal blockage. It’s recommended to take psyllium at a consistent time each day, separate from any medications, to avoid interference with absorption. Listen to your body and adjust the dosage as needed.

Dietary Guidelines During the Double Flush Detox

Adhering to specific dietary guidelines is paramount for a successful Double Flush Detox experience. The focus should be on whole, unprocessed foods that support the body’s natural detoxification pathways. Prioritize fruits, vegetables, and lean proteins to provide essential nutrients without adding to the toxic load.

A plant-based approach is highly encouraged, emphasizing fiber-rich foods to aid in waste removal. This dietary shift complements the psyllium husk phase, enhancing its effectiveness. Remember, the goal isn’t just elimination, but also nourishing the body with vital elements.

Concurrently, minimizing processed foods, refined sugars, and unhealthy fats is essential for optimal results. These items can hinder detoxification and potentially cause digestive discomfort, undermining the detox process.

Foods to Include for Optimal Results

To maximize the benefits of the Double Flush Detox, incorporate a vibrant array of nutrient-dense foods into your daily meals. Leafy green vegetables like spinach and kale are excellent choices, providing essential vitamins and minerals while supporting liver function.

Fruits, particularly berries, apples, and citrus fruits, offer antioxidants and fiber, aiding in detoxification and promoting digestive health. Lean protein sources, such as fish, poultry, and legumes, are crucial for maintaining muscle mass and supporting overall bodily functions.

Healthy fats, found in avocados, nuts, and seeds, contribute to satiety and provide essential fatty acids. Don’t forget to include probiotic-rich foods like yogurt or kefir to support a healthy gut microbiome, vital for efficient waste elimination.

Foods to Avoid During the Detox

During the Double Flush Detox, eliminating certain foods is crucial to support the cleansing process and avoid hindering progress. Processed foods, laden with artificial additives and unhealthy fats, should be completely avoided as they contribute to toxic buildup.

Refined sugars, found in sugary drinks and desserts, can disrupt gut health and impede detoxification pathways. Red meat and dairy products are also best avoided, as they can be difficult to digest and potentially inflammatory.

Limit or eliminate caffeine and alcohol, as they can dehydrate the body and strain the liver. Avoid gluten-containing grains, as some individuals experience sensitivities that can interfere with the detox. Prioritizing whole, unprocessed foods will significantly enhance the effectiveness of the Double Flush Detox.

Hydration: The Cornerstone of the Double Flush

Adequate hydration is absolutely paramount throughout the Double Flush Detox, serving as the foundation for optimal cleansing and waste elimination. Water is essential for flushing out toxins released during the detox process, supporting kidney function, and maintaining healthy digestion.

Aim to drink at least eight to ten glasses of filtered water daily, and even more if you are physically active. Herbal teas, such as dandelion or ginger tea, can also contribute to your fluid intake and offer additional detoxifying benefits.

Avoid sugary drinks and excessive caffeine, as these can dehydrate the body. Proper hydration ensures the psyllium husk functions effectively, preventing constipation and promoting smooth bowel movements. Staying well-hydrated will also help mitigate potential side effects like fatigue and headaches.

Potential Side Effects and How to Manage Them

While generally considered safe, the Double Flush Detox may induce temporary side effects as the body eliminates toxins. Common digestive issues, such as bloating, gas, or mild cramping, are frequently reported, especially during the psyllium phase. Increasing water intake and gently massaging your abdomen can provide relief.

Some individuals may experience fatigue or headaches as toxins are released. Rest, adequate sleep, and continued hydration are crucial for managing these symptoms. If headaches persist, consider reducing the intensity of the detox or consulting a healthcare professional.

Listen to your body and adjust the program as needed. Discontinue use if you experience severe or concerning symptoms.

Common Digestive Issues and Solutions

The Double Flush Detox, due to its intensive cleansing nature, can sometimes trigger temporary digestive discomfort. Bloating and gas are frequently experienced, particularly as the psyllium husk increases fiber intake. Slowly increasing psyllium dosage and ensuring adequate hydration can minimize these effects.

Mild abdominal cramping may also occur as the colon actively eliminates waste. Gentle abdominal massage in a clockwise direction can help stimulate bowel movements and alleviate discomfort. Diarrhea is possible, especially initially; reducing psyllium intake temporarily can help regulate bowel function.

Prioritize mindful eating and chew food thoroughly. If symptoms persist or worsen, consider pausing the detox and consulting a healthcare provider.

Addressing Fatigue and Headaches

During the Double Flush Detox, experiencing temporary fatigue and headaches is not uncommon. These symptoms often stem from the body adjusting to reduced caloric intake and the elimination of toxins. Ensuring sufficient rest – aiming for 7-8 hours of quality sleep each night – is crucial for mitigating fatigue.

Headaches can arise from dehydration or the release of toxins; Prioritize consistent hydration throughout the day, drinking plenty of water. Gentle exercise, like walking, can improve circulation and potentially alleviate headache symptoms.

If headaches persist or are severe, consider reducing the intensity of the detox or consulting a healthcare professional. Listen to your body and adjust the program as needed to prioritize your well-being.

Duration of the Detox Program

The Double Flush Detox is typically structured as a focused, two-week program. This timeframe is considered optimal for initiating a significant cleanse and observing noticeable changes in the body. The initial phase, centered around herbal intake, usually spans the first week, preparing the system for deeper purification.

The subsequent week focuses on psyllium husk to facilitate waste removal. While two weeks is the standard duration, individual needs may vary. It’s crucial to listen to your body and avoid extending the detox unnecessarily.

Prolonged detoxification without proper nutritional support can be counterproductive. After completing the two weeks, a carefully planned reintroduction of foods is essential for long-term maintenance and sustained benefits.

Combining the Double Flush with a Healthy Lifestyle

The Double Flush Detox isn’t a standalone solution; it’s most effective when integrated into a broader commitment to wellness. Sustained positive results depend on adopting and maintaining healthy habits beyond the two-week program. This includes prioritizing a nutrient-rich diet, regular physical activity, and sufficient sleep.

Consider the detox as a catalyst for long-term lifestyle changes. Focus on incorporating whole, unprocessed foods, minimizing sugar and unhealthy fats, and staying adequately hydrated. Regular exercise supports detoxification pathways and boosts overall health.

Stress management techniques, like yoga or meditation, can also enhance the benefits. The goal is to create a sustainable, holistic approach to health, making the detox a stepping stone towards lasting vitality.

Scientific Evidence and Criticisms of Detox Diets

While proponents claim detoxification reduces the body’s toxic load, scientific evidence supporting these claims remains limited. The human body possesses inherent detoxification mechanisms – the liver and kidneys – efficiently eliminating waste products. Critics argue that many “detox” diets lack rigorous scientific backing.

The perceived benefits often stem from calorie restriction and increased hydration, leading to temporary weight loss and improved digestion. However, severely restrictive diets can be unsustainable and potentially harmful. Concerns exist regarding nutrient deficiencies and electrolyte imbalances.

It’s crucial to approach detox diets with a critical mindset, recognizing they are not a substitute for a balanced diet and healthy lifestyle. Further research is needed to validate the purported benefits and assess long-term effects.

Long-Term Maintenance After the Detox

Sustaining the benefits of the Double Flush Detox requires a commitment to long-term lifestyle adjustments, not simply a return to previous habits. Reintroducing foods should be gradual, prioritizing whole, unprocessed options to avoid overwhelming the system.

Focus on a diet rich in fruits, vegetables, and lean proteins, while limiting processed foods, sugary drinks, and excessive fats. Consistent hydration remains paramount, supporting natural detoxification processes. Regular physical activity is also crucial for maintaining overall health and well-being.

Consider incorporating mindful eating practices to foster a healthier relationship with food. Periodic, gentler cleansing routines – like incorporating more fiber – can help support continued wellness. Remember, the detox is a catalyst for change, not a quick fix.

Resources for Further Information and Support

Embarking on a detox journey often benefits from external resources and a supportive community. Numerous online forums and websites dedicated to holistic health and detoxification offer valuable insights and shared experiences. Seek out reputable sources with qualified health professionals contributing to the content.

Consider consulting with a registered dietitian or nutritionist for personalized guidance tailored to your individual needs and health status; Books on natural health and detoxification can provide in-depth knowledge, but always critically evaluate the information presented.

Local health food stores often host workshops and events related to wellness practices. Remember to prioritize evidence-based information and exercise caution when encountering claims that seem too good to be true.

hoover steamvac instruction manual

Hoover SteamVac Instruction Manual: A Comprehensive Guide

Welcome! This manual provides detailed guidance for optimal performance of your Hoover SteamVac, covering setup, operation, maintenance, and troubleshooting for various models.

Congratulations on selecting a Hoover SteamVac! This powerful carpet cleaner is engineered to revitalize your floors, removing deep-down dirt and stains for a fresher, cleaner home. The SteamVac utilizes hot water extraction, effectively loosening and lifting away embedded grime from carpets, rugs, and upholstery.

This instruction manual serves as a comprehensive resource, guiding you through every aspect of your SteamVac’s operation – from initial assembly and setup to routine maintenance and troubleshooting. Whether you own a Turbo Power 5200 or an All Terrain model (like the F7452-900, available in various colors), this guide will ensure you maximize its cleaning potential.

Understanding your specific model and adhering to the safety precautions outlined within are crucial for optimal performance and longevity. Remember to consult the data label on the back of the handle to identify your model and serial numbers for accurate support and parts ordering.

Understanding Your SteamVac Model

Hoover SteamVac models offer diverse features tailored to various cleaning needs. The Turbo Power 5200 is a popular choice, while the All Terrain (F7452-900) provides versatility, differing primarily in color schemes – the Hoover website showcases the Patriot Blue Metallic finish. Identifying your specific model is vital for accessing the correct parts and support resources.

Key components include the clean water tank, cleaning solution tank, and the SpinScrub technology found in some models. Compatibility with filters is crucial; models like F5807, F5837-050, F5837-900, and many others utilize specific filter series (F5807, F5837).

Refer to the schematic parts diagram (available at vacfactsblog.com) for a detailed breakdown of your machine, including the location of the standpipe seal (part #27). Genuine Hoover parts and accessories are readily available through authorized retailers and directly from Hoover, ensuring optimal performance and maintaining your machine’s warranty.

Safety Precautions

Important Safety Instructions: Always disconnect the Hoover SteamVac from the power outlet before performing any maintenance or troubleshooting. Never operate the machine with a damaged cord or plug. Avoid using outdoors or on wet surfaces to prevent electric shock.

Keep children and pets away during operation. Do not direct the spray nozzle at people or animals. Use only Hoover-approved cleaning solutions to avoid damaging the machine or creating hazardous fumes. Ensure proper ventilation when cleaning upholstery.

Be cautious of hot steam and water during and immediately after use. Allow the machine to cool completely before storing. Regularly inspect the standpipe seal (part #27) and other components for wear and tear. Refer to the owner’s manual for complete safety guidelines and warnings before each use.

Setting Up Your Hoover SteamVac

Preparation is key! This section details assembling your SteamVac, filling the water tank, and adding the appropriate cleaning solution for optimal results.

Assembling the Machine

Initial Setup: Begin by carefully unpacking all components of your Hoover SteamVac. Refer to the parts diagram (available at VacFactsBlog) to ensure all parts are present. Attach the handle securely to the main body of the machine, ensuring it clicks firmly into place. Next, connect the cleaning hose to the designated port, again verifying a secure connection.

Tool Attachment: Depending on your cleaning task, select the appropriate tool – upholstery, stairs, or general floor nozzle. These tools easily attach to the hose. For models like the All Terrain (F7452-900), color variations exist, but assembly remains consistent. Ensure all connections are tight to prevent suction loss during operation. A properly assembled machine is crucial for effective cleaning.

Filling the Clean Water Tank

Water Capacity & Type: The clean water tank is essential for your SteamVac’s operation. Always use warm, not hot, tap water. Avoid using excessively hot water as it could damage internal components. Fill the tank to the “MAX” fill line indicated – overfilling can lead to leaks and reduced cleaning performance.

Adding Water: Carefully remove the tank from the machine. Locate the fill cap and unscrew it. Slowly pour the warm water into the tank, monitoring the fill level. Once filled, securely replace the cap, ensuring a tight seal. Return the tank to its designated slot on the SteamVac, confirming it clicks into place. Proper water levels are vital for optimal steam generation and effective cleaning.

Adding Cleaning Solution

Solution Compatibility: Only use Hoover-approved cleaning solutions specifically designed for SteamVac carpet cleaners. Using other solutions may damage the machine or void your warranty. Refer to your model’s documentation for recommended solutions.

Mixing & Dosage: Locate the designated cleaning solution compartment within or near the clean water tank. Carefully pour the recommended amount of cleaning solution into the compartment, following the instructions on the solution bottle. Typically, a small amount is sufficient; overusing solution can leave residue on carpets. Securely close the compartment. Ensure the solution mixes with the water for optimal cleaning performance.

Operating Your Hoover SteamVac

Begin cleaning! Power on, select your desired mode, and utilize the trigger and handle controls for effective carpet, rug, and upholstery cleaning.

Powering On and Off

Initiating Operation: To power on your Hoover SteamVac, firmly plug the power cord into a grounded electrical outlet. The power switch is typically located on the main body of the machine, often near the handle. Ensure the switch is in the “Off” position before plugging in the device for safety. Once connected, flip the power switch to the “On” position; you may hear the motor engage and the heating element begin to warm up.

Safe Shutdown Procedure: When finished cleaning, always turn the power switch to the “Off” position before unplugging the machine from the electrical outlet. This prevents potential damage to the motor or electrical components. Allow the machine to cool down completely before storing it. Never yank the cord to disconnect it – grasp the plug itself. Following these steps ensures safe and efficient operation of your Hoover SteamVac.

Selecting Cleaning Modes

Understanding Your Options: Hoover SteamVac models often feature multiple cleaning modes to cater to diverse surfaces and cleaning needs. Common modes include “Quick Clean” for light surface refreshers, “Deep Clean” for heavily soiled areas, and potentially a “Rinse” mode to extract remaining cleaning solution. Some models, like the All Terrain, may offer specialized settings for specific floor types.

Mode Selection Process: Typically, cleaning mode selection is achieved via a dial or buttons located on the machine’s handle or body. Consult your specific model’s diagram to identify the controls. Selecting the appropriate mode optimizes water flow, brush speed, and suction power for the task at hand, ensuring effective and efficient cleaning. Always refer to the cleaning solution’s instructions for recommended mode usage.

Using the Trigger and Handle Controls

Mastering Operation: The Hoover SteamVac’s trigger initiates the flow of cleaning solution and water. Squeeze it fully to activate, and release to halt the flow – crucial for controlled cleaning and conserving solution. The handle often incorporates additional controls, such as mode selection dials and potentially a “Clean Surge” feature for tackling stubborn stains.

Handle Adjustments & Ergonomics: Many models feature adjustable handles for comfortable operation. Ensure the handle is securely locked in your preferred position before starting. Familiarize yourself with the location of all controls for seamless transitions during cleaning. Proper grip and control are essential for maneuvering the SteamVac effectively and preventing fatigue during extended use.

Cleaning Carpets

Effective Carpet Cleaning: Begin by thoroughly vacuuming the carpet to remove loose debris. Select the appropriate cleaning mode – typically a “carpet” setting – and slowly push the SteamVac forward, releasing the trigger to dispense cleaning solution. Overlap each pass slightly to ensure complete coverage.

Technique & Solution Control: Avoid over-wetting the carpet; use short, controlled bursts of the trigger. For heavily soiled areas, utilize the “Clean Surge” feature if equipped, or make multiple passes. Upon completion, allow the carpet to air dry completely, avoiding foot traffic until dry. Regularly check and empty the dirty water tank to maintain optimal cleaning performance;

Cleaning Rugs

Rug Cleaning Considerations: Before cleaning rugs with your Hoover SteamVac, always check the rug’s care label for specific cleaning instructions. Some delicate rugs may require professional cleaning. Select a gentle cleaning mode, often a lower heat or suction setting, to prevent damage. Test the solution on an inconspicuous area first to ensure colorfastness.

Proper Technique: Move the SteamVac slowly and steadily across the rug’s surface, overlapping each pass. Avoid excessive wetting, especially for delicate or natural fiber rugs. Utilize the hose and attachments for edges and intricate patterns. Allow the rug to air dry completely, preferably flat, to prevent shrinkage or distortion.

Cleaning Upholstery

Upholstery Cleaning Guidelines: Always test the cleaning solution on a hidden area of the upholstery before proceeding to ensure colorfastness and fabric compatibility. Utilize the upholstery tool attachment for targeted cleaning. Select a gentle cleaning mode with lower heat and suction to protect delicate fabrics.

Effective Cleaning Process: Move the upholstery tool slowly and steadily across the surface, overlapping each pass. Avoid over-wetting the fabric, as this can lead to mildew or damage. For cushions, lift and clean both sides thoroughly. Allow the upholstery to air dry completely, avoiding direct sunlight or heat, which can cause fading or shrinkage.

Cleaning Stairs

Stair Cleaning Precautions: Exercise extreme caution when operating the SteamVac on stairs to prevent falls or accidents. Ensure the area is well-lit and free of obstacles. Utilize a low suction setting to maintain control and prevent the machine from pulling away from you.

Effective Stair Cleaning: Begin at the top of the stairs and work your way down, overlapping each pass. Use the hose and appropriate attachment for reaching tight spaces and corners. Apply the cleaning solution sparingly to avoid over-wetting the carpet or stairs. Allow the stairs to dry completely before use, ensuring a safe and clean surface.

Maintenance and Troubleshooting

Regular upkeep ensures peak performance! This section details filter replacement, nozzle cleaning, and solutions for common issues like blockages and suction loss.

Replacing Filters

Maintaining optimal suction requires regularly replacing your Hoover SteamVac’s filters. Dirty filters significantly reduce cleaning power and can even damage the machine. Compatible filter models include F5807, F5837-050, F5837-900, F5837-960, F5839-900, F5842-9RM, F5862-900, F5864-900, F5865-900, F5866-900, F5866-920, F5867-900, F5868-900, F5869-960, F5869-990, F5870-900, and F5871-900.

To replace the filter, first, ensure the machine is powered off and unplugged. Locate the filter compartment – its position varies by model, but is typically near the clean water tank. Open the compartment, remove the old filter, and insert the new one, ensuring a snug fit. Reclose the compartment securely.

Frequency of replacement depends on usage; however, replacing the filter every 3-6 months is generally recommended for consistent performance. Genuine Hoover filters are available for purchase online or at authorized retailers.

Cleaning the Nozzle and Brushes

Maintaining a clean nozzle and brushes is crucial for effective dirt and stain removal. After each use, or more frequently with heavy soiling, inspect the nozzle and brushroll for debris like hair, threads, and dried cleaning solution. Power off and unplug the machine before cleaning.

Remove the nozzle (consult your model’s specific instructions for removal). Carefully detach the brushroll and remove any wrapped debris by hand or with scissors. Rinse the nozzle and brushroll with warm water, ensuring they are completely dry before reattaching.

Stubborn residue can be loosened with a mild detergent. Regularly inspect for clogs and address them promptly to prevent reduced suction and optimal cleaning performance. A clean nozzle and brushroll ensure maximum cleaning efficiency.

Addressing Common Issues: Blockages

Reduced suction or no water flow often indicates a blockage within the Hoover SteamVac. First, power off and unplug the machine. Check the clean water tank for obstructions, ensuring the filter is correctly installed and free of debris. Inspect the dirty water tank – accumulated solids can restrict flow.

Next, detach the hose and nozzle, examining them for clogs. A straightened coat hanger or similar tool can carefully dislodge obstructions. Pay close attention to the brushroll area, as hair and fibers frequently accumulate there.

Persistent blockages may require flushing the system with clean water. Refer to your model’s manual for specific flushing instructions. Regular maintenance prevents blockages and ensures optimal performance;

Addressing Common Issues: Loss of Suction

Reduced suction power in your Hoover SteamVac typically signals an issue needing immediate attention. Begin by verifying the dirty water tank isn’t full, as this is a common cause. Ensure the filters are clean and properly seated; clogged filters severely restrict airflow. Inspect the hose for kinks or obstructions that impede suction.

Check the nozzle and brushroll for accumulated debris like hair and fibers. A blocked brushroll significantly diminishes cleaning effectiveness. Also, examine the standpipe seal (part #27) for damage or failure, as this impacts vacuum integrity.

If suction remains weak, consider flushing the system to remove potential internal blockages. Consistent maintenance, including filter replacement, prevents suction loss.

Addressing Common Issues: Standpipe Seal Failure (Part #27)

A failing standpipe seal (Part #27) drastically reduces suction and can cause leaks within your Hoover SteamVac. This critical component ensures a proper airtight connection between the machine’s internal components and the cleaning solution pathways.

Symptoms of failure include diminished cleaning power, noticeable suction loss, and potentially, water leaking from the unit. Refer to the blow-up diagram available at VacFactsBlog to locate the seal’s position.

Replacement is straightforward but requires disconnecting the appropriate hoses. Ensure a snug fit during installation to restore optimal vacuum performance. Regularly inspecting the seal during maintenance can prevent unexpected failures and maintain cleaning efficiency.

Replacing Parts

Maintaining your Hoover SteamVac often requires replacing worn components to ensure peak performance. Genuine Hoover parts are readily available, guaranteeing compatibility and quality. Common replacements include filters (models F5807, F5837 series, etc. – see Amazon), belts, and nozzles.

Before ordering, identify your specific SteamVac model (Turbo Power 5200, All Terrain F7452-900, or others) to ensure correct part selection. Color variations, like the Patriot Blue Metallic of the F7452-900, don’t affect part compatibility.

Resources for parts include the Hoover website, authorized service centers, and online retailers. Always disconnect the machine from power before attempting any repairs or part replacements for safety.

Specific Model Information

Explore details for the Hoover SteamVac Turbo Power 5200, All Terrain (F7452-900) with color options, and compatible filter series like F5807 and F5837.

Hoover SteamVac Turbo Power 5200

The Hoover SteamVac Turbo Power 5200 is a robust carpet cleaning solution designed for deep cleaning and effective stain removal. This model features a powerful motor and HeatBoost Technology to deliver consistently hot water for superior results. Refer to the parts diagram available at VacFactsBlog for component identification, particularly part #27, the standpipe seal, which is prone to failure.

Ensure you are using compatible filters, such as those in the F5807 or F5837 series, readily available at retailers like Amazon.com. Proper filter maintenance is crucial for maintaining suction power and overall performance. Regularly inspect and replace filters as needed to prevent blockages and ensure optimal cleaning efficiency. Always consult the full owner’s manual for detailed operating instructions and safety precautions specific to this model.

Hoover SteamVac All Terrain (F7452-900) ─ Color Variations

The Hoover SteamVac All Terrain (F7452-900) offers versatile cleaning capabilities for various surfaces, including carpets, rugs, and upholstery. A key feature of this model is the availability in different color options, with “Patriot Blue Metallic” being a prominent choice, as highlighted by Best Buy. However, it’s important to note that the color is the only difference between variations of this model.

Functionally, all F7452-900 units perform identically, offering the same cleaning power and features. When purchasing, focus on ensuring you receive a genuine Hoover product and verify compatibility with recommended filters (F5807, F5837 series, etc.). Refer to the complete owner’s manual for detailed instructions on operation, maintenance, and troubleshooting, regardless of the color variation you choose.

Compatible Filter Models (F5807, F5837 Series, etc.)

Maintaining optimal suction and performance with your Hoover SteamVac relies heavily on using compatible filters. Amazon.com lists a wide range of filters designed specifically for various SteamVac models. Key compatible models include the F5807, and the F5837 series – encompassing variations like F5837-050, F5837-900, F5837-960, and many others.

Regular filter replacement is crucial; a clogged filter significantly reduces cleaning effectiveness. Always check your specific SteamVac model number (located on the data label) to ensure accurate filter selection. Genuine Hoover filters are recommended for best results and to avoid potential damage to your machine. Refer to the “Replacing Filters” section for detailed instructions on how to access and replace these essential components, ensuring continued powerful cleaning.

Resources and Support

Need assistance? Find parts, accessories, owner’s manuals, service centers, and frequently asked questions online to maximize your Hoover SteamVac experience.

Finding Parts and Accessories

Genuine Hoover parts are crucial for maintaining your SteamVac’s performance and longevity. Amazon.com offers a wide selection of filters – specifically for models like F5807, F5837-050, and many others – ensuring a proper fit and effective cleaning.

For specific components, such as the standpipe seal (part #27), referencing a schematic diagram, like the one available at vacfactsblog.com, can pinpoint the exact part needed for repairs. This resource details parts diagrams for various SteamVac models (F5903-900, F5904-900, etc.).

Hoover’s official website also provides access to a comprehensive catalog of accessories, including specialized cleaning solutions and attachments designed to enhance your SteamVac’s capabilities on carpets, rugs, and upholstery. Always verify compatibility with your specific model number before purchasing.

Downloading Owner’s Manuals

Accessing your Hoover SteamVac’s owner’s manual is simple and provides invaluable information regarding operation, maintenance, and safety precautions. Hoover’s official website offers a dedicated section for downloading manuals, searchable by model number – conveniently located on the data label at the back of the handle.

These digital manuals mirror the printed version, detailing everything from assembling the machine and filling the clean water tank to troubleshooting common issues like blockages or loss of suction.

Having a digital copy readily available ensures you can quickly reference instructions without needing the physical manual. Furthermore, the online resources often include support videos and frequently asked questions, supplementing the written guidance and enhancing your understanding of your SteamVac.

Locating Service Centers

For repairs or professional assistance with your Hoover SteamVac, locating an authorized service center is crucial. Hoover’s website provides a comprehensive “Find a Service Center” tool, allowing you to search by zip code or location to identify nearby authorized technicians.

These service centers employ trained professionals equipped to diagnose and repair a wide range of issues, from motor problems and suction loss to component replacements like the standpipe seal (part #27). Utilizing an authorized center ensures genuine Hoover parts are used, maintaining the integrity and performance of your machine.

Contacting a service center is recommended for complex repairs beyond basic maintenance, safeguarding your SteamVac’s longevity and operational efficiency.

cuisinart food processor instructions

Cuisinart Food Processor Instructions: A Comprehensive Guide

Welcome! This guide details Cuisinart food processor operation, safety, and maintenance. Explore setup, blade usage, cleaning, and troubleshooting for optimal performance.

Discover recipes and accessory information to maximize your culinary experience with your Cuisinart appliance.

Refer to the official manual for detailed warranty information and support resources.

Understanding Your Cuisinart Food Processor

Cuisinart food processors are versatile kitchen tools designed to simplify food preparation. They excel at chopping, slicing, shredding, pureeing, and even making dough. Understanding the core functionality unlocks a world of culinary possibilities.

These appliances utilize a powerful motor to drive various blades and discs, transforming whole foods into desired consistencies. Different models cater to varying needs, from compact options for small kitchens to larger capacity processors for families or frequent cooks.

Familiarizing yourself with the components – work bowl, cover, feed tube, pushers, and blade assembly – is crucial. Proper assembly and usage ensure safe and efficient operation. Always consult the instruction manual specific to your model for detailed guidance and safety precautions.

The Cuisinart processor is a time-saving device, but mastering its features requires a bit of learning.

Model Variations and Identifying Your Processor

Cuisinart offers a diverse range of food processor models, each with unique features and capacities. Identifying your specific model is the first step towards accessing the correct instructions and support. Common series include the Elemental, Pro Custom, and Elite Collection lines.

Locate the model number, typically found on the underside of the base or within the instruction manual. This number is crucial when searching for replacement parts or contacting customer support. Capacity, measured in cups, also differentiates models – ranging from smaller 7-cup versions to larger 14-cup options.

Features like touchpad controls versus manual dials, and included accessories, further distinguish between models. Referencing the Cuisinart website or your original purchase documentation will help pinpoint your processor’s exact specifications;

Key Components: A Detailed Overview

Cuisinart food processors consist of several essential parts working in harmony. The Work Bowl, typically plastic, securely holds ingredients during processing. A corresponding Cover locks onto the bowl, ensuring safe operation. The Feed Tube, located on the cover, allows for adding ingredients while running.

Two Pushers – a large and a small – guide food through the feed tube. The Blade Assembly, including the S-blade and various discs, performs chopping, slicing, and shredding. Discs snap securely onto the central post within the work bowl.

Understanding each component’s function and proper assembly is vital for efficient and safe food preparation. Always ensure parts are correctly locked before operation.

Work Bowl and Cover

The Work Bowl is the foundation of your Cuisinart food processor, typically constructed from durable, BPA-free plastic. It features measurement markings inside for accurate ingredient additions, streamlining recipes. Ensure the bowl is clean and dry before each use for optimal performance.

The Cover is designed to lock securely onto the work bowl, preventing spills and ensuring safe operation. Proper alignment is crucial; look for the locking tabs to click into place. The cover also houses the Feed Tube.

Never operate the processor without the cover firmly locked. Inspect the cover regularly for cracks or damage, replacing it if necessary.

Feed Tube and Pushers (Large & Small)

The Feed Tube, located on the Work Bowl Cover, allows for the addition of ingredients while the processor is running. This is ideal for slicing, shredding, or creating emulsions. Always use the provided Pushers to guide food through the tube.

Cuisinart processors include both a Large Pusher and a Small Pusher. The Large Pusher is for wider ingredients like whole fruits and vegetables. The Small Pusher is designed for narrower items or smaller quantities, ensuring even processing.

Never insert your hands or utensils into the feed tube while the processor is operating. Always use the pushers for safe and efficient food introduction.

Blade Assembly and Discs

Cuisinart food processors utilize interchangeable blade assemblies and discs for diverse food preparation. The S-Blade, typically used for chopping, pureeing, and mixing, snaps securely onto the processor base. Always handle the S-Blade with extreme caution, as it is very sharp.

Various Discs are available for slicing, shredding, and julienning. These discs attach directly to the processor base in place of the S-Blade. Ensure the disc is properly locked into position before operation.

Properly storing blades and discs is crucial for safety. Utilize the provided storage containers or a safe, designated location to prevent accidental cuts.

Safety Precautions Before First Use

Before operating your Cuisinart food processor, carefully read all instructions in the manual. Ensure the appliance is placed on a stable, level surface. Never operate a damaged cord or plug; seek professional repair.

Always unplug the processor before assembly, disassembly, or cleaning. Keep hands and utensils away from moving parts during operation. Never feed food into the feed tube with your fingers; Utilize the provided pushers.

Exercise extreme caution when handling the blades – they are exceptionally sharp. Never immerse the motor housing in water. Supervise children closely when the appliance is in use.

Initial Setup and Assembly

Begin by unpacking all components and verifying everything is present, referencing the parts list in your manual. Place the work bowl securely on the base, ensuring it locks into position. Attach the blade assembly or desired disc, aligning it with the center post.

Next, position the cover onto the work bowl, again confirming a secure lock. Insert the appropriate pusher – large for wider items, small for narrower ones – into the feed tube.

Before first use, wash all removable parts with warm, soapy water. Ensure all parts are completely dry before assembly.

Basic Operation: Pulse, Low, and High

Understanding the controls is key. The Pulse function provides short bursts of power – ideal for chopping or preventing over-processing. Use it for textured results. Low speed is perfect for coarsely chopping, mixing, or emulsifying delicate ingredients. It offers controlled processing.

High speed delivers maximum power for pureeing, blending, or kneading dough. Start with short bursts on any speed, gradually increasing as needed. Always monitor the food’s consistency.

Remember to never operate the processor continuously for extended periods; allow it to rest between uses to prevent overheating.

Using the S-Blade: Chopping and Pureeing

The S-blade is your workhorse for chopping, pureeing, and mixing. For chopping, cut food into uniform pieces before processing for consistent results. Don’t overload the work bowl; process in batches if necessary.

To puree, ensure ingredients are relatively soft. Add liquid as needed to achieve the desired consistency. Use the Pulse function initially, then switch to Low or High speed.

Always ensure the blade is securely attached before operation. Never attempt to remove the blade while the motor is running.

Utilizing Discs: Slicing and Shredding

Cuisinart food processors excel at slicing and shredding with specialized discs. Ensure the correct disc is firmly locked into place before operation. Use the large feed tube for whole foods and the smaller tube for narrower items.

Apply even pressure with the pusher to maintain consistent results. Avoid forcing food through the feed tube. For best results, slightly chill vegetables before shredding or slicing.

Always use the pusher; never insert hands directly into the feed tube. Discs are sharp – handle with care during cleaning and storage.

Slicing Disc Instructions

Cuisinart slicing discs create uniform slices for salads, gratins, and more. Select the appropriate slicing disc – fine, medium, or coarse – based on your desired slice thickness. Securely attach the disc to the processor base, ensuring it clicks into place.

Place food items into the feed tube, utilizing the pusher for consistent pressure; Avoid overcrowding the tube for even slicing. For larger items like potatoes, pre-cut them to fit comfortably.

Monitor the sliced food and stop the processor when nearing the desired amount. Always use the pusher and never your hands!

Shredding Disc Instructions

Cuisinart shredding discs are ideal for cheese, vegetables, and more, delivering consistently shredded results. Choose the appropriate disc – fine or coarse – depending on your preference. Securely mount the disc onto the processor base, confirming a firm click.

Feed food items into the feed tube, applying gentle, even pressure with the pusher. Avoid overloading the tube to ensure uniform shredding. For firm cheeses, slightly chilling them beforehand can improve results.

Continuously monitor the shredded food and halt the processor when you’ve reached the desired quantity. Remember to always use the pusher, never your fingers!

Dough Blade: Making Pastry and Dough

Cuisinart’s dough blade excels at quickly creating pastry, pizza dough, and bread doughs. Attach the blade securely to the processor base. Combine flour and cold butter/shortening in the work bowl, pulsing until a crumbly mixture forms.

Gradually add ice water, pulsing until the dough just comes together – avoid overprocessing. For yeast doughs, add yeast and liquids, then process until a smooth ball forms.

Remove the dough, knead briefly if needed, and wrap for chilling before baking. The dough blade’s unique design efficiently incorporates ingredients, yielding tender, flaky results.

Emulsifying Disc: Creating Sauces and Dressings

Cuisinart’s emulsifying disc is ideal for crafting smooth, creamy sauces, mayonnaise, and flavorful dressings. Securely attach the disc to the processor base. Add oil slowly through the feed tube while the processor runs on low speed.

This controlled addition creates a stable emulsion, preventing separation. For mayonnaise, add egg yolk first, then slowly drizzle in oil. Experiment with herbs, spices, and citrus for customized flavors.

The disc’s design ensures thorough blending, resulting in light, airy textures. Clean the disc immediately after use to prevent residue buildup.

Cleaning and Maintenance

Regular cleaning ensures optimal performance and longevity of your Cuisinart food processor. Many parts – work bowl, cover, discs, and blades – are dishwasher safe (top rack recommended). However, hand washing preserves sharpness and finish.

For hand washing, use warm, soapy water and a soft sponge. Avoid abrasive cleaners. Carefully handle blades; they are extremely sharp! Dry all components thoroughly before reassembling.

The motor base should be wiped clean with a damp cloth. Never immerse it in water; Proper maintenance prevents food buildup and ensures hygienic operation.

Dishwasher Safe Parts

Fortunately, Cuisinart designs many food processor components for convenient dishwasher cleaning. Specifically, the work bowl, cover, feed tube, pushers (both large and small), and all plastic discs are generally safe for the top rack of your dishwasher.

However, it’s crucial to avoid high heat, which can potentially warp or damage plastic. For best results, use a gentle cycle and a mild detergent. While dishwasher safe, some users prefer hand washing to maintain the sharpness of blades and the clarity of plastic over time.

Always ensure parts are fully dry before reassembling the processor.

Hand Washing Instructions

For components not dishwasher safe, or for those you prefer to clean manually, hand washing is recommended. Use warm, soapy water and a soft sponge or cloth. Never immerse the motor base in water – wipe it clean with a damp cloth only.

Blades and discs require careful handling; wash immediately after use to prevent food from drying and sticking. Avoid abrasive cleaners, as they can dull the blades. Rinse thoroughly and dry all parts completely before reassembly.

Pay close attention to crevices where food particles may accumulate. Proper hand washing extends the life of your Cuisinart food processor parts.

Troubleshooting Common Issues

Processor Won’t Turn On: Ensure the unit is properly plugged in and the lid is securely locked in place. Check the reset button on the base – it may need to be pressed if overloaded. Verify the pulse or speed setting is engaged.

Food Not Processing Evenly: Avoid overfilling the work bowl. Cut food into uniform sizes before processing. Use the pusher to guide food towards the blade. If using discs, ensure the correct disc is selected for the desired result.

Consistent issues may indicate a need for professional service or part replacement.

Processor Won’t Turn On

Initial Checks: First, confirm the power cord is firmly plugged into a working outlet. Test the outlet with another appliance to rule out electrical issues. Ensure the Cuisinart food processor lid is correctly and securely locked onto the work bowl; it features a safety interlock.

Reset Button: Locate the reset button, typically on the base of the unit. If the motor overheated due to overloading, pressing this button may restore function. Allow the motor to cool before attempting to restart.

Speed Setting: Verify a speed setting (Low or High) or the Pulse function is selected. The processor won’t operate without activation.

Food Not Processing Evenly

Overfilling: Avoid overloading the work bowl. Process food in smaller batches for consistent results. Overcrowding prevents the blade from effectively reaching all ingredients.

Ingredient Size: Ensure food pieces are uniformly sized before processing. Large, uneven chunks will lead to inconsistent chopping or slicing. Pre-cut ingredients as needed.

Blade Selection: Confirm you’re using the appropriate blade for the task. The S-blade is for chopping/pureeing, while discs are for slicing/shredding. Incorrect blade choice causes uneven processing.

Pulse Technique: Utilize the Pulse function for controlled processing, especially with delicate items. This prevents over-processing and ensures texture control.

Blade Dullness and Replacement

Recognizing Dullness: A dull blade struggles to chop, slice, or puree efficiently, often resulting in uneven textures and requiring longer processing times. It may also crush instead of cleanly cutting.

Factors Affecting Sharpness: Processing hard foods (like frozen items or bones) frequently accelerates blade dulling. Regular use and improper cleaning also contribute to wear and tear.

Replacement Options: Cuisinart blades are replaceable. Purchase genuine Cuisinart replacement blades through their website or authorized retailers to ensure compatibility and quality.

Safety First: Always unplug the food processor before handling or replacing blades. Handle sharp blades with extreme caution to avoid injury. Dispose of old blades safely.

Storage Instructions

Proper storage extends the life of your Cuisinart food processor. Ensure all parts are completely dry before storing to prevent mold or mildew; The work bowl and cover can be stacked, but avoid tightly compressing them.

Blade Storage: Store blades separately and securely, ideally in a designated container or the original packaging, to prevent accidental contact and injuries. Never store blades loose in a drawer.

Unit Storage: Keep the motor base in a clean, dry location. Avoid storing it in direct sunlight or extreme temperatures. Wrap the cord loosely to prevent damage.

Long-Term Storage: If storing for an extended period, consider placing a desiccant packet inside the work bowl to absorb any residual moisture.

Recipes to Get You Started

Unleash your culinary creativity! Your Cuisinart food processor simplifies recipe preparation. Begin with Simple Salsa: pulse tomatoes, onion, jalapeño, cilantro, and lime juice for a fresh, vibrant condiment.

Next, try Homemade Hummus: combine chickpeas, tahini, lemon juice, garlic, and olive oil; process until smooth and creamy. Adjust seasonings to your preference.

Beyond basics: explore pesto, dips, and even doughs! The S-blade excels at chopping and pureeing, while discs create perfect slices and shreds. Experiment with different ingredients and textures.

Remember: always follow recipe instructions and use appropriate blades for optimal results. Enjoy!

Simple Salsa Recipe

Yields: Approximately 2 cups

Prep time: 10 minutes

Ingredients: 4 medium tomatoes (quartered), 1/2 onion (chopped), 1-2 jalapeños (seeded & chopped), 1/4 cup cilantro, 2 tablespoons lime juice, salt to taste.

Instructions: Place tomatoes, onion, and jalapeño in the Cuisinart work bowl. Pulse 5-8 times, until coarsely chopped. Add cilantro and lime juice. Pulse 2-3 times to combine. Season with salt.

Tip: For a smoother salsa, process for a longer duration. Adjust jalapeño quantity for desired spice level. Serve immediately with tortilla chips or your favorite Mexican dishes!

Enjoy!

Homemade Hummus Recipe

Yields: About 2 cups

Prep time: 15 minutes

Ingredients: 1 (15-ounce) can chickpeas (drained & rinsed), 1/4 cup tahini, 2-3 tablespoons lemon juice, 1-2 cloves garlic, 2 tablespoons olive oil, 1/4 teaspoon cumin, salt to taste, 2-4 tablespoons water.

Instructions: Combine chickpeas, tahini, lemon juice, garlic, olive oil, and cumin in the Cuisinart food processor. Process continuously until smooth, scraping down sides as needed. Add water, one tablespoon at a time, until desired consistency is reached. Season with salt.

Tip: Garnish with paprika and a drizzle of olive oil. Serve with pita bread or vegetables!

Enjoy!

Understanding the Instruction Manual

Your Cuisinart food processor’s instruction manual is a vital resource. It details safety precautions, component identification, and proper assembly. Carefully review the diagrams illustrating each part – work bowl, blades, discs, and pushers – before first use.

Pay close attention to the operational instructions for pulse, low, and high settings. The manual clarifies appropriate blade usage for chopping, pureeing, slicing, and shredding. It also outlines cleaning procedures, specifying dishwasher-safe parts and hand-washing guidelines.

Familiarize yourself with the troubleshooting section to address common issues. The warranty information and support contact details are also crucial for future reference. Keeping the manual handy ensures optimal performance and longevity of your appliance.

Warranty Information and Support

Cuisinart provides a limited warranty on its food processors, covering defects in materials and workmanship. The duration varies by model, typically ranging from one to three years. Retain your proof of purchase for warranty claims.

To initiate a claim, contact Cuisinart’s customer support via phone, email, or their website. Be prepared to provide your model number, serial number, and a detailed description of the issue.

Cuisinart’s website offers extensive support resources, including FAQs, downloadable manuals, and troubleshooting guides. You can also find authorized service centers for repairs. Proper care and adherence to the instruction manual’s guidelines are essential for maintaining warranty validity.

Cuisinart Food Processor Accessories

Cuisinart offers a wide array of accessories to expand your food processor’s functionality. These include various slicing and shredding discs, a dough blade for pastry making, and an emulsifying disc for sauces and dressings.

Specialty accessories like a spiralizer, citrus juicer, and even ice cream makers are available for select models. These attachments transform your food processor into a versatile kitchen tool.

Accessories are typically sold separately and can be purchased through Cuisinart’s website, authorized retailers, or appliance stores. Ensure compatibility with your specific food processor model before purchasing any additional parts.

Comparing Cuisinart Food Processor Series

Cuisinart food processors come in several series, each catering to different needs. The Elemental series offers essential functionality at an accessible price point, ideal for basic tasks.

The Pro Custom series provides increased power and larger capacities, suitable for frequent cooks and larger families. The Premier series boasts enhanced features and robust construction for demanding culinary projects.

Elite Collection models represent Cuisinart’s premium line, offering maximum power, capacity, and a comprehensive accessory set. Consider your typical usage and budget when choosing a series.

Safety Features Explained

Cuisinart food processors incorporate several safety features. A key element is the lid-lock system, preventing operation unless the lid is securely fastened, minimizing potential injury.

The processor also features a thermal overload protection system, automatically shutting off the motor if it overheats, safeguarding against damage and hazards. Rubberized feet provide stability during operation, reducing movement and spills.

Always use the provided pusher when feeding food through the feed tube, never your fingers. Disconnect the processor before cleaning or changing blades. Familiarize yourself with these features for safe operation.

Tips for Optimal Performance

Maximize your Cuisinart food processor’s efficiency by cutting food into uniform sizes before processing. This ensures even results and reduces strain on the motor.

Avoid overfilling the work bowl; process in batches for best outcomes. Utilize the pulse function for precise control, preventing over-processing. For dough, avoid prolonged operation to prevent overheating.

Ensure blades are sharp for clean cuts and efficient processing. Regularly clean all components thoroughly. Store the processor properly, protecting blades and parts. Following these tips will extend the life and performance of your appliance.

Finding Replacement Parts

Locating replacement parts for your Cuisinart food processor is straightforward. Begin by visiting the official Cuisinart website; their parts store offers a comprehensive selection. You’ll need your model number for accurate searching.

Alternatively, authorized Cuisinart service centers can assist with part identification and ordering. Major retailers like Amazon and other appliance parts suppliers also stock common components, including blades and work bowls.

When ordering, verify compatibility with your specific model. Using genuine Cuisinart parts ensures optimal performance and maintains your appliance’s warranty. Keep your model number handy for a smooth process!

Welcome to the ultimate guide for your Cuisinart food processor! This resource provides detailed instructions, ensuring safe and efficient operation. We’ll cover everything from initial setup and understanding key components to mastering various functions like chopping, slicing, and dough making.

Learn about essential safety precautions, proper cleaning techniques, and troubleshooting common issues. Discover how to utilize different blades and discs for diverse culinary tasks. Explore recipes designed to showcase your processor’s capabilities.

This guide also details warranty information and where to find replacement parts, maximizing your Cuisinart experience.

genuine essiac tea instructions

Genuine Essiac Tea Instructions: A Comprehensive Guide

Essiac tea, a celebrated herbal infusion, boasts a rich history and complex preparation. This guide delves into crafting authentic Essiac,
exploring its origins, ingredients, and brewing nuances for optimal wellness benefits.

Understanding the precise recipe and instructions is crucial, distinguishing it from variations and ensuring a potent, therapeutic brew.

What is Genuine Essiac Tea?

Genuine Essiac tea is a specific herbal blend, historically rooted in a formula developed by René Caisse, a Canadian nurse. It’s not simply any combination of four herbs; the precise proportions and quality of ingredients are paramount to achieving the tea’s purported benefits. The core components – burdock root, sheep sorrel, slippery elm bark, and Indian rhubarb – work synergistically, creating a complex botanical medicine.

Distinguishing genuine Essiac from imitations, often labeled “Original Essiac,” is vital. The “Original” versions frequently deviate from Caisse’s original formulation, potentially impacting efficacy. Authentic Essiac is traditionally prepared as a decoction, involving a specific boiling and steeping process. It’s important to note that while promoted for various health concerns, including cancer support, scientific evidence remains limited, and it should not replace conventional medical treatment.

The tea’s preparation is a meticulous process, demanding attention to detail to unlock its potential therapeutic properties.

The Historical Origins of Essiac Tea

The story of Essiac tea begins with René Caisse, a Canadian nurse who, in the 1920s, learned the formula from an Ojibwe medicine woman. This traditional knowledge sparked Caisse’s decades-long exploration of the tea’s potential health benefits, particularly in relation to cancer; She refined the formula and offered it to patients, documenting observations that fueled its growing reputation.

Throughout the mid-20th century, Essiac gained considerable attention, attracting both proponents and skeptics. Numerous individuals reported positive experiences, leading to increased demand and attempts to replicate the formula. However, variations emerged, resulting in the distinction between “genuine” and “original” Essiac, with the former adhering more closely to Caisse’s original proportions.

Caisse’s dedication to sharing her knowledge, coupled with the anecdotal evidence, cemented Essiac’s place in alternative health practices, continuing to inspire interest and research today.

The Four Core Ingredients

Genuine Essiac tea derives its potency from a precise blend of four key herbs: burdock root, sheep sorrel, slippery elm bark, and Indian rhubarb. Each ingredient contributes unique properties, working synergistically to support the body’s natural processes. The quality and sourcing of these components are paramount to achieving an effective brew.

The traditional recipe calls for specific quantities of each herb, carefully balanced to maximize therapeutic benefits. Burdock root acts as a detoxifier, sheep sorrel provides essential nutrients, slippery elm soothes the digestive tract, and Indian rhubarb aids in cleansing.

Understanding the role of each ingredient is vital for appreciating the holistic approach of Essiac tea and ensuring a truly authentic preparation.

Burdock Root: Properties and Sourcing

Burdock root, a cornerstone of Genuine Essiac tea, is celebrated for its detoxifying and blood-purifying properties. Traditionally used to address skin conditions and support liver health, it contains inulin, a prebiotic fiber that promotes gut wellness. When sourcing burdock root, prioritize organically grown varieties to avoid pesticide contamination.

The root should be carefully dried and cut, ensuring optimal extraction of its beneficial compounds. Look for suppliers who offer high-quality, sustainably harvested burdock root, ideally from regions with a long history of herbal medicine. Approximately 6 cups of cut burdock root are needed for a standard 8-cup batch.

Proper sourcing guarantees a potent and effective ingredient, crucial for the tea’s overall efficacy.

Sheep Sorrel: Key Component and Benefits

Sheep sorrel is arguably the most vital component of Genuine Essiac tea, renowned for its high concentration of chlorophyll and its potential anti-inflammatory and antioxidant effects. Historically, it’s been used to support overall health and well-being, and is believed to aid in detoxification processes within the body.

For authentic Essiac, sheep sorrel should be sourced as a powdered herb, ensuring maximum bioavailability of its nutrients. One pound of powdered sheep sorrel is typically required for an 8-cup batch. It’s crucial to obtain sheep sorrel from a reputable supplier to guarantee purity and potency, avoiding potential contaminants.

The quality of sheep sorrel significantly impacts the tea’s therapeutic value.

Slippery Elm Bark: Traditional Uses

Slippery elm bark has a long history of traditional medicinal use, particularly among Native American cultures. It’s included in Genuine Essiac tea for its demulcent properties – meaning it creates a soothing, protective coating over mucous membranes. This can be beneficial for digestive health and overall comfort.

Within the Essiac formula, slippery elm contributes to the tea’s gentle yet effective cleansing action. It’s believed to help support the body’s natural detoxification pathways. While the exact quantity can vary slightly, a standard 8-cup batch typically requires approximately ¼ pound of slippery elm bark.

Ensure the bark is sourced from a reliable supplier to guarantee its authenticity and quality, contributing to the tea’s overall efficacy.

Indian Rhubarb: Considerations and Quality

Indian rhubarb (Rheum emodi) is a crucial, yet often misunderstood, component of Genuine Essiac tea. Unlike common garden rhubarb, Indian rhubarb possesses distinct properties vital to the tea’s purported benefits. It’s a potent ingredient, requiring careful consideration regarding sourcing and quantity.

Authentic Essiac recipes call for a relatively small amount – around ¼ pound for an 8-cup batch – due to its strength. It’s essential to use Rheum emodi specifically, as other rhubarb varieties can be toxic or lack the desired therapeutic compounds.

Prioritize purchasing from reputable suppliers who can verify the species and ensure it’s free from contaminants. Quality Indian rhubarb will have a rich, earthy aroma and a deep reddish-brown color.

Distinguishing Genuine Essiac from “Original” Essiac

The terms “Genuine Essiac” and “Original Essiac” often cause confusion, but represent distinct formulations with differing histories and potential efficacy. “Original Essiac” typically refers to the modified formula popularized after René Caisse’s passing, often incorporating alterations to ingredient ratios or substitutions.

Genuine Essiac adheres closely to Caisse’s initial documented recipe, emphasizing precise proportions of burdock root, sheep sorrel, slippery elm, and Indian rhubarb. Many believe the modifications in “Original” versions diminish the tea’s therapeutic power.

Key differentiators include the specific type of rhubarb used (Rheum emodi for Genuine), and the emphasis on sourcing high-quality, ethically harvested ingredients. Understanding this distinction is vital when seeking the potential benefits associated with the historically documented Essiac formula.

Sourcing Authentic Essiac Tea Ingredients

Obtaining high-quality ingredients is paramount when preparing Genuine Essiac Tea. Prioritize suppliers specializing in medicinal herbs, ensuring ethical sourcing and rigorous quality control. Burdock root should be sourced from reputable growers, ideally organic, and properly dried.

Sheep sorrel, a crucial component, requires careful selection; powdered form is common, but verify its purity and origin. Slippery elm bark should be inner bark, sustainably harvested. Authentic Indian rhubarb (Rheum emodi) is often the most challenging to find, demanding diligent research to avoid substitutions.

Consider suppliers offering third-party testing for heavy metals and contaminants. Direct sourcing from farms, when feasible, provides greater transparency. Remember, ingredient quality directly impacts the tea’s potential benefits and overall safety.

Precautions and Contraindications

Genuine Essiac Tea, while often lauded for its potential benefits, isn’t suitable for everyone. Individuals with intestinal obstructions or severe kidney issues should avoid it. Pregnant or breastfeeding women require medical consultation before use, as its effects haven’t been thoroughly studied in these populations.

Essiac can have a diuretic effect, potentially leading to dehydration; adequate fluid intake is crucial. Those on medications should consult their healthcare provider, as interactions are possible. Monitor for any adverse reactions, such as digestive upset or allergic responses.

Start with a small batch to assess tolerance. Discontinue use if experiencing discomfort. It’s vital to remember Essiac isn’t a substitute for conventional medical treatment, but a complementary approach.

Standard Essiac Tea Recipe (8-Cup Batch)

To prepare an 8-cup batch of Genuine Essiac Tea, begin with 6 cups of cut burdock root (approximately 24 ounces), 1 pound of powdered sheep sorrel, and ¼ pound of both slippery elm bark and Indian rhubarb. Combine these ingredients in a large, non-reactive pot.

Add 8 cups (64 ounces) of filtered water. Bring the mixture to a boil, then reduce heat for a simmer. Maintain a gentle boil for 10-20 minutes, ensuring the herbs infuse properly. Remove from heat and allow to steep, covered, for 4-12 hours – longer steeping yields a stronger brew.

Strain the tea through a fine-mesh sieve or cheesecloth. The resulting liquid is your Essiac Tea, ready for storage or consumption.

Measuring the Ingredients Accurately

Accurate measurement is paramount when crafting Genuine Essiac Tea, directly impacting its potency and effectiveness. Utilize a kitchen scale for precise weight measurements, especially for powdered ingredients like sheep sorrel. Volume measurements, while convenient, can be inconsistent.

For burdock root, ensure it’s cut and not powdered, measuring 6 cups packed. Sheep sorrel requires a full pound, while slippery elm and Indian rhubarb each necessitate ¼ pound. Deviations from these ratios can alter the tea’s delicate balance.

Consistency is key; maintain these proportions with each batch. Precise measurements guarantee a reliable and therapeutic brew, honoring the traditional Essiac formula and maximizing its potential benefits.

The Boiling Process: Temperature and Duration

Boiling is a critical stage in Essiac Tea preparation, demanding careful attention to temperature and timing. Begin by bringing filtered water to a rolling boil in a non-reactive pot – stainless steel or glass is ideal.

Once boiling, immediately add the measured herbs. Reduce the heat to maintain a moderate boil, avoiding a vigorous, splashing boil. This gentler simmer allows for optimal extraction of beneficial compounds.

Maintain this moderate boil for precisely ten minutes. This duration ensures the herbs release their therapeutic properties without degradation. Avoid prolonged boiling, which can diminish the tea’s potency.

Following the ten-minute boil, remove the pot from the heat and proceed to the steeping phase, crucial for developing the tea’s full flavor and medicinal qualities.

Steeping and Cooling Instructions

After the ten-minute boil, the Essiac Tea requires a thorough steeping process to fully unlock its therapeutic potential. Cover the pot tightly and allow the tea to steep for a minimum of four hours, but ideally overnight, at room temperature.

This extended steeping period is vital for extracting the full spectrum of beneficial compounds from the herbs. Avoid disturbing the tea during steeping; do not stir or lift the lid unnecessarily.

Once steeped, strain the tea through a fine-mesh strainer or cheesecloth to remove the herbal solids. Allow the strained tea to cool completely before storing it in airtight glass containers in the refrigerator.

Proper cooling and storage are essential for preserving the tea’s potency and preventing spoilage, ensuring a safe and effective herbal remedy.

Essiac Tea for Small Animals (Pint Batch)

Administering Essiac Tea to pets requires careful dosage adjustments. For smaller animals like cats, a pint batch is ideal. Begin by boiling 20 ounces of filtered water. Once boiling, add ½ ounce of burdock root, ¼ ounce of sheep sorrel, ⅛ ounce of slippery elm bark, and ⅛ ounce of Indian rhubarb.

Reduce the heat to maintain a gentle boil for ten minutes. Allow the mixture to cool completely, then strain thoroughly. This concentrated brew must be further diluted before offering it to your pet.

A general guideline is 1/4 teaspoon per 5 pounds of body weight, administered orally once or twice daily. Always consult with a veterinarian before introducing Essiac Tea into your pet’s regimen.

Adjusting the Recipe for Pets

When adapting the Essiac Tea formula for animal companions, precise adjustments are paramount to ensure safety and efficacy. The standard human recipe contains ingredients that, while beneficial for us, require dilution for smaller creatures.

Reducing the quantities of each herb proportionally is crucial. A pint batch, as previously outlined, provides a concentrated base for further dilution. Always prioritize using high-quality, organic ingredients, free from pesticides or contaminants.

Consider your pet’s individual health status and any existing conditions. Start with a very small dose and observe for any adverse reactions. Veterinary guidance is strongly recommended before incorporating Essiac Tea into your pet’s healthcare plan.

Safe Dosage Guidelines for Cats and Dogs

Determining appropriate Essiac Tea dosages for cats and dogs necessitates careful consideration of their weight and overall health. Begin with extremely conservative amounts, observing for any sensitivities.

For cats, a general guideline is 1/8 to 1/4 teaspoon of the prepared tea, mixed with water, once or twice daily. Small dogs (under 10 lbs) may receive 1/4 to 1/2 teaspoon, while larger dogs (over 50 lbs) can potentially tolerate 1 teaspoon, administered similarly.

These are merely starting points; individual responses vary. Monitor your pet closely for any changes in appetite, energy levels, or digestive function. Always consult with a veterinarian before administering Essiac Tea, especially if your pet has pre-existing medical conditions or is taking other medications.

Storage and Shelf Life of Prepared Essiac Tea

Proper storage is paramount to maintaining the potency and quality of your brewed Essiac Tea. Once prepared, the tea should be stored in a clean, airtight glass container, shielded from direct sunlight and heat.

Refrigeration is essential. Properly stored, Essiac Tea will generally remain viable for up to five to seven days. However, observe for any signs of spoilage, such as a change in odor or appearance, and discard if questionable.

Freezing can extend the shelf life to several months, but may slightly alter the tea’s texture upon thawing. It’s best to freeze in smaller portions for convenient use. Always label the container with the preparation date to ensure freshness and track usage.

Potential Side Effects and Monitoring

While generally considered safe, Essiac Tea can induce mild side effects, particularly during the initial stages of consumption. These may include temporary digestive upset, such as diarrhea or mild cramping, as the body detoxifies.

Fatigue and skin rashes have also been reported, typically subsiding within a few days. It’s crucial to start with a small dosage and gradually increase it, allowing your body to adjust.

Closely monitor your body’s response, noting any unusual or persistent symptoms. Individuals with pre-existing medical conditions, especially kidney or liver issues, should consult a healthcare professional before use. Regular blood tests can help assess the tea’s impact and ensure safe consumption.

Long-Term Use Considerations

For those considering Essiac Tea as a long-term wellness strategy, cyclical use is often recommended. Continuous, uninterrupted consumption may diminish its effectiveness as the body can adapt. A common approach involves consuming the tea for several weeks or months, followed by a break of similar duration.

This allows the body to fully benefit from its effects and prevents potential tolerance. Maintaining a healthy lifestyle – including a balanced diet and regular exercise – complements the tea’s benefits.

Periodic health check-ups are advisable to monitor overall well-being and assess any long-term impacts. Remember, Essiac Tea is a supportive therapy and should not replace conventional medical treatments.

Combining Essiac Tea with Other Therapies

Essiac Tea is frequently viewed as a complementary therapy, best utilized alongside, rather than as a replacement for, conventional medical treatments. When integrating it with other modalities, open communication with your healthcare provider is paramount.

Consider potential interactions with medications, particularly those affecting the immune system or blood clotting. Essiac’s detoxifying properties may enhance the effects of other cleansing therapies, but caution is advised to avoid overwhelming the body.

Nutritional support, such as a plant-based diet rich in antioxidants, can synergistically amplify Essiac’s benefits. Mind-body practices like meditation and yoga can further support the body’s natural healing processes. Always prioritize a holistic approach to wellness.

Understanding the pH Level of Essiac Tea

The pH of properly prepared Essiac Tea is a crucial factor influencing its efficacy and tolerability. Ideally, the final brew should exhibit a slightly alkaline pH, generally ranging between 7.5 and 8.5. This alkalinity is believed to contribute to its purported health benefits, aiding in detoxification and creating a less hospitable environment for certain pathogens.

Factors impacting pH include water quality, ingredient sourcing, and brewing time. Using filtered water is essential, as tap water can contain minerals affecting the pH balance. Precise adherence to the recipe and avoiding over-boiling or prolonged steeping are also vital.

Monitoring pH with litmus strips or a pH meter can ensure optimal potency. Maintaining the correct pH enhances absorption and maximizes the therapeutic potential of this ancient herbal remedy.

Variations in Essiac Tea Preparation Methods

While a standardized recipe exists for Genuine Essiac Tea, subtle variations in preparation methods are common. Some practitioners advocate for a specific order of ingredient addition during the boiling process, believing it impacts extraction efficiency. Others suggest adjusting brewing times based on ingredient freshness and personal preference.

A notable variation involves using different ratios of the four core ingredients – burdock root, sheep sorrel, slippery elm, and Indian rhubarb – though deviating significantly from the traditional proportions may alter the tea’s properties. Some individuals prefer a longer steeping period to maximize nutrient release, while others opt for a shorter duration to minimize potential bitterness.

Experimentation within reasonable bounds is acceptable, but maintaining the fundamental principles of the instructions is key to preserving the tea’s integrity and potential benefits.

The Role of Water Quality in Brewing

The quality of water used significantly impacts the final product when preparing Genuine Essiac Tea. Filtered water is universally recommended, as tap water often contains chlorine, fluoride, and other minerals that can interfere with the herbal infusion process and potentially diminish the tea’s therapeutic properties.

Distilled water, while pure, lacks the mineral content that can aid in extracting beneficial compounds from the herbs. Spring water, if sourced from a reputable source, can be an excellent alternative, providing natural minerals without harmful contaminants.

Avoid using softened water, as the sodium content can alter the tea’s taste and potentially counteract its benefits. Following the instructions and prioritizing pure, mineral-rich water is crucial for a potent and flavorful brew.

Frequently Asked Questions About Essiac Tea

Is Essiac tea safe? While generally well-tolerated, consulting a healthcare professional before use is vital, especially with existing conditions or medications.

What’s the difference between Essiac and Original Essiac? Authentic Essiac follows René Caisse’s original formula, while “Original Essiac” often contains variations.

How long can I store prepared Essiac tea? Refrigerated, it lasts up to five days. Freezing extends shelf life considerably.

Can I adjust the recipe? Strict adherence to the instructions is recommended initially. Experienced users may experiment cautiously.

Will Essiac tea interact with my medications? Potential interactions exist; professional guidance is essential.

Is it okay to drink Essiac tea every day? Long-term use requires monitoring and professional advice.

duplo fire truck instructions

Duplo Fire Truck Instructions: A Comprehensive Guide

Embark on a building adventure! This guide provides detailed LEGO DUPLO Fire Truck (10969) assembly steps, PDF downloads, and playtime ideas for endless fun.

The LEGO DUPLO Fire Truck (10969) is a fantastic first responder vehicle designed for little hands and big imaginations! This set, released in 2022 with 21 pieces, introduces preschoolers to the exciting world of firefighters and emergency services.

It’s more than just a toy; it’s a tool for developing crucial skills like role-playing, problem-solving, and fine motor skills. The bright colors and chunky bricks are specifically designed for safe and engaging play.

With its easy-to-follow instructions, even the youngest builders can experience the joy of creating their own rescue adventures. Prepare for hours of imaginative fun!

Understanding the LEGO Duplo System

LEGO DUPLO bricks are specifically engineered for small hands, differing significantly from standard LEGO systems. These larger bricks promote early childhood development, focusing on safety and ease of manipulation. DUPLO elements are designed to be durable and withstand enthusiastic play, ensuring longevity.

The system emphasizes intuitive building, encouraging creativity without complex connections. Bricks easily snap together and pull apart, fostering independence in young builders. DUPLO sets often incorporate vibrant colors and simple designs to stimulate imagination and learning.

This system prioritizes a safe and enjoyable building experience for toddlers and preschoolers.

Components of the Duplo Fire Truck (10969)

Discover the 21 pieces included! This set features bricks, firefighter figures, a functional ladder, a hose, and everything needed for exciting rescue missions.

Identifying the Bricks

Before beginning assembly, familiarize yourself with each DUPLO brick. The Fire Truck (10969) includes various sizes and shapes – larger blocks for the chassis, smaller ones for detailing, and specialized pieces for the ladder and hose reel.

Carefully separate the bricks; the set contains 21 pieces in total. Pay close attention to the color coding, as certain colors are used for specific sections of the truck. Identifying these components upfront will streamline the building process and prevent confusion during later stages. A detailed parts list is available in the official PDF instructions.

Figures Included: Firefighters

The DUPLO Fire Truck set includes friendly firefighter figures ready for action! These figures are designed with simple, expressive faces to encourage imaginative role-playing. They easily grip the DUPLO accessories, like the fire hose and axe, enhancing interactive play.

These figures are crucial for creating rescue scenarios and bringing the Fire Truck to life. Encourage children to develop stories around the firefighters’ bravery and teamwork. The figures are durable and perfectly sized for small hands, promoting safe and engaging playtime experiences.

Specialty Pieces: Ladder and Hose

The DUPLO Fire Truck boasts a functional ladder and hose, key components for realistic rescue play! The ladder pivots, allowing firefighters to reach elevated areas during imaginative emergencies. The flexible hose connects to the truck, enabling children to “extinguish” fires.

These specialty pieces enhance the play experience, fostering problem-solving skills and creativity. The ladder’s movement and the hose’s connection demonstrate simple mechanics. These durable DUPLO elements are designed for repeated use, ensuring long-lasting fun and engaging scenarios.

Step-by-Step Assembly Instructions

Follow this section for a clear, guided build! We’ll cover chassis construction, wheel attachment, cab building, and adding the ladder, siren, and hose reel.

Building the Chassis

Begin constructing the Duplo Fire Truck by assembling the base, or chassis. Utilize the larger, flat Duplo bricks to create a sturdy rectangular platform – this forms the foundation of the vehicle. Ensure a secure connection between each brick, pressing firmly to guarantee stability.

Pay close attention to the brick orientation; the chassis needs to be wide enough to accommodate the wheels and subsequent building stages. This initial step is crucial for a robust and reliable Fire Truck build, providing a solid base for all other components. A well-built chassis ensures smooth rolling action later on!

Attaching the Wheels

Now, it’s time to add the wheels to the Duplo Fire Truck’s chassis! Locate the wheel and axle pieces – typically, these are brightly colored Duplo wheels designed for easy attachment. Carefully insert the axles through the designated holes in the chassis, ensuring they protrude equally on both sides.

Securely attach the wheels to the axles, pressing firmly until they click into place. Verify that all four wheels spin freely, allowing for smooth movement. Proper wheel attachment is vital for realistic play and ensures the Fire Truck can respond quickly to emergencies!

Constructing the Cab

Begin building the Fire Truck’s cab by connecting the larger Duplo bricks to form the basic structure. Pay close attention to the color scheme and brick placement as shown in the instructions – typically, the cab is red or yellow. Ensure a sturdy connection between each brick for a stable cab.

Add the windshield piece, securing it firmly to the front of the cab. This provides visibility for the firefighter figure; Finally, attach the roof element, completing the cab’s enclosure and preparing it for the siren and lights installation.

Adding the Ladder Mechanism

Now, focus on the Fire Truck’s crucial ladder system. Attach the rotating baseplate to the rear of the cab, ensuring smooth movement. This base supports the ladder’s elevation. Carefully connect the ladder segments, building upwards to achieve the desired height.

Securely fasten the ladder to the rotating base, testing its range of motion. The ladder should easily raise and lower, allowing for realistic rescue scenarios. Double-check all connections for stability before proceeding to the next assembly stage.

Installing the Siren and Lights

Enhance the Fire Truck with its auditory and visual alerts! Locate the designated slots on the cab’s roof for the siren and light elements. Gently press the siren component into its position, ensuring a snug fit. Then, attach the light bricks, typically red or orange, to the corresponding mounts.

Verify that the lights are securely fastened and ready for imaginative play. While DUPLO lights don’t illuminate, they add a realistic touch. Test the siren’s functionality – a simple press activates the sound, signaling emergency response!

Connecting the Hose Reel

Prepare for action by attaching the hose reel to the Fire Truck! Identify the mounting point, usually located on the side or rear of the vehicle. Align the reel’s connector with the truck’s attachment point and press firmly until it clicks into place.

Ensure the reel rotates freely, allowing the DUPLO hose to be extended during play. This feature encourages realistic role-playing scenarios. Once connected, test the hose’s movement to confirm smooth operation, ready for extinguishing imaginary blazes!

Detailed Instructions for Specific Steps

Master tricky builds! This section clarifies challenging steps, like roof securing and panel attachment, ensuring a sturdy DUPLO Fire Truck construction for imaginative play.

Securing the Roof

Attaching the roof requires careful alignment with the cab’s side panels. Ensure a snug fit by gently pressing down on each corner until you hear a distinct click, confirming secure connection. This step is crucial for the structural integrity of the DUPLO Fire Truck, preventing accidental dislodging during enthusiastic play sessions.

Double-check that the roof sits flush against the cab walls, creating a smooth, streamlined appearance. If resistance is encountered, slightly adjust the panel positioning before applying pressure. A properly secured roof not only enhances the truck’s aesthetic appeal but also provides a stable platform for the siren and lights.

Attaching the Side Panels

Begin by identifying the left and right side panels – they are typically symmetrical but may have unique features like hose reel attachments. Align the panels with the chassis, ensuring the studs connect seamlessly with the corresponding holes. Apply even pressure along the length of each panel to guarantee a firm and stable attachment.

Verify that the side panels are securely fastened, preventing wobbling or detachment during play. A solid connection is vital for supporting the ladder mechanism and maintaining the truck’s overall structural integrity. These panels define the truck’s shape and prepare it for further assembly.

Positioning the Firefighter Figure

Carefully place the firefighter figure within the cab of the Duplo fire truck. Ensure the figure’s legs fit securely into the designated slots or stand firmly on the baseplate within the cab area. Consider the figure’s orientation – facing forward to drive, or positioned to operate the ladder.

Experiment with different poses to enhance role-playing scenarios. The firefighter can hold the fire axe or stand ready to deploy the hose. Secure placement prevents accidental dislodging during enthusiastic play, fostering immersive and imaginative firefighting adventures for young builders.

Troubleshooting Assembly Issues

Encountering difficulties? This section addresses missing pieces, connection problems, and instruction errors, ensuring a smooth building experience for your Duplo fire truck!

Missing Pieces – What to Do?

Discovering a missing brick can be frustrating! First, double-check the packaging and building area – small pieces often hide. If still missing, visit the official LEGO website; they offer a replacement parts service. You’ll need the set number (10969) and the missing piece’s ID.

Alternatively, contact LEGO Customer Service directly. Be prepared to provide details about your purchase. While waiting for a replacement, consider temporarily using a similar brick from another DUPLO set to continue building. LEGO prioritizes customer satisfaction and aims to resolve missing piece issues promptly.

Bricks Not Connecting Properly

Encountering difficulty connecting DUPLO bricks is common, especially with younger builders. Ensure the bricks are aligned correctly – DUPLO bricks connect easily when properly positioned. Avoid forcing them; excessive pressure can damage the studs.

Check for any debris or dust obstructing the connection points. A gentle cleaning might help. If a brick feels unusually tight, it could be a manufacturing variation; try swapping it with a similar brick from another set. Remember, DUPLO bricks are designed for little hands, so a snug fit is expected!

Incorrect Step in the Instructions

Occasionally, errors can occur in instruction manuals. If a step seems impossible or results in an unstable structure, double-check the brick orientation and quantities used. Compare your build to the image carefully.

Consider reviewing the previous and subsequent steps to ensure you haven’t missed anything. Online resources, like LEGO’s official website or fan forums, often provide clarifications or alternative build sequences. Don’t hesitate to seek help – building should be enjoyable, not frustrating!

Exploring Playtime with the Duplo Fire Truck

Ignite imaginations with exciting rescue scenarios! Combine with the Duplo Fire Station for expanded play, fostering role-playing and crucial developmental skills.

Role-Playing Scenarios

Unleash creativity with diverse rescue missions! Imagine a blazing building and practice extinguishing the “flames” with the Duplo hose. Develop communication skills by having the firefighter coordinate efforts.

Create a scenario where a cat is stuck in a tree, requiring skillful ladder deployment. Encourage problem-solving as children devise strategies to save the day. Extend the play by incorporating other Duplo figures as citizens needing assistance.

Promote teamwork and empathy through collaborative storytelling, building confidence and social-emotional growth. The possibilities are endless with this versatile toy!

Combining with Other Duplo Sets

Expand the emergency response world! Integrate the Fire Truck with the Duplo Fire Station (10593) for a fully operational rescue headquarters. Add the Duplo Police sets to create a collaborative emergency services team.

Incorporate Duplo Town sets to build a community needing protection, enhancing role-playing scenarios; Utilize Duplo animal sets to rescue stranded creatures, fostering compassion. Mix and match figures to create diverse rescue teams and storylines.

This interoperability boosts creativity and extends playtime, offering limitless building and imaginative possibilities!

Educational Benefits of Play

Duplo play fosters crucial developmental skills! Building the Fire Truck enhances fine motor skills and hand-eye coordination. Role-playing rescue scenarios encourages problem-solving and critical thinking. Imagination blossoms as children create stories and scenarios.

Social-emotional growth is nurtured through cooperative play and empathy. Learning about community helpers promotes civic awareness. Color recognition and counting are reinforced during construction.

Duplo bricks provide a safe and stimulating environment for early learning, preparing children for future academic success!

Finding Official LEGO Instructions

Access official LEGO DUPLO Fire Truck (10969) instructions on the LEGO website or via downloadable PDF files for easy building!

LEGO Website Instructions

The official LEGO website serves as a primary resource for DUPLO Fire Truck (10969) building instructions. Navigate to the LEGO support section and search for the set number to instantly access digital guides.

These online instructions offer an interactive building experience, allowing you to zoom in on each step and rotate the model for a clearer understanding. LEGO frequently updates its online library, ensuring you have the most current and accurate instructions available. Furthermore, the website provides a convenient platform to report any issues or missing pieces encountered during assembly.

Accessing instructions online eliminates the need for physical manuals, reducing paper waste and providing a readily available resource on any device.

PDF Download Options

For offline access, LEGO provides downloadable PDF versions of the DUPLO Fire Truck (10969) instructions. These PDFs, approximately 28.93MB to 28.97MB in size, can be found on the official LEGO website or through various third-party LEGO instruction databases.

Downloading the PDF allows builders to print the instructions or view them on any device without an internet connection, making it ideal for travel or building in areas with limited connectivity. The PDF format preserves the clarity and detail of the original instructions, ensuring a smooth building experience.

Save the file to your preferred device for easy access whenever inspiration strikes!

Alternative Instruction Sources

Beyond the official LEGO website, several resourceful platforms offer DUPLO Fire Truck (10969) instructions. Dedicated LEGO instruction websites and fan communities frequently host scanned or digitally recreated manuals. YouTube channels specializing in LEGO builds often provide video tutorials, offering a dynamic, step-by-step visual guide.

These alternative sources can be invaluable if you’ve misplaced the original booklet or prefer a different learning style. However, always verify the accuracy of instructions from unofficial sources to ensure a correct and enjoyable building experience.

Explore these options for added support!

Maintaining Your Duplo Fire Truck

Keep your DUPLO Fire Truck pristine! Regularly clean bricks, store them properly, and easily replace lost pieces for lasting playtime enjoyment.

Cleaning the Bricks

Maintaining cleanliness extends the life and vibrancy of your Duplo Fire Truck. Dust and grime can accumulate, especially with frequent play. For a quick clean, simply wipe the bricks with a damp cloth – avoid harsh chemicals or abrasive cleaners.

For a more thorough cleaning, place the bricks in a mesh laundry bag and gently wash them in lukewarm water with mild soap. Ensure they are completely dry before storing to prevent mildew. Avoid prolonged soaking, as this could potentially damage the printed details.

Regular cleaning ensures a hygienic and enjoyable play experience for your little firefighter!

Storage Solutions

Proper storage safeguards your Duplo Fire Truck and its components, preventing loss and damage. Utilize large, clear plastic bins to easily identify and access the bricks. Labeling the bins can further streamline organization, especially with multiple Duplo sets.

Consider a dedicated play area with built-in storage, like shelves or drawers. This encourages independent play and easy cleanup. Mesh bags are ideal for storing smaller pieces, like the hose and firefighter accessories, preventing them from getting lost.

Consistent storage habits maintain a tidy play space and prolong the life of your set!

Replacing Lost Pieces

Losing pieces is inevitable with active play! LEGO offers a convenient “Bricks & Pieces” service on their website, allowing you to order individual replacement bricks. You’ll need the set number (10969) and specific part identification.

Alternatively, explore online marketplaces like BrickLink, a community-based platform where individuals sell LEGO parts. Be sure to verify seller ratings and part condition before purchasing. Duplo sets are often compatible, so similar bricks from other sets might suffice.

Don’t let a missing brick halt the fun – replacements are readily available!

Duplo Fire Truck Variations & Related Sets

Expand the emergency response! Combine with the Duplo Fire Station or other emergency vehicles for enhanced role-playing and creative building scenarios.

Duplo Fire Station Compatibility

The Duplo Fire Truck seamlessly integrates with the Duplo Fire Station (10593), creating a fully functional emergency response headquarters! Imagine dispatching the truck to rescue missions, utilizing the station’s features like the helipad and garage.

This compatibility enhances role-playing opportunities, allowing children to simulate realistic fire fighting scenarios. The station provides a central hub for the truck and firefighter figures, fostering imaginative play and storytelling. Consider adding other Duplo sets to expand the emergency services world, building a complete town with rescue operations!

Other Duplo Emergency Vehicles

Expand your child’s rescue fleet with other LEGO Duplo emergency vehicles! Consider the Duplo Police Motorcycle, Ambulance, or Helicopter for diverse rescue scenarios. These sets complement the Fire Truck, enabling collaborative play and broadening imaginative storytelling possibilities.

Combining these vehicles creates a comprehensive emergency response team, fostering problem-solving skills and cooperative play. Duplo offers a range of vehicles, allowing children to explore different roles within the community. Encourage them to create elaborate rescue missions, enhancing their creativity and social interaction!

Evolution of the Duplo Fire Truck Design

LEGO Duplo Fire Trucks have evolved significantly over the years, adapting to enhance play and developmental benefits. Early models were simpler, focusing on basic building skills and color recognition. Later iterations introduced more intricate features like rotating ladders and working sirens.

Recent designs, such as the 10969 model, prioritize realistic details and interactive elements. Improvements include more durable bricks, improved figure designs, and enhanced playability. This evolution reflects LEGO’s commitment to innovation and providing engaging, age-appropriate toys for young children.

Safety Considerations for Duplo Play

Ensure a safe play environment! Supervise young children due to potential choking hazards from small parts, and verify brick quality for durability.

Choking Hazards

LEGO DUPLO bricks, while larger than traditional LEGO pieces, can still present a choking hazard for very young children, particularly those under three years of age. DUPLO Fire Truck sets, like the 10969 model, include smaller components such as the fire hose and potentially detachable parts of the ladder mechanism.

Constant adult supervision is crucial during playtime. Regularly inspect the set for any broken or damaged pieces, as these could create smaller, swallowable fragments. Teach children not to put DUPLO bricks or any small toy parts in their mouths. Store the set securely when not in use, out of reach of infants and toddlers.

Supervision Recommendations

Active adult supervision is highly recommended during DUPLO Fire Truck (10969) assembly and play, especially for younger children. This ensures safe handling of the bricks and prevents potential misuse. Guide children through the building process, offering assistance with connecting pieces and following the instructions.

Encourage collaborative play, fostering communication and problem-solving skills. Supervise to prevent forceful assembly, which could damage the bricks or cause injury. Regularly check for loose or broken parts. Store the set responsibly when not in use, promoting a safe play environment for all ages.

Brick Quality and Durability

LEGO DUPLO bricks, including those in the Fire Truck (10969) set, are renowned for their high quality and exceptional durability. Manufactured from robust, non-toxic plastic, they withstand enthusiastic play and repeated assembly. Rigorous testing ensures they meet stringent safety standards, resisting breakage and chipping.

Despite their resilience, inspect bricks periodically for wear and tear. Replace damaged pieces to maintain structural integrity and prevent potential hazards. Proper storage, away from direct sunlight and extreme temperatures, further extends their lifespan, guaranteeing years of imaginative building fun.

tie dye printable instructions

Tie Dye Printable Instructions: A Comprehensive Guide

Dive into vibrant creativity! This guide offers easy-to-follow tie dye tutorials, from classic spirals to advanced shibori, perfect for all skill levels.

Explore trendy techniques like marbling and wig-wag patterns, alongside detailed instructions for achieving stunning rainbow effects on shirts and more!

Tie dye, a timeless textile art, has experienced a remarkable resurgence in popularity, captivating creators of all ages. What began as a resourceful method for embellishing fabrics has blossomed into a vibrant expression of individuality and style. This comprehensive guide aims to demystify the process, providing printable instructions and detailed tutorials to empower you on your tie dye journey.

From the iconic spiral patterns to intricate shibori techniques and the mesmerizing ombre effect, the possibilities are truly endless. Whether you’re reviving old garments or crafting unique fashion statements, tie dye offers a fulfilling and accessible creative outlet. We’ll explore various methods, including the classic rainbow spiral, the bold hyper jump design, and the captivating marbled look.

This isn’t just about following steps; it’s about understanding the principles behind color interaction and fabric preparation. Get ready to transform ordinary materials into extraordinary works of art!

What is Tie Dye and Its History?

Tie dye, at its core, is a resist dyeing technique – a method of folding, twisting, pleating, or crumpling fabric and binding it to create patterns before applying dye. The areas shielded by the bindings resist the dye, resulting in unique and often unpredictable designs. While often associated with the 1960s counterculture movement, its roots stretch far back in history.

Evidence of resist dyeing exists in cultures worldwide, including ancient China, Japan (where shibori techniques flourished), India, and Peru. These early forms often involved intricate hand-stitching and natural dyes derived from plants and minerals. The 1960s saw a revival in the West, becoming a symbol of individuality and self-expression.

Today, printable instructions and readily available dye kits have made tie dye accessible to everyone. It’s evolved from a niche craft to a mainstream fashion trend, continually reinventing itself with new techniques and vibrant color palettes.

Gathering Your Supplies

Embarking on your tie-dye journey requires a few essential supplies! First, you’ll need fabric – 100% cotton works best for vibrant color absorption. Tulip One-Step Tie-Dye Kits are a fantastic starting point, offering pre-mixed, ready-to-use dyes. Don’t forget protective gear: rubber gloves are crucial to prevent stained hands, and a drop cloth or plastic covering will safeguard your workspace.

Binding materials are key; rubber bands are traditional, but string or twine also work well. Squeeze bottles for dye application provide control, and plastic bags or plastic wrap are needed for setting the dye. A bucket or sink for rinsing is essential, and old towels will help manage any mess.

Finally, printable instructions (like this guide!) will streamline the process, ensuring a successful and colorful outcome. Having everything prepared beforehand makes the dyeing process smooth and enjoyable.

Essential Materials for Tie Dyeing

For a successful tie-dye experience, specific materials are non-negotiable. Tie-dye kits, like those from Tulip, provide a convenient all-in-one solution, including dyes, gloves, and sometimes even rubber bands. However, you can source items individually. Dyes themselves are paramount – reactive dyes are recommended for cotton, offering vibrant, long-lasting color.

100% cotton fabric is ideal, such as t-shirts, tote bags, or skirts. Rubber bands are crucial for creating patterns, while squeeze bottles allow for precise dye application. Plastic drop cloths protect surfaces, and plastic bags or wrap are needed for the dye-setting process.

Don’t overlook rubber gloves to shield your hands, and old towels for cleanup. Having these essentials readily available ensures a smooth and enjoyable creative process, allowing you to focus on the artistry of tie-dye!

Choosing the Right Fabric

Fabric selection is key to achieving vibrant and lasting tie-dye results. Natural fibers, particularly 100% cotton, are the most receptive to dye. This is because the dye molecules bond effectively with cotton fibers, creating a strong, wash-resistant color. Other natural fibers like linen and rayon also work well, though results may vary.

Avoid synthetic fabrics like polyester, as they don’t readily absorb dye. While some specialized dyes exist for synthetics, they often require higher temperatures and more complex processes. Pre-washing your fabric is crucial to remove any sizing or finishes that could hinder dye absorption.

White or light-colored fabrics provide the best canvas for showcasing the vibrant colors of tie-dye. Consider the weight of the fabric; lighter-weight fabrics are easier to manipulate and tie, while heavier fabrics offer a more substantial feel.

Preparing Your Workspace

Protecting your work area is paramount! Tie-dyeing can be messy, so cover your surfaces with plastic sheeting, old newspapers, or drop cloths. Work in a well-ventilated area, preferably outdoors, to avoid inhaling dye fumes. An easy-to-clean floor is also highly recommended – think garage, patio, or basement.

Gather all your supplies – dyes, bottles, rubber bands, gloves, fabric – and arrange them within easy reach. Have buckets of clean water readily available for rinsing. Wear old clothes that you don’t mind staining, and protect your hands with rubber or latex gloves.

Consider using a dedicated tie-dye station to contain the mess. Having everything organized beforehand will streamline the process and allow you to focus on the creative aspects of tie-dyeing!

Tie Dye Techniques: Step-by-Step

Unlock a world of patterns! Explore classic spiral, vibrant rainbow, bold bullseye, and unique wig-wag techniques. Detailed tutorials await your creative touch!

Classic Spiral Tie Dye

The iconic spiral is a fantastic starting point for any tie-dye enthusiast! Begin with a clean, damp cotton t-shirt. Pinch the fabric at the center point where you want the spiral to originate.

Twist and turn: Rotate the fabric continuously, creating a tight, flat spiral resembling a cinnamon roll. Secure this spiral firmly with rubber bands, dividing it into pie-shaped sections. The more rubber bands, the more defined your spiral will be.

Dye application is key: Carefully apply your chosen dye colors to each section, ensuring the dye penetrates the fabric. Consider using contrasting colors for a vibrant effect. Jacquard Products offers a clear tutorial emphasizing the importance of color placement for a true rainbow spiral.

Let the magic happen: Allow the dye to set for the recommended time (usually 6-8 hours, or overnight for deeper colors), then rinse thoroughly with cold water until the water runs clear.

Rainbow Spiral Tie Dye Instructions

Achieve a vibrant rainbow effect with this classic technique! Start with a pre-washed, damp cotton t-shirt. Pinch the fabric at the center and twist into a tight spiral, resembling a cinnamon roll. Secure with rubber bands, dividing the spiral into 6-8 sections – these will become your color zones.

Color placement is crucial: For a true rainbow, apply colors in the order of the spectrum – red, orange, yellow, green, blue, indigo, and violet. Ensure each color is applied to a separate section. Remember to apply the same colors to opposite sides of the spiral for a balanced result, avoiding a “rainbow spider pattern”.

Dye thoroughly: Saturate each section with dye, ensuring it penetrates the fabric. Allow the dye to set for 6-8 hours, or ideally overnight. Rinse with cold water until the water runs clear, then wash separately.

Bullseye Tie Dye Method

Create striking concentric circles with the bullseye technique! Lay your fabric flat and pinch a section you want to be the center of your bullseye. Pull the fabric upwards, creating a cone shape. Secure tightly with rubber bands at intervals down the cone – the closer the bands, the more defined the rings will be.

Apply dye strategically: Carefully apply different colors between each rubber band, ensuring each section receives ample dye. Consider using contrasting colors for a bolder effect. You can repeat this process to create multiple bullseyes across the fabric.

Allow for saturation and rinsing: Let the dye set for the recommended time (usually 6-8 hours). Rinse thoroughly with cold water, removing all excess dye, before washing separately in cold water. This method yields a visually dynamic and captivating pattern!

Stripes Tie Dye Tutorial

Achieve classic linear designs with this simple technique! Begin by folding your garment accordion-style, like creating pleats. The tighter the folds, the finer the stripes will be. Once folded neatly, secure the entire length with rubber bands spaced evenly apart – typically every inch or two.

Dye application is key: Apply different dye colors along the exposed sections between the rubber bands. You can opt for a rainbow effect, alternating colors, or stick to a limited palette for a more subtle look. Ensure the dye penetrates the fabric thoroughly.

Patience and rinsing are vital: Allow the dye to set for the recommended duration, usually 6-8 hours, for optimal color vibrancy. Rinse under cold water until the water runs clear, then wash separately to prevent color bleeding. Enjoy your bold, striped creation!

Marbled Tie Dye Technique

Create a unique, flowing pattern with the marbled tie-dye method! Start with a fully gathered fabric – scrunch it up randomly, rather than folding it neatly. Secure the entire bundle tightly with numerous rubber bands in various directions. This creates a dense network of creases and folds.

Dye application is crucial for the marbled effect: Generously apply dye all over the scrunched fabric, using multiple colors for a vibrant result; Don’t be afraid to layer colors and let them blend organically. The more dye used, the more pronounced the marbling will be.

Allow ample setting time: Let the dye sit for at least 6-8 hours, or even overnight, for maximum color absorption. Rinse thoroughly with cold water, removing all excess dye, and then wash separately. The result is a beautifully unpredictable, marbled masterpiece!

Wig-Wag Tie Dye Pattern

The Wig-Wag technique creates a dynamic, zig-zag pattern! Begin by pinching the fabric at one point and twisting it tightly, forming a long, cylindrical shape. Then, pleat the twisted fabric back and forth like an accordion, creating sharp folds. Secure these pleats firmly with rubber bands spaced evenly along the length.

Dye application defines the Wig-Wag: Apply different colors between each rubber band, ensuring each section receives a generous amount of dye. This creates distinct color blocks that will form the zig-zag pattern. Consider using contrasting colors for a bolder effect.

Patience is key for vibrant results: Allow the dye to set for the recommended time, typically 6-8 hours. Rinse thoroughly with cold water until the water runs clear, then wash separately. The final result is a striking, energetic Wig-Wag design!

Dyeing Process: Detailed Instructions

Apply dye evenly to each section, ensuring saturation for vibrant colors. Mix colors creatively, and allow sufficient setting time before rinsing thoroughly with cold water.

Applying the Dye

Carefully apply the chosen dye to your prepared fabric, ensuring complete saturation for the most impactful results. For a rainbow spiral, meticulously match colors on opposite sides – red to red, blue to blue – to achieve the classic swirling effect.

Utilize squeeze bottles for precise dye placement, especially when working with intricate patterns like bullseyes or wig-wag designs. Don’t be afraid to experiment with layering colors, but remember that overlapping can create unique blended shades.

Consider the fabric; some materials absorb dye more readily than others. Work in a well-ventilated area and wear gloves to protect your skin. Apply dye liberally, but avoid excessive pooling, which can lead to uneven coloring. Remember, a consistent application is key to a beautiful, professional-looking tie-dye project!

Color Combinations and Mixing

Unleash your creativity with vibrant color palettes! Classic rainbow combinations – red, orange, yellow, green, blue, and violet – remain popular, but don’t hesitate to explore unique blends. Consider complementary colors like blue and orange, or purple and yellow, for striking contrast.

When mixing dyes, start with small amounts and gradually add more to achieve your desired shade. Keep detailed notes of your mixtures for future reference. Remember that dye colors can appear different on fabric than in the bottle, so testing is crucial.

For subtle variations, experiment with adding white dye to lighten colors or black dye to create deeper tones. Avoid mixing too many colors together, as this can result in a muddy or unpredictable outcome. Plan your color scheme beforehand to ensure a harmonious and visually appealing final product!

Ensuring Even Dye Distribution

Achieving consistent color is key to a beautiful tie-dye result. After applying dye, gently massage it into the fabric, ensuring it penetrates all layers of the folds. Use a squeeze bottle for precise application, targeting each section thoroughly.

Flip the garment over and repeat the dye application on the opposite side, mirroring the colors used on the first side. This prevents unevenness and ensures a vibrant, symmetrical pattern. Avoid over-saturating the fabric, as this can cause colors to bleed and blend excessively.

For intricate patterns, use a brush to carefully apply dye to smaller areas. Check for any dry spots and add dye as needed. Remember, even distribution leads to a professional-looking finish, maximizing the impact of your chosen design!

Dye Setting and Rinsing

Allow the dye to set for a minimum of 6-8 hours, or ideally, 24 hours. This crucial step ensures the color bonds with the fabric fibers. Keep the dyed item in a sealed plastic bag or container during this process to maintain moisture and prevent drying.

Begin rinsing under cold water, gradually increasing the water pressure. Continue rinsing until the water runs clear – this removes excess dye. Avoid using hot water, as it can cause colors to fade or bleed. Wear gloves during rinsing to prevent staining your hands.

Wash the tie-dyed garment separately in cold water with a mild detergent for the first few washes. This further secures the dye and minimizes color transfer. Dry on a low heat setting or hang to dry, preserving the vibrancy of your creation!

Advanced Tie Dye Patterns

Elevate your skills! Explore intricate designs like Hyper Jump, traditional Shibori, captivating Ice Dyeing, and gradient Ombre effects for unique results.

Hyper Jump Tie Dye

Unleash a dynamic burst of color with the Hyper Jump tie dye technique! This pattern creates a striking, almost three-dimensional effect, resembling radiating energy. Begin by pinching the center of your fabric and twisting it into a tight, flat spiral, similar to a classic spiral tie dye.

However, instead of binding the entire spiral, strategically section it off with rubber bands, creating distinct ‘jumps’ or segments. Apply different colors to each section, ensuring vibrant contrast. The key is to use bold, complementary hues for maximum impact.

Allow the dye to set fully before rinsing. The resulting pattern is a visually exciting explosion of color, perfect for those seeking a more complex and modern tie dye design. Experiment with color placement to achieve unique variations of this captivating technique!

Shibori Tie Dye Techniques

Explore the ancient Japanese art of Shibori! Unlike typical tie dye, Shibori focuses on precise folding, twisting, and clamping techniques to create intricate, patterned resists. Several methods exist, including Kanjii (tie-resist), Itajime (shape-resist using boards), and Arashi (pole-wrapping).

Kanjii involves binding sections of fabric with thread, creating small, detailed patterns. Itajime utilizes wooden blocks to block dye penetration, resulting in geometric designs. Arashi, arguably the most dramatic, involves wrapping fabric tightly around a pole and binding it, producing dynamic, linear patterns.

Shibori often employs indigo dye, but modern variations embrace a wider color palette. Achieving authentic Shibori requires patience and precision, but the results – beautifully textured and uniquely patterned fabrics – are well worth the effort.

Ice Dyeing Method

Unleash unpredictable beauty with Ice Dyeing! This captivating technique replaces traditional dye application with… ice! Crumpled fabric is layered with powdered dye, then covered completely in ice. As the ice melts, it creates unique, watercolor-like patterns. The dye is distributed organically, resulting in soft, blended colors and stunning variations.

The key is the ice itself – it acts as both a resist and a delivery system for the dye. Different ice crystal sizes and melting rates contribute to the final design. Experiment with dye placement and fabric scrunching for diverse effects.

Pro Tip: Use a plastic bin to contain the melting ice and dye. This method is incredibly forgiving and yields beautiful, one-of-a-kind results, even for beginners. It’s a fantastic way to explore color blending and create artistic textiles!

Ombre Tie Dye Effect

Create a gradient masterpiece with the Ombre Tie Dye effect! This technique achieves a beautiful transition of color, fading from dark to light (or vice versa) across your fabric. Unlike traditional tie dye, ombre focuses on a gradual color shift rather than distinct patterns.

The secret lies in controlled dye application. Start by applying the darkest shade of dye to one section of the fabric, then gradually reduce the dye concentration as you move towards the opposite end. You can achieve this by diluting the dye with water or using progressively lighter shades.

Experiment with different color combinations for striking results. Pro Tip: For a seamless blend, lightly mist water onto the fabric between dye applications. This helps the colors meld together, creating a smooth ombre transition. It’s a sophisticated take on tie dye!

Post-Dyeing Care & Maintenance

Preserve your vibrant creations! Proper washing prevents color bleeding and ensures long-lasting brilliance. Cold water and color-safe detergents are essential for tie dye garments.

Washing Tie Dye Garments

Initial Wash: After rinsing out the dye, it’s crucial to wash your tie-dye garment separately for the first few washes. This prevents any excess dye from transferring onto other clothes. Use cold water – hot water can cause colors to fade and bleed. A mild, color-safe detergent is your best friend; avoid harsh chemicals or bleach.

Subsequent Washes: Once the initial dye release has subsided (usually after 2-3 washes), you can begin washing your tie-dye items with similar colors. However, continuing to use cold water is highly recommended to maintain vibrancy. Turn the garment inside out before washing to protect the design from abrasion during the wash cycle.

Drying: Air drying is the gentlest option and will help preserve the colors for longer. If you must use a dryer, select a low heat setting. High heat can cause shrinkage and fading. Remember, a little extra care during washing will ensure your tie-dye creations remain bright and beautiful for years to come!

Preventing Color Bleeding

Color Fixatives: To minimize color bleeding, consider using a color fixative after rinsing the dye. These products help lock the dye into the fabric fibers, reducing the amount that releases during washing. Follow the product instructions carefully for optimal results.

Vinegar Soak: A simple home remedy involves soaking the dyed garment in a solution of cold water and white vinegar (about a cup of vinegar per gallon of water) for 30 minutes before the first wash. This helps set the dye and reduce bleeding.

Separate Washing: As mentioned previously, always wash new tie-dye items separately for the first few washes. Even with fixatives, some dye release is normal. Cold water is essential, and avoid washing with light-colored items until you’re confident the bleeding has stopped. Regular use of color-catching sheets in the wash can also help!

Long-Term Care Tips

Gentle Washing: To preserve the vibrancy of your tie-dye creations, always wash them inside out in cold water. Harsh detergents can fade the colors, so opt for a mild, color-safe detergent. Avoid bleach at all costs, as it will quickly diminish the dye.

Low Heat Drying: Tumble dry on low heat or, even better, hang your tie-dye garments to dry. High heat can cause the colors to fade and the fabric to shrink. Air drying also helps maintain the softness of the material.

Minimize Sun Exposure: Prolonged exposure to direct sunlight can also cause colors to fade over time. When drying outdoors, try to hang your tie-dye items in a shaded area. Proper care will ensure your vibrant designs last for years to come!

Troubleshooting Common Issues

Color Bleeding: If you experience color bleeding, especially during the first few washes, re-wash the garment alone with cold water and a color-catching sheet. Pre-soaking in a salt water solution before dyeing can help minimize this.

Muddy Colors: Muddy or dull colors often result from insufficient dye saturation or improper rinsing. Ensure thorough dye application and rinse until the water runs completely clear. Avoid over-mixing dyes, as this can also lead to undesirable shades.

Uneven Dyeing: For uneven dye distribution, ensure the fabric is properly scrunched or tied, and the dye is applied evenly throughout. Using a spray bottle can help reach all areas. Remember, slight variations are part of the tie-dye charm!

what is a curative instruction

What is a Curative Instruction? A Comprehensive Guide

Curative instructions are directives from a judge to a jury‚ aiming to counteract prejudicial effects during a trial‚ often stemming from improperly admitted evidence.

These instructions‚ also known as evidentiary instructions‚ seek to ‘cure’ any harm caused by inadmissible or improperly presented information‚ ensuring a fairer verdict.

Gmail‚ a secure email service‚ exemplifies how information needs clarity; similarly‚ curative instructions clarify trial proceedings for the jury’s understanding and decision-making.

Curative instructions represent a crucial procedural tool within the American legal system‚ designed to address instances where potentially damaging or inadmissible evidence has been presented to a jury. These instructions‚ delivered by the presiding judge‚ aren’t about preventing errors – they’re about mitigating their impact. Essentially‚ they are a judicial attempt to “unring the bell‚” acknowledging that while the jury heard something problematic‚ they should not consider it when reaching a verdict.

The core function is to refocus the jury’s attention on the admissible evidence and the applicable law. They come in various forms‚ each tailored to the specific issue at hand. Like ensuring clarity in a service such as Gmail‚ where confirmations are synchronized‚ curative instructions aim to streamline the jury’s understanding. They are a recognition that perfect trials are rare‚ and the legal system must have mechanisms to address inevitable imperfections‚ striving for a just outcome despite them.

These instructions are a vital component of ensuring a fair trial.

Historical Context of Curative Instructions

The historical development of curative instructions is interwoven with the evolution of evidentiary rules and the pursuit of fair trial procedures in common law systems. While a precise pinpoint of origin is difficult‚ the need to address prejudicial evidence arose early in legal proceedings. Initially‚ judges relied on general admonitions to juries‚ urging them to disregard improper statements or evidence.

Over time‚ these admonitions became more formalized‚ evolving into specific‚ tailored instructions. The late 19th and early 20th centuries saw increased emphasis on defining the scope and limitations of such instructions‚ mirroring the growing complexity of trial practice. Much like the development of secure email systems like Gmail‚ prioritizing privacy‚ legal procedures adapted to address emerging challenges.

The modern framework for curative instructions is largely shaped by codified rules of evidence‚ aiming for consistency and clarity in their application‚ ensuring a more equitable legal process.

The Purpose of a Curative Instruction

The core purpose of a curative instruction is to mitigate the potentially prejudicial impact of improperly admitted evidence or statements made during a trial. It’s a judicial tool designed to ‘cure’ any harm caused‚ ensuring the jury’s decision is based solely on admissible evidence. This isn’t about erasing what the jury heard – akin to unringing a bell – but rather directing them to disregard it.

Essentially‚ the instruction serves as a corrective measure‚ reinforcing the jury’s duty to follow the law and avoid being swayed by irrelevant or inadmissible information. Like Gmail’s filters reducing spam‚ curative instructions aim to filter out damaging‚ yet improper‚ influences.

The goal is to preserve the integrity of the trial process and guarantee a fair verdict‚ upholding the principles of due process and ensuring justice is served‚ despite procedural errors.

Distinction Between Standard and Curative Instructions

Standard instructions are pre-defined legal guidelines given to the jury before deliberation‚ outlining the applicable law and their duties. Conversely‚ curative instructions are reactive – issued in response to specific events during trial‚ like inadmissible evidence. Think of standard instructions as the foundational rules‚ and curative instructions as addressing mid-game corrections.

While standard instructions proactively guide the jury‚ curative instructions attempt to remedy a potential prejudice that has already occurred. They don’t establish law; they clarify how existing law applies to a specific situation.

Like Gmail automatically categorizing emails‚ standard instructions organize the legal framework. However‚ if a harmful email slips through (inadmissible evidence)‚ a curative instruction is needed to direct attention away from it‚ ensuring a fair assessment.

When are Curative Instructions Given?

Curative instructions are typically given when improper evidence is presented‚ prejudicial statements are made‚ or witness misconduct occurs during a trial’s proceedings.

They address immediate issues to safeguard a fair trial.

Responding to Improperly Admitted Evidence

Curative instructions frequently arise when evidence slips in that shouldn’t have been admitted in the first place. This can happen despite a judge’s best efforts to maintain proper procedure‚ or through unforeseen circumstances during testimony. The core purpose of the instruction in these scenarios is to tell the jury to disregard the problematic evidence entirely.

However‚ simply telling jurors to ignore something isn’t always effective – the “bell that cannot be unrung” analogy is often used. Therefore‚ the instruction must be carefully worded. It should not draw more attention to the evidence by repeating its details‚ but rather‚ firmly direct the jury to treat it as if they never heard it.

The instruction’s success hinges on the judge’s authority and the clarity of the direction. It’s a critical tool for preserving the integrity of the trial and ensuring a verdict based solely on admissible evidence‚ much like Gmail’s security features protect user information.

Addressing Prejudicial Statements by Attorneys

Curative instructions become essential when an attorney makes improper or prejudicial statements during trial. These statements might violate rules of evidence‚ appeal to emotions unfairly‚ or offer opinions disguised as facts. While objections are the first line of defense‚ sometimes a statement gets out before a timely objection can be made‚ or the damage is already done.

In such cases‚ a curative instruction serves to neutralize the effect of the attorney’s misconduct. The judge directs the jury to disregard the statement and refrain from considering it during deliberations. Similar to how Gmail filters spam‚ the instruction aims to remove unwanted influence from the jury’s consideration.

The instruction must be prompt and direct‚ emphasizing that the attorney’s statement doesn’t constitute evidence. It’s a vital mechanism for maintaining a fair trial‚ ensuring the verdict rests on legitimate evidence‚ not improper advocacy.

Dealing with Witness Misconduct

Curative instructions are frequently employed when a witness engages in misconduct on the stand. This misconduct can take various forms‚ including offering unsolicited opinions‚ speculating‚ volunteering information beyond the scope of the question‚ or making improper references to inadmissible evidence. Just as Gmail automatically organizes flight confirmations‚ curative instructions aim to restore order to the proceedings.

When witness misconduct occurs‚ the judge may issue an instruction directing the jury to disregard the improper testimony. The instruction emphasizes that the witness’s statement isn’t evidence and shouldn’t influence their decision. The goal is to ‘cure’ any prejudice created by the witness’s inappropriate behavior.

Effectiveness hinges on the promptness and clarity of the instruction. A swift response minimizes the risk of the jury being unduly swayed by the misconduct‚ preserving the integrity of the trial process.

Types of Curative Instructions

Curative instructions manifest as directives to disregard evidence‚ limiting instructions defining evidence scope‚ or clarifying instructions explaining legal concepts—all aiming for a fair trial.

Instructions to Disregard Evidence

Instructions to disregard evidence represent a core type of curative instruction‚ issued when inadmissible or improperly admitted information has reached the jury’s awareness. The judge directs the jurors to completely ignore the specific evidence during their deliberations‚ essentially attempting to erase it from their consideration.

However‚ the effectiveness of these instructions is often debated‚ facing the “bell that cannot be unrung” challenge – jurors may find it difficult‚ if not impossible‚ to truly disregard information they’ve already heard. Despite this limitation‚ courts frequently employ them as a good-faith effort to mitigate prejudice.

These instructions are particularly crucial when evidence is admitted inadvertently‚ or when a witness makes an improper statement. The goal is to prevent the tainted evidence from unduly influencing the jury’s verdict‚ upholding the principles of a fair trial‚ much like ensuring clarity in communications‚ as exemplified by services like Gmail.

Limiting Instructions

Limiting instructions‚ a vital form of curative instruction‚ don’t ask the jury to disregard evidence entirely‚ but rather to restrict how they use it. Unlike instructions to disregard‚ these define the specific purpose for which evidence is admissible‚ preventing jurors from considering it for other‚ improper reasons.

For example‚ evidence admitted to show a pattern of behavior might be limited to that purpose‚ with the jury instructed not to infer a defendant’s character from it. This nuanced approach acknowledges the evidence’s relevance for a specific issue while safeguarding against undue prejudice.

Effectively‚ limiting instructions act as a boundary‚ guiding the jury’s reasoning process. Similar to how Gmail filters emails‚ these instructions filter the jury’s consideration of evidence‚ ensuring it’s applied correctly within the legal framework and promoting a just outcome.

Clarifying Instructions

Clarifying instructions serve as a corrective measure when ambiguity arises during a trial‚ ensuring the jury comprehends legal concepts or the application of evidence. These aren’t responses to specific errors‚ but proactive steps to prevent misinterpretations that could influence the verdict.

They might explain the burden of proof‚ define key terms‚ or elaborate on the elements of a crime. Essentially‚ clarifying instructions aim to remove any confusion that could lead jurors astray‚ fostering a more informed and accurate decision-making process.

Much like Gmail’s organization features help users understand their inbox‚ clarifying instructions organize complex legal principles for the jury. They ensure a shared understanding of the legal landscape‚ promoting fairness and transparency‚ and ultimately‚ a just resolution‚ similar to a detective’s testimony.

Legal Basis and Authority for Curative Instructions

Curative instructions derive authority from rules of evidence‚ like the Federal Rules‚ and state-specific guidelines‚ ensuring trials remain fair despite evidentiary errors.

Case law‚ such as State v. Olajuwan Herbert‚ demonstrates judicial application of these instructions to remedy trial issues and protect due process.

Federal Rules of Evidence & Curative Instructions

While the Federal Rules of Evidence (FRE) don’t explicitly mention “curative instructions” by name‚ their underlying principles heavily support the practice. Rule 103‚ concerning rulings on evidence‚ allows courts to take measures to mitigate errors‚ including issuing instructions to the jury.

Specifically‚ FRE 103(a) permits objections to evidence‚ and 103(b) details how to preserve a claim of error for appeal. If improper evidence is admitted‚ a timely objection allows the requesting party to seek a curative instruction. The judge‚ possessing discretion‚ can then direct the jury to disregard the evidence or limit its consideration.

This aligns with the broader goal of the FRE – to ensure fair trials. A curative instruction isn’t a guaranteed remedy‚ but it represents a procedural mechanism to address prejudicial errors. The effectiveness hinges on the judge’s promptness and clarity‚ aiming to neutralize the impact of the flawed evidence on the jury’s deliberations‚ much like Gmail’s security features protect user information.

State-Specific Rules Regarding Curative Instructions

Beyond the Federal Rules of Evidence‚ individual states often have specific rules or established case law governing curative instructions. These can vary significantly‚ impacting when and how they are employed.

Some states may have codified procedures for requesting such instructions‚ outlining the required timing and content. Others rely heavily on common law principles‚ granting judges broad discretion. For example‚ states may differ on whether a curative instruction is sufficient‚ or if the evidence requires striking from the record.

The New Jersey case of State v. Olajuwan Herbert demonstrates state-level application. Understanding these nuances is crucial‚ as a curative instruction deemed adequate in one state might be insufficient in another. Like Gmail adapting to different language preferences‚ state rules tailor legal procedures to local contexts‚ ensuring fairness within their jurisdictions.

Case Law Examples: State v. Olajuwan Herbert

The New Jersey Appellate Division case‚ State v. Olajuwan Herbert (2019)‚ provides a practical illustration of curative instructions in action. During the trial‚ a detective’s testimony inadvertently revealed prior bad acts of the defendant‚ information not admissible under the rules of evidence.

Defense counsel requested a curative instruction to mitigate the potential prejudice. The court granted the request‚ directing the jury to disregard the detective’s improper statements and to base their verdict solely on admissible evidence.

The appellate court upheld the trial court’s decision‚ recognizing the importance of curative instructions in safeguarding a defendant’s right to a fair trial. Similar to Gmail filtering spam‚ the instruction aimed to remove damaging‚ irrelevant information from the jury’s consideration‚ ensuring a verdict based on proper evidence.

Effectiveness and Limitations of Curative Instructions

Despite their intent‚ curative instructions face the “bell that cannot be unrung” problem; jurors may struggle to fully disregard prejudicial information‚ impacting verdict objectivity.

Effectiveness hinges on factors like timing‚ clarity‚ and the nature of the prejudice‚ mirroring Gmail’s spam filter accuracy.

The “Bell That Cannot Be Unrung” Problem

The phrase “bell that cannot be unrung” vividly illustrates a significant limitation of curative instructions. Despite a judge’s directive to disregard certain evidence or statements‚ the initial exposure often leaves a lasting impression on jurors. This is because human cognition doesn’t easily suppress information once it’s been processed‚ much like recalling an unwanted memory.

Even with sincere attempts to follow the instruction‚ jurors may subconsciously factor the inadmissible material into their deliberations. The prejudicial impact‚ therefore‚ persists despite the court’s effort to ‘cure’ it. This challenge is amplified when the evidence is particularly inflammatory or emotionally charged‚ making complete disregard exceedingly difficult.

Similar to how a Gmail notification‚ once read‚ cannot be unseen‚ the initial exposure to damaging information during a trial creates a cognitive footprint. While instructions aim to mitigate harm‚ they cannot entirely erase the initial impact‚ raising concerns about the fairness of the trial process and the potential for biased verdicts.

Factors Influencing Effectiveness

The effectiveness of curative instructions isn’t uniform; several factors significantly impact their success. The timeliness of the instruction is crucial – a prompt response minimizes the prejudicial effect‚ while delays diminish its impact. The clarity and forcefulness of the judge’s language also matter; ambiguous or weak instructions are easily disregarded.

The nature of the evidence itself plays a role; highly prejudicial material is harder to overcome than minor infractions. Juror characteristics‚ such as pre-existing biases or levels of cognitive processing‚ can also influence their susceptibility to the instruction.

Furthermore‚ a judge’s overall demeanor and the context in which the instruction is given contribute to its weight. Just as Gmail prioritizes important emails‚ a judge must emphasize the instruction’s importance to ensure jurors prioritize it during deliberations‚ maximizing its potential to mitigate bias.

Criticisms of Curative Instructions

Despite their intent‚ curative instructions face substantial criticism. The primary concern is the “bell that cannot be unrung” problem – jurors may struggle to fully disregard damaging information‚ even after being instructed to do so. Critics argue instructions often highlight the inadmissible evidence‚ drawing more attention to it than if it hadn’t been mentioned at all.

Some legal scholars contend instructions place undue faith in jurors’ ability to compartmentalize information‚ a cognitive task proven difficult. The reliance on instructions can also discourage attorneys from diligently objecting to improper evidence initially‚ assuming a ‘cure’ is available.

Similar to how Gmail filters spam but isn’t foolproof‚ curative instructions aren’t guaranteed to eliminate prejudice. They are often seen as a less effective remedy than preventing the evidence’s admission in the first place‚ raising questions about their overall utility.

Requesting a Curative Instruction

Requests should be timely‚ made after prejudicial statements or evidence‚ and contain precise wording to address the issue‚ anticipating potential objections from opposing counsel.

Timing of the Request

The timing of a curative instruction request is critical; it must be made promptly after the prejudicial matter occurs. Delay can diminish its effectiveness‚ as the jury’s initial impression may solidify. Ideally‚ a request should be made before the jury begins deliberating‚ allowing the judge to address the issue while the evidence is still fresh in their minds.

However‚ a request made during closing arguments can still be considered‚ particularly if the prejudice is ongoing or cumulative; Failing to object contemporaneously to the improper evidence might waive the right to a curative instruction‚ depending on jurisdiction. Like Gmail’s instant synchronization‚ a swift response is vital.

The goal is to mitigate harm immediately‚ preventing the jury from being unduly influenced by information they shouldn’t have considered. A timely request demonstrates diligence and protects the integrity of the trial process‚ ensuring a fair outcome.

Proper Wording and Content

Curative instruction wording must be precise and neutral‚ avoiding any language that could further emphasize the inadmissible evidence. The instruction should clearly state what the jury should not consider‚ without repeating the damaging information itself. It’s crucial to avoid drawing undue attention to the issue while still adequately addressing the prejudice.

The content should focus on the legal principle violated‚ guiding the jury to disregard the specific evidence. Like Gmail’s clear interface‚ instructions should be easily understood. Avoid argumentative language or attempts to re-litigate the evidence.

A well-crafted instruction will simply and directly tell the jury to disregard the improper matter and continue deliberations based solely on admissible evidence‚ ensuring a fair and impartial verdict.

Potential Objections to the Instruction

Opposing counsel may object to a curative instruction on several grounds. A common objection is that the instruction unduly emphasizes the inadmissible evidence‚ potentially exacerbating the prejudice it aimed to cure – the “bell that cannot be unrung” problem.

Another objection centers on the instruction’s accuracy or neutrality‚ arguing it misstates the law or subtly directs the jury towards a specific conclusion. Like ensuring Gmail account security‚ legal precision is vital.

Objections may also arise if the instruction is deemed repetitive or cumulative‚ or if the requesting party failed to timely object to the initial improper evidence. Successfully navigating these objections requires careful drafting and a clear understanding of evidentiary rules.

sol lewitt wall drawing instructions

Sol LeWitt Wall Drawing Instructions: A Comprehensive Guide

Sol LeWitt’s conceptual approach revolutionized art, shifting focus from execution to idea; his wall drawings exemplify this, offering accessible instructions for realization․

These instructions, often deceptively simple, invite participation and challenge traditional notions of authorship, making the artwork a collaborative process․

Published sets and online archives, like Yale’s, provide crucial documentation, enabling continued engagement with LeWitt’s enduring artistic legacy․

The Conceptual Foundation of Sol LeWitt’s Wall Drawings

Sol LeWitt’s wall drawings arose from a pivotal shift in artistic thought, prioritizing the underlying concept over the artist’s physical hand․ This move firmly placed him within the Conceptual art movement, where the idea is the artwork; He deliberately distanced himself from traditional sculpture and painting, seeking a more democratic and accessible art form․

Instead of creating a finished piece himself, LeWitt devised detailed instructions – sets of rules and guidelines – that others could follow to execute the drawings directly onto the wall․ This process wasn’t about replicating his style, but about realizing his idea․ The instructions themselves became the artwork, a score to be performed․

This approach challenged notions of artistic genius and authorship, emphasizing the importance of the system and the potential for multiple interpretations․ LeWitt believed this method allowed for a purer expression of the concept, free from the limitations of individual skill or aesthetic preference․ The resulting works are not merely decorations, but manifestations of a thought process․

LeWitt’s Approach to Art Creation: Instructions as Artwork

Sol LeWitt’s unique methodology centered on the creation of instructions, meticulously detailing every aspect of a wall drawing’s execution․ These weren’t simply guides for creating art; they were the art itself․ He intentionally relinquished control over the final product, embracing the variability inherent in having others realize his concepts;

The instructions, often employing simple geometric forms and systematic progressions, ranged from straightforward to complex, yet always remained precise․ They specified materials, colors, line weights, and the order of application, leaving little room for subjective interpretation․ This deliberate precision was key to LeWitt’s conceptual framework․

By separating the idea from its physical manifestation, LeWitt redefined the role of the artist․ He became a generator of systems, a conceptual architect, rather than a traditional craftsman․ The drafters, following his instructions, acted as facilitators, bringing the artwork into being, but not as individual authors․

The Significance of Instructions in Conceptual Art

Sol LeWitt’s wall drawings profoundly impacted Conceptual Art by elevating the idea—the concept—above traditional artistic skill and execution․ The instructions themselves became the primary artwork, challenging established notions of authorship and originality․ This shift prioritized the intellectual process over the aesthetic object, a hallmark of the movement․

By providing detailed instructions, LeWitt democratized art creation, allowing others to participate in realizing his vision․ This collaborative aspect questioned the artist’s singular authority and emphasized the importance of systems and processes․ The focus moved from the artist’s hand to the underlying conceptual framework․

Furthermore, the instructions’ inherent reproducibility highlighted the idea’s independence from a unique, irreplaceable object․ Multiple iterations of a single wall drawing could exist, each a valid expression of the original concept, solidifying the primacy of the idea within Conceptual Art․

Understanding Wall Drawing Instructions

LeWitt’s notation system, utilizing geometric forms and sequential steps, demands precise interpretation by drafters; materials are typically simple – pencil, ink, and paint․

Deciphering these instructions requires careful attention to detail, ensuring faithful reproduction of the artist’s conceptual vision․

Decoding LeWitt’s Notation System

Sol LeWitt’s instruction sets aren’t free-flowing descriptions but rather meticulously crafted notations, resembling architectural blueprints or mathematical equations․ These systems employ a unique visual language, relying heavily on geometric shapes – lines, squares, circles – and numerical sequences to dictate the drawing’s composition․

The instructions detail not just what to draw, but how to draw it, specifying the order of operations, the types of lines used (straight, broken, wavy), and the precise measurements between elements․ He often uses parenthetical notes to clarify ambiguities or offer alternative approaches․

Understanding the system requires recognizing that LeWitt intentionally minimized ambiguity, aiming for a clarity that would allow anyone, regardless of artistic skill, to execute the work accurately․ The notation isn’t about personal expression but about faithfully translating a conceptual idea into a visual form․ The instructions themselves are the artwork, and their precise execution is paramount․

Variations in the notation exist across different wall drawings, reflecting the evolving nature of LeWitt’s exploration of conceptual art, but the core principle of systematic instruction remains constant․

Materials Typically Used in Executing Wall Drawings

Sol LeWitt’s wall drawings, while conceptually driven, necessitate specific materials for their physical realization․ The most common medium is acrylic paint, favored for its durability, vibrant colors, and ease of application and removal – crucial given the drawings are often temporary or subject to restoration․

Walls are typically primed with a neutral base coat, often white, to provide a consistent surface․ Tools range from simple items like pencils, rulers, and masking tape to more specialized equipment like compasses and protractors, ensuring precise geometric execution․

The choice of paint sheen – matte, satin, or gloss – can subtly alter the drawing’s appearance, and LeWitt’s instructions sometimes specify a particular finish․ Occasionally, charcoal or colored pencils are used for preliminary sketches or to create softer effects․

Importantly, the materials are deliberately non-precious, emphasizing the idea over the object, and facilitating the drawings’ reproducibility and potential for re-execution․

The Role of the Drafter in LeWitt’s Process

Sol LeWitt intentionally distanced himself from the physical execution of his wall drawings, assigning the task to trained drafters․ This wasn’t a delegation of skill, but a core tenet of his conceptual approach; the idea, embodied in the instructions, was paramount, not the artist’s hand․

The drafter’s role is one of meticulous translation – faithfully interpreting LeWitt’s written directives into a visual form․ Precision and adherence to the instructions are critical, minimizing individual interpretation․

While LeWitt provided detailed instructions, drafters sometimes encountered ambiguities, requiring careful consideration and, occasionally, communication with the artist (or his estate)․

This collaborative process highlights the democratic nature of LeWitt’s work, emphasizing the idea’s potential for realization by anyone capable of following the instructions, effectively dissolving the traditional artist-as-genius paradigm․

Specific Wall Drawing Examples & Instructions

LeWitt’s diverse wall drawings, like #394, #797, and #958 (Splat), showcase varied techniques—from geometric patterns to chance operations—all guided by precise instructions․

Wall Drawing #394: Detailed Instruction Breakdown

Wall Drawing #394, executed at Concordia University and documented extensively, exemplifies LeWitt’s instructional clarity․ The instructions call for fifty dots to be evenly distributed across the wall surface, a seemingly simple directive that belies the challenges of precise execution․

The key lies in interpreting “evenly distributed”—does this mean equal spacing, or a visual balance? This ambiguity is intentional, prompting the drafter to make subtle decisions within the framework of the instructions․

Typically, the instructions specify the use of graphite, allowing for easy correction and a consistent aesthetic․ The process involves careful measurement, marking points, and then applying the graphite, often with a soft pencil or charcoal․ The resulting work, while appearing minimalist, is a testament to the interplay between conceptual intent and practical application, showcasing LeWitt’s unique approach to art creation․

Wall Drawing #797: Exploring Geometric Patterns

Wall Drawing #797 delves into LeWitt’s fascination with geometric progressions and serial systems․ Instructions for this drawing typically involve a series of intersecting lines, often based on modular units that repeat and transform across the wall․ The complexity arises not from intricate shapes, but from the precise relationships between these elements․

The instructions meticulously define angles, distances, and color schemes (often utilizing primary colors), demanding accuracy from the drafter․ Variations within the pattern are generated through systematic alterations, creating a dynamic visual rhythm․

This drawing highlights LeWitt’s belief that the idea behind the artwork is paramount; the geometric patterns are pre-determined, leaving the execution to a skilled interpreter․ The resulting work embodies mathematical precision and aesthetic harmony, demonstrating the power of conceptual art․

Wall Drawing #958 (Splat): An Examination of Chance and Control

Wall Drawing #958 (Splat) represents a fascinating departure in LeWitt’s oeuvre, introducing an element of controlled chance․ Unlike his precisely defined geometric works, “Splat” instructs the drafter to throw colored ink or paint onto the wall, creating seemingly random splatters․

However, the instructions aren’t entirely open-ended; they specify the colors to be used, the number of splatters, and sometimes, the height from which the paint should be dropped․ This establishes a framework within which chance operates, balancing spontaneity with intentionality․

“Splat” challenges the notion of the artist’s complete control, acknowledging the unpredictable nature of the process․ It’s a playful exploration of form and color, demonstrating LeWitt’s willingness to experiment and embrace the unexpected within a conceptual structure․

Locating and Accessing Wall Drawing Instructions

LeWitt’s instructions are widely available through published sets and online resources, notably Yale’s archive, facilitating broader access and continued artistic engagement․

The Importance of Published Instruction Sets

Published instruction sets are paramount to understanding and realizing Sol LeWitt’s wall drawings, serving as the definitive record of his artistic intent․ These sets aren’t merely supplemental; they are the artwork, embodying the conceptual core of his practice․ Without them, the drawings risk becoming interpretations rather than faithful executions of LeWitt’s vision․

The meticulous detail within these instructions—specifying line weights, colors, sequences, and even the roles of the drafters—ensures consistency and longevity․ They allow for the drawings to be recreated accurately, even decades after LeWitt’s passing, as evidenced by ongoing restoration projects at Mass MoCA․

Furthermore, the publication of these instructions democratizes art, removing the mystique of the artist’s hand and inviting broader participation․ They transform the act of drawing into a collaborative process, where the drafter becomes an essential component in bringing LeWitt’s ideas to life․ These sets are, therefore, vital for preservation, interpretation, and continued engagement with his influential work․

Online Resources for LeWitt’s Wall Drawing Documentation

Numerous online resources provide access to Sol LeWitt’s extensive wall drawing documentation, crucial for anyone interested in understanding or executing his work․ The Yale University Art Gallery’s archive stands out as a particularly comprehensive resource, offering detailed images and, importantly, the instructions themselves for a significant portion of his drawings․

Beyond Yale, various websites and digital collections compile information about LeWitt’s oeuvre, including articles discussing specific drawings and their conceptual underpinnings․ These platforms often feature photographs of completed wall drawings, offering visual references for drafters and researchers alike․

However, it’s essential to prioritize official sources like published instruction sets when available, as online interpretations can sometimes deviate from LeWitt’s original intent․ Utilizing these digital tools alongside the authoritative documentation ensures a more accurate and informed engagement with his groundbreaking artistic practice․

Yale University Art Gallery’s Wall Drawing Archive

The Yale University Art Gallery houses an exceptional archive dedicated to Sol LeWitt’s wall drawings, representing a cornerstone for research and practical execution․ This archive isn’t merely a collection of images; it’s a meticulously maintained repository of the artist’s original instructions, providing unparalleled access to his conceptual process․

Visitors – both physical and virtual – can explore detailed documentation for numerous wall drawings, including precise measurements, color specifications, and step-by-step guidelines․ The archive’s digital presence significantly expands its reach, allowing scholars and artists globally to study LeWitt’s methods․

Furthermore, the Gallery actively maintains and reinstates wall drawings, offering a unique opportunity to witness these ephemeral works in their intended form․ This commitment ensures LeWitt’s legacy continues to inspire and challenge artistic conventions for generations to come․

Executing a Wall Drawing: Practical Considerations

Successful execution demands careful wall preparation, precise tools, and a thorough understanding of LeWitt’s notation․ Addressing challenges proactively ensures faithful realization of the artwork․

Preparing the Wall Surface for Application

Prior to commencing any wall drawing, meticulous surface preparation is paramount․ Sol LeWitt’s instructions rarely specify surface texture, but a smooth, clean wall is generally preferred for accurate execution․ Begin by thoroughly cleaning the wall to remove dust, dirt, and any existing coatings that might interfere with the drawing materials․

Priming the wall is often recommended, especially if the surface is porous or uneven․ A good quality acrylic primer will create a uniform base for the drawing and enhance the vibrancy of the colors․ Allow the primer to dry completely before proceeding․

Consider the wall’s color; while LeWitt’s drawings often function independently of the background, a neutral tone—typically white or off-white—provides the best contrast and clarity․ Finally, ensure the wall is structurally sound and free from cracks or imperfections that could compromise the final artwork․ A properly prepared surface is the foundation for a successful and lasting wall drawing․

Tools and Techniques for Accurate Drawing

Executing a Sol LeWitt wall drawing demands precision and adherence to the provided instructions․ Essential tools include high-quality drafting pencils, erasers, rulers – both short and long – set squares, and a plumb bob for vertical lines․ For colored drawings, acrylic paints are commonly used, applied with brushes of varying sizes․

Techniques often involve establishing a grid system to ensure accurate proportions and placement of lines and shapes․ Careful measuring and marking are crucial, as even minor errors can accumulate and distort the overall design․

Masking tape can be used to create clean, straight edges, while stencils may be employed for repeating patterns․ Patience and meticulous attention to detail are key; LeWitt’s drawings, while conceptually driven, rely on precise execution to fully realize their intended form․

Common Challenges and Troubleshooting Tips

Executing Sol LeWitt’s wall drawings isn’t without potential hurdles․ Maintaining consistent color throughout a large-scale work can be difficult; batching paint and careful mixing are essential․ Achieving perfectly straight lines, especially over long distances, requires a steady hand and precise tools, potentially needing multiple passes with a ruler․

Errors inevitably occur․ Lightly sketched guidelines are invaluable, allowing for corrections before committing to final lines․ If paint bleeds under masking tape, a fine brush and steady hand can remedy the issue․

Uneven wall surfaces can also pose a challenge, requiring adjustments to maintain visual accuracy․ Remember, LeWitt’s instructions prioritize the concept; minor imperfections are often acceptable and even contribute to the drawing’s unique character․

The Legacy and Impact of LeWitt’s Wall Drawings

LeWitt’s wall drawings transcend traditional mediums, becoming permanent installations or undergoing meticulous restoration, like at Mass MoCA, profoundly influencing contemporary artistic practices․

Wall Drawings as Permanent Installations

Sol LeWitt’s innovative approach to art creation resulted in wall drawings often conceived as permanent installations, fundamentally altering the relationship between artwork and architectural space․ Unlike traditional paintings or sculptures, these drawings become the wall, integrated directly into the building’s fabric․ This permanence distinguishes them, transforming spaces into ongoing artistic experiences․

The instructions themselves are the artwork, allowing for recreation even after the artist’s passing, ensuring the continued existence of his vision․ Institutions like Yale University Art Gallery and Mass MoCA actively maintain and restore these drawings, demonstrating a commitment to preserving LeWitt’s legacy․ This dedication highlights the drawings’ significance beyond their initial creation, establishing them as enduring cultural landmarks․ The drawings’ inherent adaptability also contributes to their longevity, as they can be faithfully reproduced in various locations, extending their reach and impact․

This concept of a ‘permanent’ artwork executed through instruction is a cornerstone of LeWitt’s contribution to conceptual art, challenging conventional notions of artistic ownership and originality․

The Ongoing Restoration Projects at Mass MoCA

Mass MoCA houses a significant collection of Sol LeWitt’s wall drawings, necessitating continuous restoration projects to maintain their vibrancy and accuracy․ Given the drawings’ inherent nature – being directly on the walls – preservation requires meticulous adherence to LeWitt’s original instructions․ These aren’t restorations in the traditional sense, but rather re-executions, guided by the detailed documentation he provided․

Currently, a long-term project is underway, involving the restoration of eight of the 105 wall drawings, scheduled to continue until 2043․ This ambitious undertaking demonstrates a profound commitment to LeWitt’s work and the unique challenges of preserving ephemeral art․ Skilled drafters meticulously follow the instructions, ensuring each line and form aligns with the artist’s intent․

The process highlights the importance of the instruction sets as the artwork itself, allowing for faithful recreation and ensuring LeWitt’s vision endures for generations to come․

LeWitt’s Influence on Contemporary Art Practices

Sol LeWitt’s pioneering use of instructions as artwork profoundly impacted contemporary art, shifting the emphasis from the artist’s hand to the conceptual idea․ His wall drawings, executed by others following his precise directives, challenged traditional notions of authorship and artistic skill․ This dematerialization of the art object paved the way for conceptual and minimalist practices․

The accessibility of LeWitt’s instructions encouraged participation and collaboration, influencing artists to explore open-ended systems and process-based art․ His work legitimized the idea that the concept is the artwork, not merely a precursor to its physical manifestation․

Contemporary artists continue to draw inspiration from LeWitt’s approach, employing instruction-based works to explore themes of control, chance, and the relationship between artist, artwork, and audience․

Further Exploration of Sol LeWitt’s Work

LeWitt’s sculptures and drawings share a common thread of geometric abstraction, revealing his consistent exploration of form and structure through varied mediums․

His connection to Minimalism lies in the reduction of art to essential elements, emphasizing conceptual clarity and systematic approaches to creation․

Exploring LeWitt’s Sculptural Work Alongside Wall Drawings

Sol LeWitt’s sculptural endeavors, particularly his modular structures, offer a compelling parallel to his celebrated wall drawings, revealing a unified artistic vision․ Both bodies of work demonstrate a commitment to systematic, rule-based creation, where the idea precedes and dictates the execution․

His early Incomplete Open Cubes, for instance, showcase a similar exploration of geometric forms and seriality found in drawings like Wall Drawing #394․ The sculptures, constructed according to precise instructions, emphasize the conceptual framework over the artist’s hand․

Examining these three-dimensional forms alongside the two-dimensional wall drawings illuminates LeWitt’s broader interest in deconstructing and reconstructing space․ The instructions for both are paramount, allowing for variations in realization while maintaining the integrity of the original concept․ This interplay between instruction and interpretation is central to understanding LeWitt’s artistic process and enduring legacy․

The Connection Between LeWitt’s Drawings and Minimalism

Sol LeWitt’s wall drawings are inextricably linked to the Minimalist movement, yet transcend its limitations through their conceptual underpinnings and emphasis on instruction․ Like Minimalist sculpture, his drawings prioritize geometric abstraction, clean lines, and industrial materials, rejecting subjective expression․

However, LeWitt diverged from traditional Minimalism by dematerializing the artwork; the wall drawing is the instruction, not a fixed object․ This focus on the idea, rather than the physical manifestation, aligns with Conceptual art, but retains a strong visual connection to Minimalist aesthetics․

The systematic application of rules, reminiscent of artists like Donald Judd, is crucial in both․ Yet, LeWitt’s instructions invite participation, creating a dynamic interplay between artist, drafter, and viewer, expanding beyond the self-contained nature often associated with Minimalism․

Resources for Continued Learning About Sol LeWitt

Delving deeper into Sol LeWitt’s work requires exploring various resources․ The Yale University Art Gallery’s online archive is invaluable, offering extensive documentation of his wall drawings and their instructions, providing a comprehensive overview of his practice․

Numerous publications detail his artistic philosophy and techniques; searching art history databases and museum collections yields scholarly articles and exhibition catalogs․ Mass MoCA’s ongoing restoration projects offer insights into the practical challenges and preservation of these ephemeral artworks․

Furthermore, exploring books on Conceptual and Minimalist art provides crucial context․ Websites dedicated to contemporary art often feature articles and analyses of LeWitt’s influence, while online art platforms showcase images and videos of his installations, fostering a deeper understanding․