Vinayaka Chaturthi Katha Telugu PDF: A Comprehensive Plan
Finding Telugu PDF versions of the Vinayaka Chaturthi Katha is increasingly common․ Online resources and platforms like Canva offer digital access to this sacred narrative, aiding devotees in their celebrations and understanding․
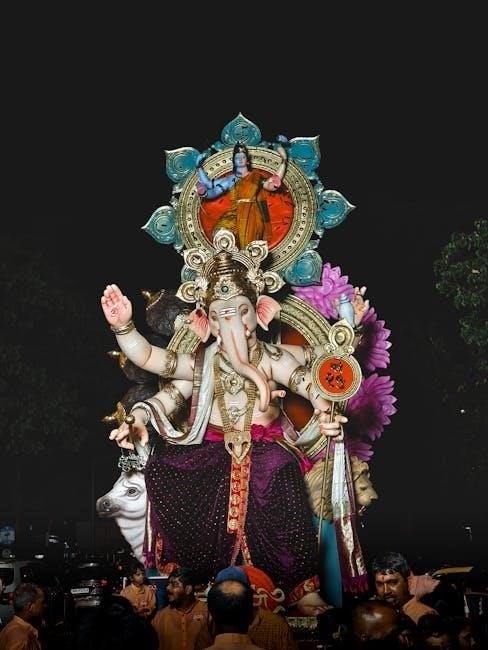
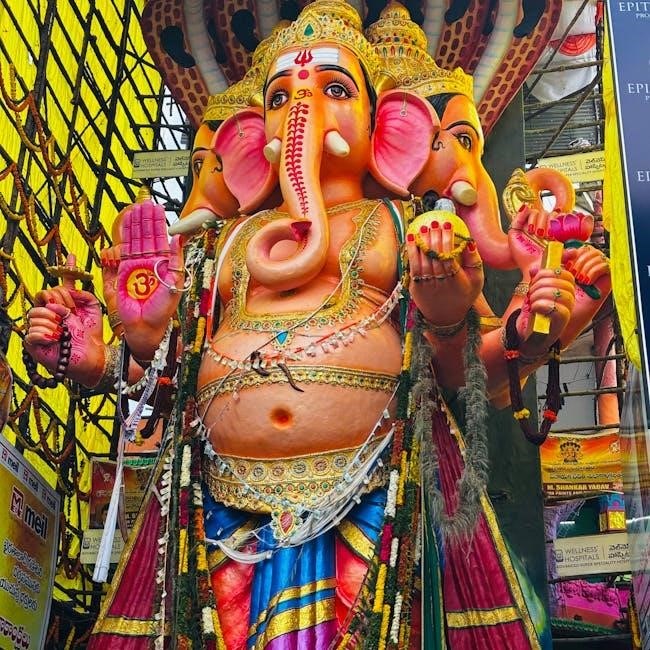
Vinayaka Chaturthi, widely known as Ganesh Chaturthi, is a profoundly significant Hindu festival celebrating the birth of Lord Ganesha, the elephant-headed deity revered as the remover of obstacles and the god of new beginnings․ This ten-day festival, Ganeshotsav, is particularly vibrant in the Indian states of Maharashtra, Andhra Pradesh, Telangana, and Karnataka, but its reverence extends across the globe wherever Hindu communities reside․
The festival’s core revolves around the installation of Ganesha idols in homes and public pandals (temporary structures), followed by daily prayers, rituals, and offerings․ A crucial element of the celebration is the recitation or listening to the Vinayaka Chaturthi Katha – the story of Ganesha’s birth and associated legends․ In Telugu-speaking regions, the Katha holds immense cultural and religious importance, often sought in PDF format for convenient access and preservation․
The festival isn’t merely a religious observance; it’s a joyous community event fostering unity and shared devotion․ Celebrities and community leaders actively participate, further amplifying the festival’s reach and cultural impact․ The anticipation for Vinayaka Chavithi 2025 is already building, with preparations underway to ensure a grand and meaningful celebration․
The Significance of the Katha (Story)
The Vinayaka Chaturthi Katha, or story, is central to the festival’s spiritual meaning․ It’s not simply a narrative recounting Ganesha’s birth; it’s a vehicle for understanding the deity’s attributes, his role in the cosmos, and the lessons he imparts to humanity․ The Katha details the circumstances surrounding Ganesha’s creation, including the conflict between Shiva and Parvati and the unique origin of his elephant head․
Within the Telugu tradition, the Katha is often recited by learned individuals, or read from texts, including increasingly popular Telugu PDF versions, ensuring accessibility for all devotees․ The story emphasizes themes of devotion, righteousness, and overcoming obstacles – qualities Ganesha embodies․ It explains the reasons behind the rituals performed during the festival, like offering modakas (sweets) and performing puja․
Furthermore, the Katha addresses the legend of the moon’s curse and Ganesha’s subsequent grace, explaining why Ganesha is not directly worshipped on certain lunar days․ Accessing the Vinayaka Chaturthi Katha in Telugu PDF format allows families to preserve and share this vital part of their cultural and religious heritage, strengthening their connection to the divine․
Historical Background of the Festival
Vinayaka Chaturthi’s history is a fascinating blend of ancient traditions and more recent socio-political influences․ While the worship of Ganesha dates back to the 6th century CE, the festival as we know it today gained prominence during the Maratha period under Shivaji Maharaj․ He is credited with establishing Vinayaka Chaturthi as a public festival to foster unity and national spirit․
However, the festival truly blossomed into a widespread celebration in 1893, thanks to the efforts of Lokmanya Tilak․ He transformed it into a platform for bringing people together during a time of political unrest, using it to promote Indian nationalism․ The tradition then spread throughout India, including the Telugu-speaking regions․
The availability of the Vinayaka Chaturthi Katha in Telugu PDF format reflects this evolution․ Historically, the Katha was passed down orally or through handwritten manuscripts․ Now, digital accessibility ensures wider dissemination of the story and the festival’s underlying principles․ This democratization of knowledge allows more individuals to connect with the historical and spiritual roots of Vinayaka Chaturthi, preserving its legacy for future generations․
Vinayaka Chavithi 2025: Dates and Celebrations
Vinayaka Chavithi, or Ganesh Chaturthi, in 2025 will be celebrated on Wednesday, August 27th․ The ten-day Ganeshotsav festival will conclude on Saturday, September 6th, 2025, with the immersion of Ganesha idols․ Celebrations are particularly vibrant in Andhra Pradesh and Telangana, where the festival holds immense cultural significance․
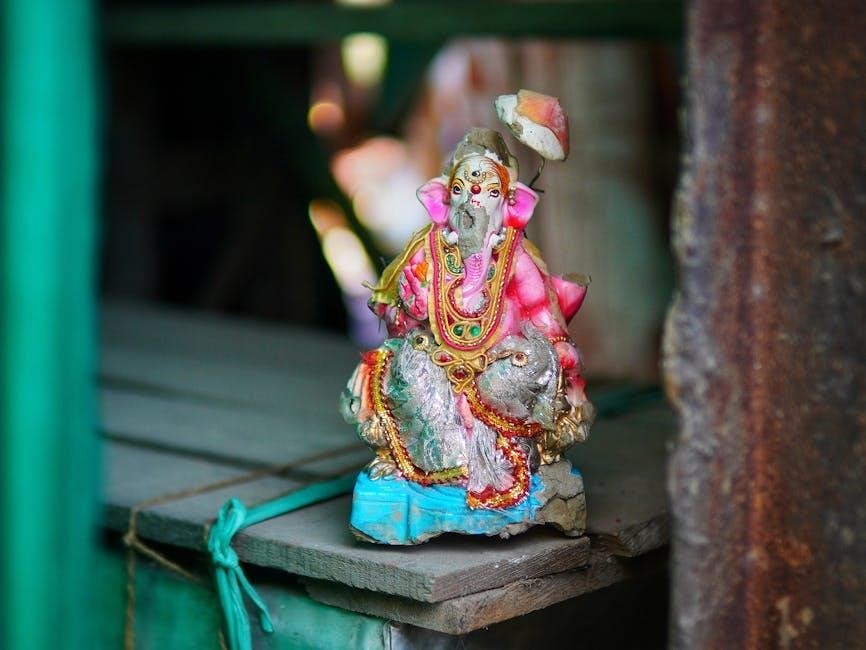
Preparations begin weeks in advance, with families commissioning clay idols of Ganesha and decorating their homes․ The Vinayaka Chaturthi Katha in Telugu PDF becomes a central element during the puja, with families gathering to read and reflect upon the story of Ganesha’s birth and adventures․ This digital format allows for easy access and sharing of the narrative․
Alongside religious observances, the festival is marked by community gatherings, cultural performances, and the distribution of prasad (sweets, especially modakas)․ South Indian celebrities actively participate, sharing festive greetings and showcasing traditions․ The widespread availability of the Katha in Telugu PDF format ensures the story remains accessible to all, fostering a deeper connection to the festival’s rich heritage․
The Story of Ganesha’s Birth: Core Narrative
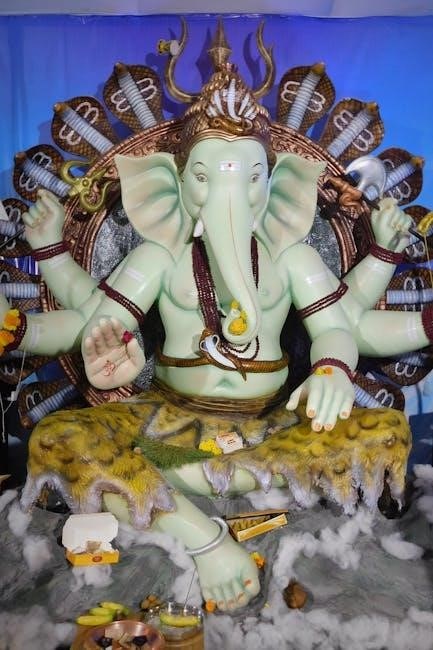
The Vinayaka Chaturthi Katha, readily available in Telugu PDF format, centers around the divine birth of Lord Ganesha․ The narrative begins with Goddess Parvati creating Ganesha from the turmeric paste she used for her bath, imbuing him with life to guard her privacy․ This act, however, displeased Lord Shiva, who, unaware of the situation, severed Ganesha’s head․
Distraught, Parvati demanded Shiva restore their son’s life․ Shiva, complying with her wish, instructed his attendants to bring the head of the first creature they encountered facing north․ This led to the head of an elephant being placed on Ganesha’s body, thus giving him his iconic form․ The Telugu PDF versions often detail this sequence with intricate descriptions and illustrations․
The Katha emphasizes themes of parental love, divine intervention, and acceptance of the unexpected․ Accessing the story through a Telugu PDF allows devotees to easily follow the narrative during puja and understand the profound symbolism embedded within Ganesha’s birth story, reinforcing the festival’s spiritual core․
The Legend of Ganesha’s Elephant Head
The Telugu PDF versions of the Vinayaka Chaturthi Katha deeply explore the significance of Lord Ganesha’s elephant head․ Following the tragic incident where Shiva severed young Ganesha’s head, the quest for a replacement led his attendants northward․ They encountered an elephant facing north, considered auspicious, and brought its head back to Shiva․
The narrative details Shiva reattaching the elephant’s head to Ganesha’s body, bestowing upon him his unique and recognizable form․ This wasn’t merely a restoration; it was a divine transformation․ The elephant head symbolizes wisdom, strength, and good luck – qualities central to Ganesha’s persona․ The Katha emphasizes that this form wasn’t a punishment, but a blessing in disguise․
PDF texts often include interpretations of why an elephant head was chosen, linking it to Ganesha’s role as the remover of obstacles․ The elephant’s large ears represent attentive listening, while the trunk symbolizes humility and adaptability․ Studying these details within the Telugu PDF enhances understanding of the profound symbolism woven into this pivotal moment in Ganesha’s legend․
The Moon’s Curse and its Relation to Ganesha
Telugu PDF versions of the Vinayaka Chaturthi Katha meticulously detail the story of the moon’s curse and its connection to Lord Ganesha․ The narrative recounts how Ganesha, while riding his mouse, was mocked by the moon․ This ridicule deeply offended Ganesha, leading to a curse that decreed anyone observing the moon on Vinayaka Chaturthi would be falsely accused of theft․
The Katha explains that this curse wasn’t malicious, but a demonstration of Ganesha’s power to protect his devotees from negativity․ The Telugu texts often emphasize the importance of avoiding moon sightings on this day, offering explanations for the rationale behind this tradition․ Some versions detail how Ganesha, upon realizing his impulsive action, offered a solution – observing a fast or performing a specific ritual to negate the curse’s effects․
PDF resources frequently include interpretations of the moon’s symbolism – representing ego and illusion – and how Ganesha’s response highlights the need to overcome these traits․ Understanding this legend within the Telugu context provides a deeper appreciation for the cultural nuances and spiritual significance of Vinayaka Chaturthi․
Different Versions of the Vinayaka Chaturthi Katha
Telugu PDF compilations of the Vinayaka Chaturthi Katha reveal a fascinating array of variations in the core narrative․ While the central theme of Ganesha’s birth and his role as the remover of obstacles remains consistent, details surrounding the events leading to his elephant head and the subsequent interactions with deities differ across texts․
Some PDFs present a more elaborate account of Parvati’s desire for a son and Shiva’s initial reluctance․ Others focus intensely on the role of Nandi, Shiva’s bull, in the incident involving Ganesha’s head․ The story of the moon’s curse, as previously mentioned, also exhibits variations in its detailing and the prescribed remedies․
These differing versions aren’t contradictions, but rather reflect the oral tradition from which the Katha evolved․ Telugu scholars and storytellers have enriched the narrative over centuries, adapting it to regional customs and beliefs․ Accessing multiple PDF versions allows devotees to appreciate the richness and flexibility of this beloved legend, fostering a deeper connection to its spiritual essence․
The Role of Shounaka and the Sages
Telugu PDF versions of the Vinayaka Chaturthi Katha consistently highlight the pivotal role of Shounaka and other revered sages in preserving and disseminating the story․ The narrative often begins with Shounaka, a prominent sage, being approached by other sages seeking knowledge about the origins of Ganesha and the significance of the festival․
These sages, representing a lineage of spiritual wisdom, inquire about the circumstances surrounding Ganesha’s birth, the acquisition of his elephant head, and the reason for the moon’s curse․ Shounaka then recounts the complete Katha, acting as a conduit for divine knowledge․ This framing device emphasizes the importance of oral tradition and the transmission of sacred stories through generations of enlightened individuals․
The inclusion of Shounaka and the sages within the PDF texts isn’t merely a literary convention; it underscores the authority and authenticity of the narrative․ It positions the Katha as a timeless teaching, validated by the wisdom of ancient seers and intended for the spiritual upliftment of all devotees․
Symbolism within the Vinayaka Chaturthi Katha
Telugu PDF versions of the Vinayaka Chaturthi Katha are rich with symbolism, offering layers of meaning beyond the literal narrative․ Ganesha’s elephant head, for instance, represents wisdom, intellect, and the ability to overcome obstacles – qualities devotees seek to embody․
The story’s emphasis on Modakas (sweets) symbolizes the rewards of devotion and the sweetness of spiritual realization․ The moon’s curse and subsequent repentance highlight the importance of humility and seeking forgiveness․ Even the act of creating and immersing the Ganesha idol carries symbolic weight, representing the cycle of creation and dissolution․
These PDF texts often include interpretations of these symbols, enhancing the reader’s understanding of the Katha’s deeper philosophical implications․ The narrative isn’t simply a story; it’s a visual and conceptual guide to spiritual growth․ The detailed descriptions within the Katha, readily available in digital formats, invite contemplation and a deeper connection to the divine․
The Importance of Modakas (Sweets)
Within the Vinayaka Chaturthi Katha, readily accessible in Telugu PDF formats, Modakas hold a central symbolic position․ These sweet dumplings aren’t merely offerings; they represent the fruits of spiritual practice and the rewards of devotion to Lord Ganesha․
The story details how Ganesha was pacified by his mother, Parvati, with Modakas after being upset by the moon’s mockery․ This highlights the power of love and nourishment – both physical and spiritual – in overcoming adversity․ The act of preparing and sharing Modakas during Vinayaka Chavithi is therefore considered highly auspicious․
PDF versions of the Katha often detail specific recipes and the significance of each ingredient used in making Modakas․ They symbolize prosperity, happiness, and the sweetness of life․ Offering Modakas to Ganesha is believed to remove obstacles and bestow blessings․ The Katha emphasizes that devotion, like a perfectly crafted Modaka, requires dedication and care․
Rituals and Traditions Associated with the Katha
Telugu PDF versions of the Vinayaka Chaturthi Katha detail a rich tapestry of rituals and traditions surrounding its recitation and celebration․ Traditionally, the Katha is read or listened to collectively, often by families gathered together, emphasizing community and shared devotion․
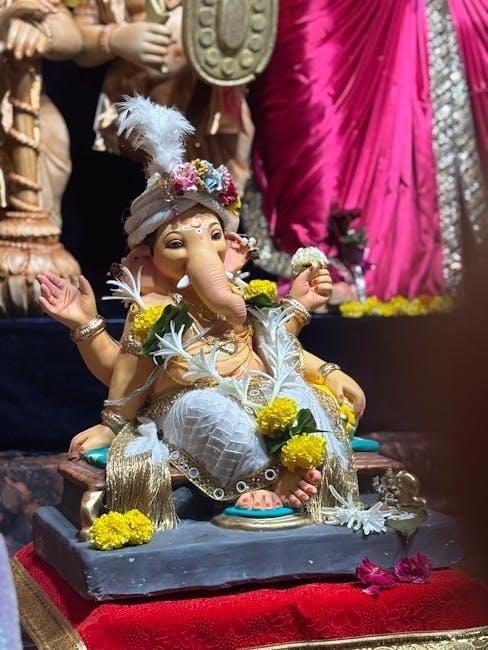
Before commencing the Katha, a beautifully decorated idol of Lord Ganesha is installed․ Offerings of flowers, fruits, and, crucially, Modakas are presented․ The recitation itself is often accompanied by devotional songs (bhajans) and the chanting of mantras․ Many families observe a fast (vrat) during the day, breaking it only after the Katha concludes․
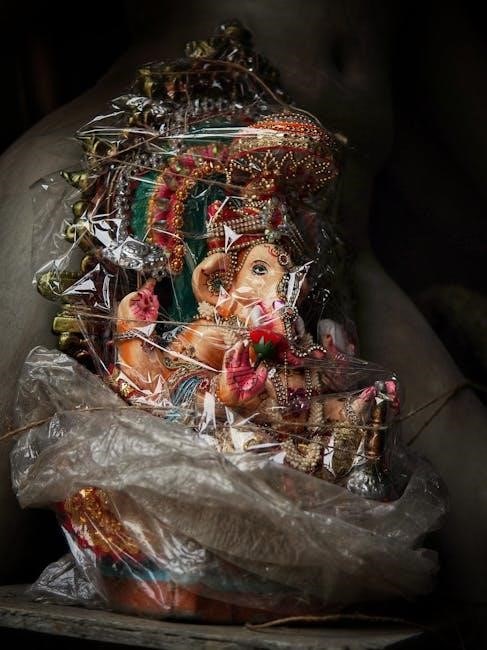
PDF texts frequently outline specific procedures for the Puja (worship) and the significance of each step․ The immersion of the idol, a poignant conclusion to the festival, symbolizes the cyclical nature of creation and dissolution․ These traditions, meticulously preserved in the Katha’s digital versions, reinforce faith and cultural identity, ensuring the enduring legacy of Vinayaka Chavithi․
Vinayaka Chavithi Celebrations in Telugu-Speaking Regions
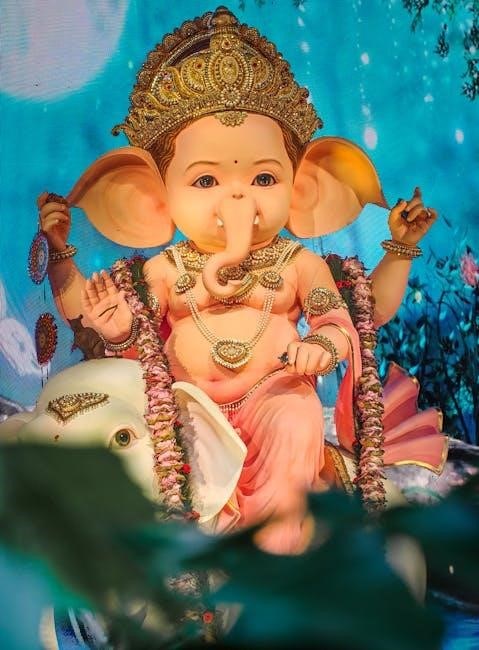
Vinayaka Chavithi, deeply ingrained in the cultural fabric of Andhra Pradesh and Telangana, witnesses vibrant celebrations․ Access to the Vinayaka Chaturthi Katha in Telugu PDF format significantly enhances these festivities, allowing widespread access to the sacred narrative․
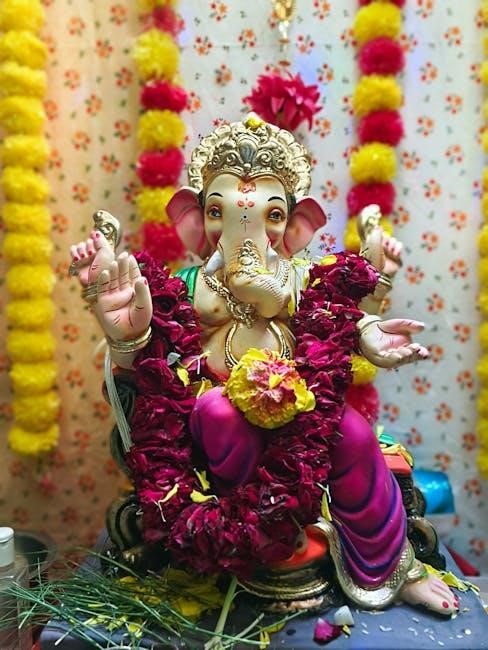
Homes and public spaces are adorned with colorful decorations and illuminated with lights․ Elaborate idols of Lord Ganesha, crafted from clay, are installed with great reverence․ The recitation of the Katha, often from digitally accessed PDF versions, forms a central part of the celebrations, narrating Ganesha’s birth and legends․
Community gatherings and processions are common, with devotees carrying idols to immerse them in rivers, lakes, or the sea․ Cultural programs, including music and dance performances, add to the festive atmosphere․ The availability of the Katha in Telugu PDF ensures that the story and its associated values are passed down through generations, strengthening cultural bonds and devotion․
Celebrity Celebrations of Vinayaka Chavithi 2025
South Indian celebrities actively participate in Vinayaka Chavithi celebrations, often sharing their devotion and festive wishes on social media․ Many embrace the tradition of reading or listening to the Vinayaka Chaturthi Katha, with Telugu PDF versions becoming a convenient way to access the story․
Stars like Chiranjeevi, Mohanlal, and Jr NTR have previously extended greetings, showcasing the festival’s widespread appeal․ Mrunal Thakur’s display of festive attire highlights the cultural significance of the occasion․ These public figures often perform puja at home, sometimes with family members, mirroring traditions observed by devotees accessing the Katha in Telugu PDF format․
The accessibility of the Katha through digital formats like PDF allows celebrities, even with busy schedules, to connect with the narrative and share its essence with their fans․ This reinforces the festival’s cultural importance and encourages broader participation in the traditions surrounding Vinayaka Chavithi․
Community Participation: Interfaith Celebrations
Vinayaka Chavithi increasingly showcases beautiful examples of community harmony, with interfaith participation becoming a notable feature․ This inclusivity extends to sharing the spirit of the festival and, importantly, the Vinayaka Chaturthi Katha itself․
Reports indicate a significant instance of a large Muslim congregation joining Vinayaka Chavithi celebrations, demonstrating a spirit of unity and respect․ The accessibility of the Katha in Telugu PDF format facilitates wider understanding, allowing individuals from diverse backgrounds to engage with the story’s core message․
Providing the Katha in readily available digital formats, like PDFs, removes language and access barriers, fostering greater inclusivity․ This allows communities to collectively appreciate the narrative’s symbolism and moral lessons․ Such participation strengthens social bonds and promotes a shared cultural experience, proving the Katha’s universal appeal beyond religious boundaries․
The ease of sharing Telugu PDF versions of the Katha online further encourages this interfaith dialogue and understanding․
Finding Vinayaka Chaturthi Katha in Telugu PDF Format
Locating the Vinayaka Chaturthi Katha in Telugu PDF format has become remarkably accessible thanks to the digital age․ Numerous online resources now offer downloadable versions of this sacred text, catering to devotees seeking convenient access․
A simple online search using keywords like “Vinayaka Chavithi Katha Telugu PDF” yields a variety of results, including websites dedicated to Hindu scriptures and cultural resources․ These platforms often provide multiple versions of the Katha, allowing users to choose based on preference or specific traditions․
Furthermore, platforms like Canva, while primarily design-focused, can be utilized to create visually appealing digital versions of the Katha, which can then be saved and shared as PDFs․ This allows for personalized presentations of the story․
Devotees can also find Telugu PDF versions shared within social media groups and online forums dedicated to Hindu festivals․ Ensuring the source is reputable is crucial when downloading any digital content․
Online Resources for Telugu Katha Texts
Several dedicated online resources provide access to the Vinayaka Chaturthi Katha in Telugu text and PDF formats․ These platforms cater to the growing demand for digital access to religious scriptures and stories․
Websites specializing in Hindu religious texts frequently host the Katha, offering options for both reading online and downloading as a PDF․ These resources often include transliterations and translations, aiding understanding for those less familiar with the Telugu script․
Digital libraries and archives focused on Indian culture and literature are also valuable sources․ These repositories often contain scanned copies of traditional texts, including the Vinayaka Chaturthi Katha, available for download․
Furthermore, various blogs and devotional websites dedicated to Lord Ganesha regularly publish the Katha in Telugu, sometimes accompanied by audio recitations․ Social media platforms and online forums also serve as distribution points, though verifying source authenticity is essential․
Exploring these online avenues ensures devotees can readily access and engage with the sacred narrative of Ganesha’s birth and significance․
Canva and Visual Representations of the Katha
Canva, a versatile graphic design platform, offers innovative ways to visually represent the Vinayaka Chaturthi Katha, enhancing engagement and understanding․ While not a direct repository for Telugu PDF texts, it empowers users to create compelling visual narratives based on the story․
Users can design visually stunning presentations summarizing the Katha’s key events and characters․ Canva’s extensive library of images, illustrations, and templates facilitates the creation of eye-catching storyboards and infographics․
The platform allows for incorporating Telugu text into designs, enabling the creation of visually appealing posters, social media graphics, and even short animated videos retelling the story․ This is particularly useful for educational purposes or sharing the Katha with a wider audience․
Furthermore, Canva supports collaborative design, allowing families and communities to work together on creating visual representations of the Vinayaka Chaturthi Katha․ This fosters a sense of shared devotion and creativity․
By leveraging Canva’s tools, devotees can transform the traditional narrative into a dynamic and accessible visual experience․
The Cultural Impact of Vinayaka Chaturthi
Vinayaka Chaturthi, and consequently the Vinayaka Chaturthi Katha, profoundly impacts culture, particularly within Telugu-speaking regions․ The festival fosters community spirit, evidenced by widespread celebrations and interfaith participation, as seen with Muslim community involvement․
The accessibility of the Katha, including its increasing availability in Telugu PDF format, strengthens cultural transmission across generations․ Digital platforms and resources like Canva, while not hosting the PDFs directly, aid in visually disseminating the story’s core values․
Celebrity endorsements, from South Indian film stars sharing festive wishes to figures like MP Kavitha and Vice President Venkaiah Naidu observing traditions, amplify the festival’s cultural significance․
The Katha reinforces values of wisdom, devotion, and overcoming obstacles, deeply embedded in Hindu philosophy․ The widespread sharing of the story, even through modern mediums, ensures its continued relevance․
Ultimately, Vinayaka Chaturthi isn’t merely a religious observance; it’s a vibrant cultural expression that unites communities and preserves cherished traditions․
The Enduring Legacy of the Katha
The Vinayaka Chaturthi Katha, particularly in its Telugu iterations and increasingly accessible PDF formats, demonstrates a remarkable enduring legacy․ Its core narrative of Ganesha’s birth and adventures continues to resonate across generations, solidifying its place in cultural consciousness․
The story’s adaptability – existing in various versions – ensures its continued relevance․ Modern tools like Canva, while focused on visual design, indirectly support the Katha’s dissemination by enabling creative representations of its themes․
Celebrity participation, from festive wishes shared by South Indian stars to personal observances, reinforces the Katha’s cultural importance․ The festival’s inclusive spirit, exemplified by interfaith celebrations, further strengthens its legacy․
The ease of access to Telugu PDF versions ensures the story remains readily available, fostering devotion and understanding․ This accessibility is crucial for preserving the narrative’s nuances and symbolism․
Ultimately, the Vinayaka Chaturthi Katha isn’t simply a story; it’s a living tradition, continually renewed and reinterpreted, guaranteeing its enduring presence for years to come․