Singer Sewing Machine User Guide: A Comprehensive Overview (12/10/2025)
Welcome! This guide provides detailed instructions for Singer sewing machines‚ covering everything from basic operation to advanced techniques‚ ensuring a seamless creative journey.
Explore a wide range of models – mechanical‚ computerized‚ embroidery‚ and heavy-duty – with access to downloadable manuals and updates for optimal performance.
Discover essential accessories‚ troubleshooting tips‚ and support resources to unlock your sewing potential and maintain your machine for years to come.
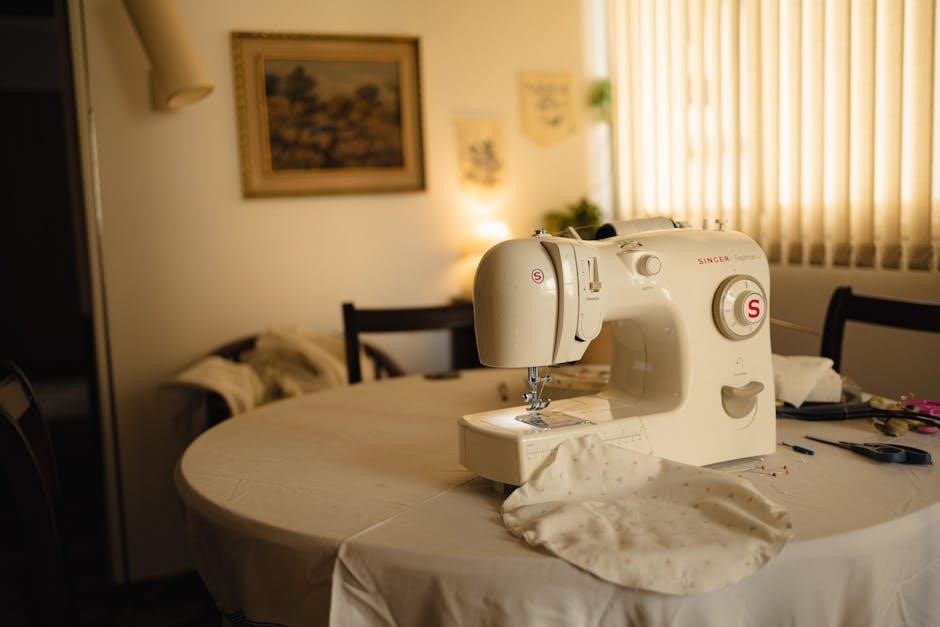
Singer sewing machines represent a cornerstone of the home crafting world‚ offering a diverse range of models to suit every skill level and project need. From beginner-friendly mechanical machines to sophisticated computerized and embroidery options‚ Singer consistently delivers innovation and reliability.
This user guide serves as your comprehensive companion‚ designed to unlock the full potential of your Singer machine. Whether you’re a seasoned seamstress or just starting your sewing adventure‚ understanding your machine’s capabilities is key to achieving professional results.
Singer’s legacy of “firsts” – including the zig-zag and electronic machines – continues today with mobile apps and a commitment to user-friendly design. Explore the world of sewing with confidence‚ knowing you have the resources to create beautiful and lasting projects.
History of Singer: Innovation and Legacy
Singer’s history is deeply interwoven with the evolution of modern sewing. Founded in 1851‚ the company quickly revolutionized garment production with the first commercially successful sewing machine. This innovation moved sewing from a laborious handcraft to a faster‚ more efficient process.
Throughout the 20th and 21st centuries‚ Singer continued to pioneer advancements‚ including the world’s first zig-zag machine and electronic models. They’ve consistently adapted to changing needs‚ recently introducing a sewing assistant app for mobile devices.
This dedication to innovation isn’t just about technology; it’s about empowering creators. Singer’s legacy is built on providing reliable‚ accessible tools that have fueled generations of sewing enthusiasts and professionals alike‚ shaping the world of fashion and crafting.
Types of Singer Sewing Machines Available
Singer offers a diverse range of machines catering to all skill levels and project needs. Mechanical sewing machines are ideal for beginners‚ providing reliable‚ straightforward functionality without complex features. Computerized sewing machines offer greater precision‚ automated features‚ and a wider stitch selection.
For intricate designs‚ embroidery machines unlock creative possibilities with built-in patterns and customization options. Heavy-duty sewing machines tackle tough fabrics like denim and leather with ease‚ perfect for upholstery or crafting durable goods.
Whether you’re a novice or an experienced sewist‚ Singer has a model to match your aspirations‚ ensuring a fulfilling and productive sewing experience.
Mechanical Sewing Machines
Singer’s mechanical sewing machines represent a classic approach to sewing‚ prized for their simplicity and durability. These machines are perfect for beginners learning the fundamentals‚ offering direct control over stitch formation and speed. They typically feature essential stitches – straight‚ zigzag‚ and buttonhole – providing versatility for everyday projects.
Mechanical models require manual adjustments for stitch length and width‚ fostering a deeper understanding of the sewing process. Their robust construction ensures long-lasting performance with minimal maintenance. Ideal for basic alterations‚ garment construction‚ and crafting‚ these machines offer a reliable and cost-effective entry point into the world of sewing.
Computerized Sewing Machines
Singer’s computerized sewing machines blend traditional sewing with modern technology‚ offering enhanced features and convenience. These machines boast a wide array of built-in stitches‚ often exceeding 100‚ catering to diverse project needs. Automated functions like needle threading‚ stitch selection‚ and speed control simplify the sewing experience‚ particularly for complex designs.
Computerized models often include LCD screens for easy navigation and customization. They excel in precision and consistency‚ making them suitable for quilting‚ intricate garment construction‚ and decorative sewing. While offering more features‚ they remain user-friendly‚ empowering both beginners and experienced sewists to explore their creativity with ease and efficiency.
Embroidery Machines
Singer’s embroidery machines unlock a world of personalized creativity‚ allowing users to design and stitch intricate patterns onto fabric. These machines combine sewing capabilities with specialized embroidery features‚ including multiple hoops sizes and built-in designs. Software compatibility enables importing custom designs‚ expanding artistic possibilities.
Embroidery machines are ideal for monogramming‚ creating custom apparel‚ and adding decorative embellishments to home décor. They often feature automatic needle threading‚ bobbin winding‚ and stitch selection for streamlined operation. While requiring a learning curve‚ the ability to create unique‚ personalized items makes Singer’s embroidery machines a rewarding investment for crafting enthusiasts.
Heavy Duty Sewing Machines
Singer’s Heavy Duty sewing machines are engineered for tackling tough projects‚ offering increased power and durability compared to standard models. These machines excel at working with thick fabrics like denim‚ leather‚ and canvas‚ making them perfect for upholstery‚ crafting bags‚ and repairing heavy-duty materials.
Featuring a robust motor and metal frame‚ Heavy Duty machines provide consistent performance and long-lasting reliability. They often include a higher presser foot lift and specialized needles to accommodate thicker fabrics. These machines are a great choice for sewers who frequently work with challenging materials or require a machine capable of handling demanding projects‚ delivering professional results with ease.
Understanding Your Singer Sewing Machine
Familiarize yourself with key components‚ powering on procedures‚ and threading techniques to unlock your machine’s full potential for successful and enjoyable sewing projects.
Key Components and Their Functions
Understanding the parts of your Singer machine is crucial for effective operation. The power switch initiates all functions‚ while the handwheel allows manual control for precise stitching. The bobbin winder prepares the bobbin for seamless thread delivery.
The presser foot secures fabric during sewing‚ with various types available for specialized tasks. The needle pierces the fabric‚ guided by the needle clamp and needle plate. Adjust the stitch length and stitch width dials to customize your seams.
The tension dial regulates thread balance‚ preventing puckering or looping. The feed dogs advance fabric evenly‚ and the reverse lever enables backstitching for secure seam endings. Finally‚ the spool pin holds the thread spool‚ ensuring smooth feeding through the machine.
Powering On and Basic Operation
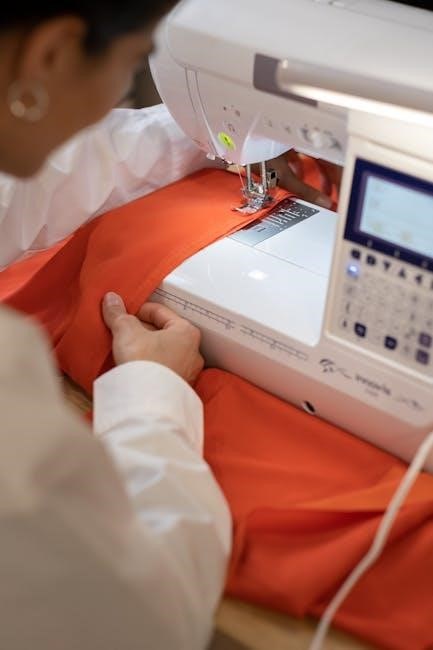
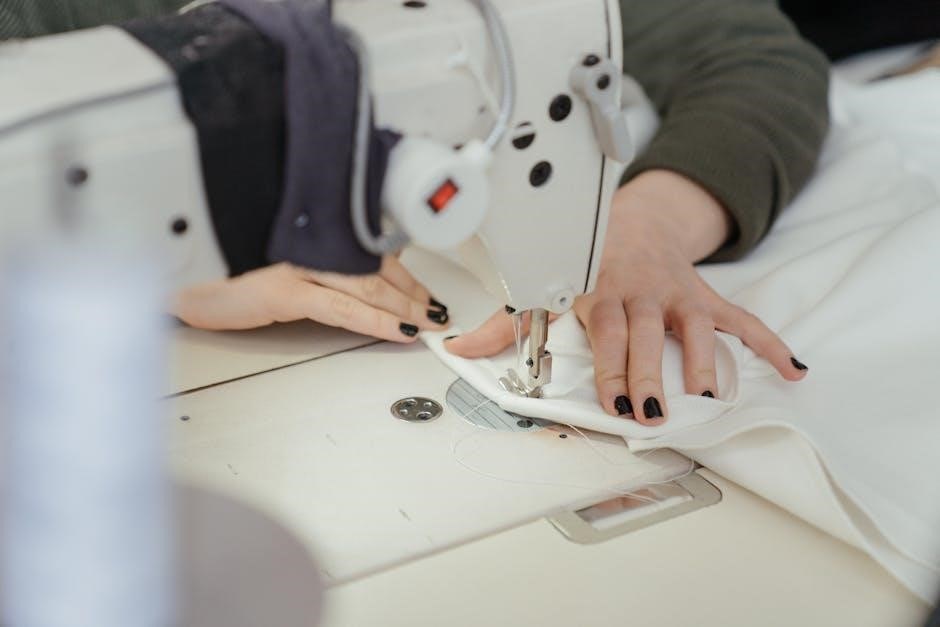
Initiating your Singer begins with connecting the power cord and switching the machine ON using the power switch. Ensure the handwheel is turned towards you for safe operation. Gently depress the foot pedal to start stitching; the speed is directly proportional to pedal pressure.
Before sewing‚ always raise the presser foot to prevent damage. Position your fabric under the presser foot‚ aligning the edge with your desired seam allowance. Lower the foot and begin sewing‚ guiding the fabric gently – never pull or push.
Utilize the reverse lever for backstitching at the beginning and end of seams for added security. Remember to lift the presser foot between fabric sections to pivot easily. Practice these steps to gain confidence and control.
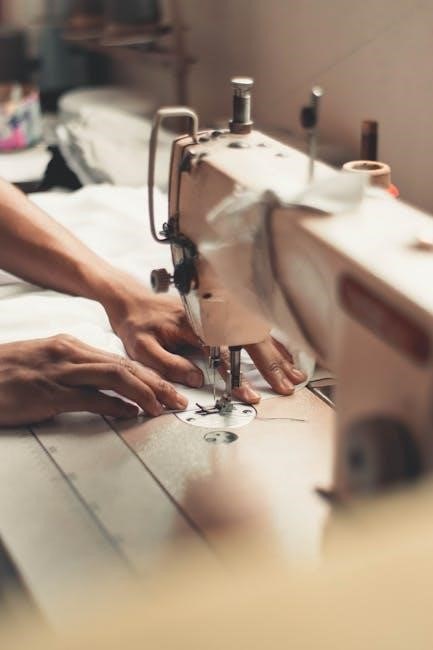
Threading the Machine: A Step-by-Step Guide
Proper threading is crucial for optimal sewing. Begin by raising the presser foot and the needle to its highest position. Guide the thread from the spool pin‚ through the first thread guide‚ and then down through the tension discs – ensuring it’s firmly seated.
Next‚ lead the thread through the take-up lever and down to the needle. Use the needle threader if needed! Finally‚ thread the needle from front to back. For the bobbin thread‚ follow your machine’s specific bobbin winding and insertion instructions (top or front-loading).
Draw up the bobbin thread by holding the needle thread and gently turning the handwheel. Confirm both threads are flowing freely before starting to sew.
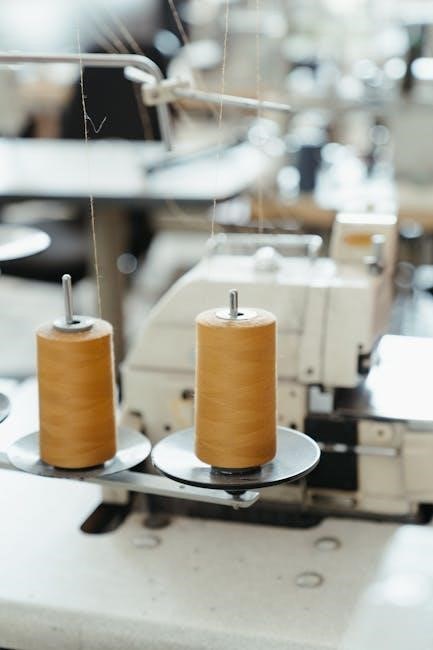
Winding the Bobbin
Winding the bobbin correctly ensures consistent stitch quality. Place the thread spool on the spool pin. Guide the thread through the designated bobbin winding tension disc. Then‚ thread the end of the thread through several holes in the bobbin itself‚ securing it firmly.
Place the bobbin onto the bobbin winder spindle. Push the bobbin winder to the right to engage it. Start the machine by gently pressing the foot pedal. Allow the bobbin to wind evenly‚ stopping when full.
Remove the bobbin and carefully trim the thread. Depending on your machine‚ insert the bobbin into either a top-load or front-load system.
Top-Load Bobbin Systems
Top-load bobbin systems‚ like those found in the Husqvarna Viking Tribute 150C‚ offer convenient and visible bobbin access. Open the clear bobbin cover located on the top of the machine. Insert the bobbin with the thread unwinding in a clockwise direction‚ ensuring it seats correctly.
Guide the thread through the tension slot and then through the thread guide. Gently pull a few inches of thread to the needle area. These systems utilize Husqvarna Bobbins for optimal performance.
Always use genuine Singer or Husqvarna Viking bobbins to prevent issues like skipped stitches or thread nests. Proper bobbin insertion is crucial for smooth sewing.
Front-Load Bobbin Systems
Front-load bobbin systems‚ common in many Singer models‚ require accessing the bobbin through a front-facing compartment. Locate the bobbin cover on the front of the machine and gently open it. Insert the bobbin‚ ensuring the thread unwinds in the correct direction – typically counter-clockwise‚ but consult your machine’s manual.

Thread the bobbin through the tension spring and guide it along the designated path. Pull several inches of thread through the thread guide before closing the bobbin cover securely.
Using the correct bobbin type is vital for proper tension and stitch quality. Refer to your user manual for specific bobbin recommendations.
Essential Sewing Techniques
Master fundamental skills! Learn stitch selection‚ seam allowance adjustments‚ and fabric/needle pairing for optimal results with your Singer machine.
Basic Stitch Selection and Adjustment
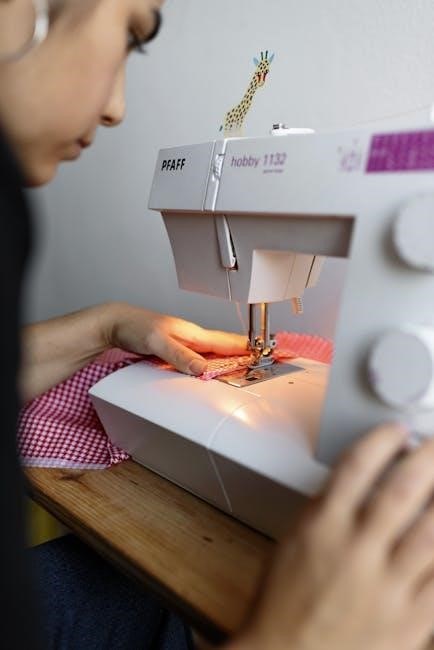
Unlocking Stitch Versatility: Your Singer sewing machine offers a diverse range of stitches‚ each designed for specific applications. Begin by familiarizing yourself with the stitch selection dial or digital interface. Common stitches include the straight stitch‚ ideal for seams‚ and the zigzag stitch‚ perfect for finishing raw edges and creating decorative elements.
Adjusting Stitch Length and Width: Mastering stitch adjustment is crucial for achieving professional results. The stitch length determines the distance between stitches; shorter lengths are suitable for delicate fabrics‚ while longer lengths are better for heavier materials. Similarly‚ the stitch width controls the breadth of zigzag or decorative stitches. Experiment with different settings on scrap fabric to understand their impact.
Testing and Fine-Tuning: Always test your chosen stitch and settings on a fabric scrap before starting your project. This allows you to fine-tune the length and width for optimal appearance and durability. Refer to your machine’s manual for specific stitch recommendations based on fabric type and desired outcome.
Seam Allowances and Stitch Length
Precision in Sewing: Understanding seam allowances and stitch length is fundamental to garment construction and quilting. A seam allowance is the distance between the raw edge of the fabric and the stitching line‚ typically 5/8 inch for clothing. Consistent seam allowances ensure accurate pattern matching and a professional finish.
Stitch Length Considerations: Stitch length impacts fabric strength and appearance. A standard stitch length of 2.5mm is suitable for most woven fabrics. For lightweight or delicate fabrics‚ reduce the stitch length to 2mm to prevent puckering. Conversely‚ increase the stitch length to 3mm or more for heavier fabrics like denim or canvas.
Adjusting for Different Projects: Quilters often use a slightly shorter stitch length (around 2mm) for increased durability. Always test stitch settings on scrap fabric before sewing your project to ensure optimal results and prevent unwanted issues.
Fabric Selection and Needle Types
Matching Materials for Success: Choosing the right fabric and needle combination is crucial for achieving quality stitches and preventing damage to your machine. Lightweight fabrics like chiffon require fine needles (size 60/8) to avoid snagging or puckering. Medium-weight cottons work well with universal needles (size 80/12).
Needle Types Explained: Denim and canvas necessitate sturdy needles (size 90/14 or 100/16) designed to penetrate thicker materials. Ballpoint needles are ideal for knit fabrics‚ preventing skipped stitches by gliding between the fibers. Stretch needles are specifically designed for highly elastic fabrics like spandex.
Regular Replacement is Key: Always replace needles after eight hours of sewing or when they become dull to maintain stitch quality and protect your machine. A fresh needle ensures smooth fabric feeding and prevents thread breakage.

Maintenance and Troubleshooting
Keep Sewing Smoothly! Regular cleaning‚ proper oiling‚ and swift troubleshooting of issues like thread breaks or skipped stitches ensure longevity and peak performance.
Cleaning Your Singer Sewing Machine
Maintaining a clean machine is crucial for optimal performance and longevity. Regularly remove lint‚ dust‚ and thread debris from all areas‚ especially the bobbin case and feed dogs. Always disconnect the power supply before cleaning!
Use a soft brush‚ or the brush included with your machine‚ to gently dislodge lint. A vacuum cleaner with a brush attachment can also be helpful. For stubborn buildup‚ a cotton swab dipped in sewing machine oil can be used cautiously.
Pay attention to the needle plate area and around the tension discs. Avoid using compressed air‚ as it can push debris further into the machine. Consistent cleaning prevents jams‚ skipped stitches‚ and ensures smooth operation‚ extending the life of your Singer.
Oil and Lubrication
Proper lubrication is vital for a Singer sewing machine’s smooth operation and preventing wear and tear. Use only sewing machine oil specifically designed for this purpose; other oils can cause buildup and damage; Always refer to your machine’s manual for specific oiling points.
Typically‚ oiling points include the bobbin race‚ hook assembly‚ and any areas indicated in the manual. Apply oil sparingly‚ using a needle oiler for precision. Wipe away any excess oil to prevent staining fabric.
Avoid over-oiling‚ as this can attract lint and create a sticky residue. Regular oiling‚ as recommended by Singer‚ ensures effortless stitching and prolongs the machine’s lifespan‚ maintaining its peak performance for years to come.
Troubleshooting Common Issues
Encountering problems? This section addresses frequent Singer sewing machine issues. Thread breakage often stems from incorrect threading‚ a dull needle‚ or improper tension. Skipped stitches can indicate a bent needle‚ incorrect needle size for the fabric‚ or timing issues – consult your manual.
Bobbin problems‚ like uneven stitching or empty bobbin cases‚ may result from incorrect bobbin winding or improper bobbin insertion. Always ensure the bobbin is correctly seated and the thread flows smoothly.
Refer to your machine’s manual for detailed troubleshooting steps. If issues persist‚ contact Singer’s support for professional assistance‚ ensuring your machine remains in optimal working condition.
Thread Breakage
Frequent thread breaks? Several factors can cause this frustrating issue. First‚ re-thread the machine completely‚ ensuring the thread is properly seated in all guides and the tension discs. A dull or damaged needle is a common culprit; replace it with a new one of the correct type and size for your fabric.
Incorrect tension – too tight or too loose – can also lead to breakage. Adjust the tension dial incrementally‚ testing with scrap fabric. Ensure you’re using quality thread compatible with your machine. Finally‚ check for burrs or rough spots on any thread guides.
Skipped Stitches
Experiencing skipped stitches? This often indicates a problem with the needle or its interaction with the machine. Begin by replacing the needle with a fresh one‚ ensuring it’s correctly inserted – all the way up into the needle clamp. Verify you’re using the correct needle type for your fabric weight; a ballpoint needle for knits‚ a universal needle for woven fabrics.
Incorrect threading or improper tension can also cause skipped stitches. Double-check your threading path and adjust the tension dial. Finally‚ ensure the bobbin is wound evenly and inserted correctly into the bobbin case.
Bobbin Problems
Encountering bobbin issues? Common problems include the bobbin not winding‚ thread bunching‚ or the bobbin case jamming. First‚ confirm you’re using a compatible bobbin for your Singer model – Husqvarna Viking bobbins are often specified for certain machines like the Tribute 150C.
If the bobbin isn’t winding‚ check the bobbin winder tension and ensure the bobbin is properly seated. For thread bunching‚ re-thread both the top thread and bobbin‚ and verify correct tension settings. A jammed bobbin case usually requires careful removal of tangled threads and a thorough cleaning.
Accessories and Attachments
Enhance your sewing! Explore Singer’s diverse range of presser feet‚ needles‚ and bobbins‚ designed to add professional touches and unlock creative possibilities.
Presser Feet: A Guide to Different Types
Unlock versatility! Singer offers a wide array of presser feet‚ each designed for specific sewing tasks. The standard foot is ideal for everyday stitching‚ while the zipper foot simplifies inserting zippers with precision.
For decorative stitching‚ the decorative foot expands creative options. The buttonhole foot automates buttonhole creation‚ ensuring consistent results. A blind hem foot delivers nearly invisible hems‚ and the satin stitch foot excels with satin stitches.
Quilters benefit from the walking foot‚ providing even fabric feed‚ and the darning foot is perfect for free-motion quilting and mending. Choosing the right foot significantly impacts project quality and efficiency‚ transforming your sewing experience.
Needles: Choosing the Right Size and Type
Selecting the correct needle is crucial! Needle size corresponds to fabric weight; smaller numbers (e.g.‚ 60/8) suit delicate fabrics‚ while larger numbers (e.g.‚ 110/18) handle heavier materials. Universal needles work well on woven fabrics‚ but specialized needles enhance results.
Ballpoint needles are designed for knit fabrics‚ preventing skipped stitches. Stretch needles are ideal for spandex and Lycra. Leather needles feature a cutting point for piercing leather. Embroidery needles have a larger eye to accommodate embroidery threads.
Regularly replacing needles ensures optimal stitch quality and prevents fabric damage. A dull or incorrect needle can cause thread breakage and skipped stitches‚ impacting your project’s final appearance.
Bobbins: Compatibility and Usage
Using the correct bobbin is essential! Singer machines require specific bobbin types – glass‚ plastic‚ or metal – depending on the model. Refer to your machine’s manual for compatibility. Husqvarna Viking Tribute 150C utilizes a top-load bobbin system with Husqvarna Bobbins.
Proper bobbin winding ensures even thread distribution. Wind the bobbin slowly and evenly‚ avoiding overfilling. Incorrect winding can lead to tension issues and poor stitch quality. Always test your tension after changing the bobbin.
Ensure the bobbin thread flows smoothly through the tension disc. A properly inserted bobbin guarantees consistent and reliable sewing performance‚ contributing to professional-looking results.
Resources and Support
Need help? Access free manuals‚ updates‚ and sewing tips on Singer’s official website. Explore crafting inspiration from brand ambassadors and online communities!
Downloading User Manuals and Updates
Stay current with your machine! Singer provides a comprehensive online resource for downloading user manuals‚ stitch guides‚ and essential machine updates. This ensures optimal performance and unlocks the full potential of your sewing machine.
You can find these resources not only for Singer machines but also for Husqvarna Viking models. Accessing these materials is simple – just visit the dedicated manuals and updates page on the official Singer website.
Regularly checking for updates is crucial‚ as they often include bug fixes‚ new features‚ and improved compatibility. Having the latest manual guarantees you have access to the most accurate and up-to-date information for your specific model‚ empowering you to tackle any sewing project with confidence.
Singer’s Official Website and Support
Your central hub for all things Singer! The official Singer website is a treasure trove of information‚ offering a direct line to support and resources. Here‚ you can explore the complete range of Singer sewing‚ embroidery‚ serger‚ and heavy-duty machines‚ each packed with powerful and user-friendly features.
Beyond product information‚ the website facilitates direct access to customer support‚ allowing you to resolve any issues or queries quickly. Benefit from free shipping on all machines and fast‚ free delivery on most orders‚ making it convenient to start creating immediately.
Discover a vibrant community and unlock your sewing potential with Singer’s official online presence!
Finding Sewing and Crafting Tips
Elevate your skills with expert guidance! Singer provides a wealth of sewing and crafting tips through its brand ambassadors‚ offering inspiring projects and demonstrating innovative techniques. These resources cater to all experience levels‚ from beginners taking their first stitches to seasoned sewists seeking new challenges.
Explore tutorials‚ pattern suggestions‚ and creative ideas to transform your projects and unlock your full potential. Discover how to upcycle garments‚ design original creations‚ or personalize your home with custom décor.
Singer’s commitment extends beyond machines; it’s about fostering a community of passionate creators!